Sweet Tooth Experiments

  • About Me
  • Recipe Index
  • Baking Metrics
  • Tips & Tricks
  • Common Baking Questions
  • Contact

Tag Archives: coffee

Rice Flour White Chocolate and Coffee Brownies

Posted on May 10, 2019 Posted in Brownies .

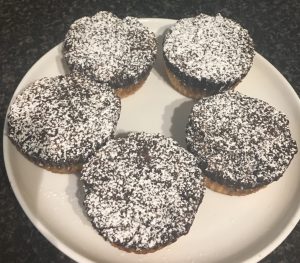
Rice Flour, White Chocolate and Coffee Brownie recipe

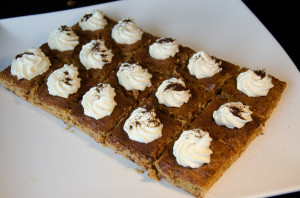
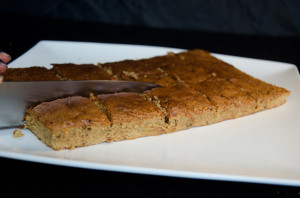
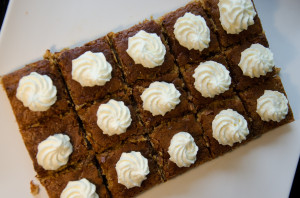
Rice Flour, White Chocolate and Coffee Brownies

This recipe is the most simple and quick recipe you will come across. This took me a whole of 5 minutes to prepare and 5 minutes to decorate.

I recommend you read the notes to this recipe before planning to bake as it does have a defined ‘textural’ consistency.

This recipe made it to my blog due to the interesting texture, simplicity, gluten-free bake and cost efficiency. Also, it is quite the tasty flavor (hmm coffee).

Introducing the unique Rice flour, white chocolate and coffee brownies.


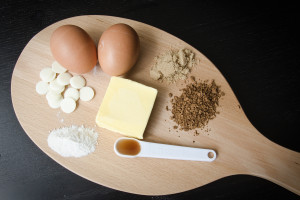
Ingredients:

  • 90g white chocolate
  • 70g butter
  • 190g brown sugar
  • 3 eggs, beaten
  • ½ tsn vanilla essence
  • ½ tsn almond essence
  • 160g-rice flour
  • 1 tbsn instant espresso coffee granules
  • 150ml thickened cream


Method:

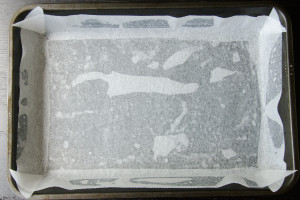
  1. Line a 30cm x 15cm baking tray with baking paper and pre-heat the oven to 180c degrees.
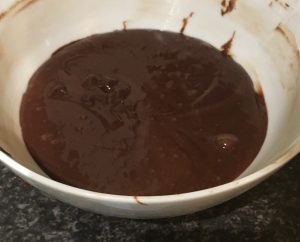
  2. Place the butter and sugar in a microwave safe bowl and microwave on medium for 1 minute or until the chocolate is half melted. Stir with a metal spoon until smooth and glossy.
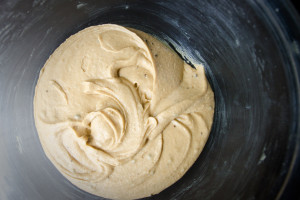
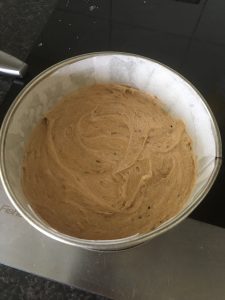
  3. With a hand whisk beat in the instant coffee until dissolved then beat in the remaining ingredients.
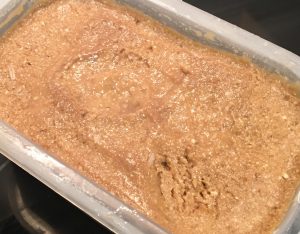
  4. Pour the mix into the tin and place in the oven for 30 mins or until a skewer inserted into the centre comes out clean.
  5. Tap the tin on a table lightly to get rid of air bubbles before placing in the oven (otherwise the brownie will get bubble like domes on the base).
  6. Cool in the tin for 10 minutes for place on a cooling rack and cut.
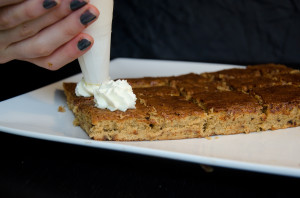
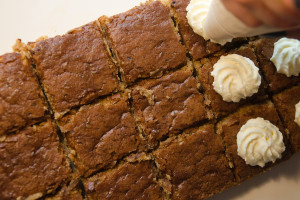
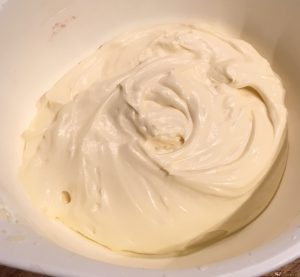
  7. Whip up the thickened cream with electric beaters until peaks form and pipe on the top of each brownie then sprinkled with a little coffee granules on top to decorate.


Notes:

  • The title of this brownie does state rice flour, however I have made this a few times and suggest that if you are not a real fan of texture (rice flour is much more granular than other flours) then substitute it with normal plain flour or gluten free plain flour to stay gluten-free.


Like this recipe? Subscribe via RSS or email to get my new entries and more scrumptious recipes with reviews.

Rice Flour, White Chocolate and Coffee Brownie recipe

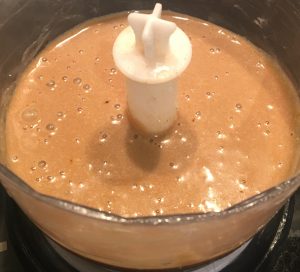
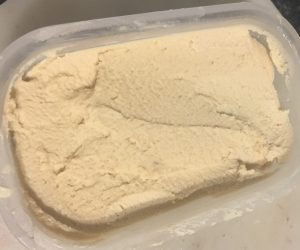
The ingredients

Rice Flour, White Chocolate and Coffee Brownie recipe

Step 1

Photographer: Margaret Paola Minero

Step 3

Rice Flour, White Chocolate and Coffee Brownie recipe

Step 6

Rice Flour, White Chocolate and Coffee Brownie recipe


Step 7

Rice Flour, White Chocolate and Coffee Brownie recipe


Step 7

Rice Flour, White Chocolate and Coffee Brownie recipe

Step 7

Email, RSS Follow
Print
Leave a comment .
Tags: brownies, coffee, rice flour, white chocolate, white chocolate and coffee brownies .

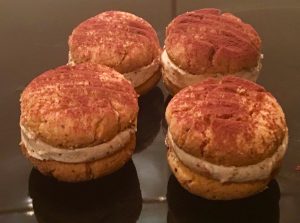
Coffee Melting Moments

Posted on February 2, 2019 Posted in Biscuits .

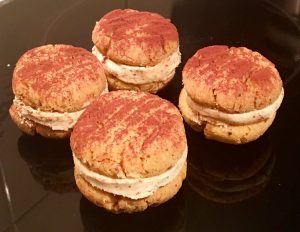
Coffee Melting Moments

Coffee Melting Moments recipe

Ok, so this recipe is not that ‘out there’. But it’s just too good for me to not include on my blog and coffee flavored melting moments, well they are not the usual flavor. Generally, or traditionally I should say Melting Moments are shortbread type biscuits that are butter or vanilla in flavor with a buttercream filling. Soo… I figured it ticks some boxes (not all) in terms of being uncommon. BUT, what I can guarantee is this recipe ticks all the boxes when it comes to texture, taste and decadency. To be honest I have gone off coffee on recent months but one taste of this biscuit and there is no way I won’t be finishing it, as well as another one for the road!

An easy and super delicious recipe with the beautiful melt in your mouth texture.

Ingredients:

Biscuit:

  • 150g butter
  • 2 tsn instant coffee granules
  • 64g custard powder
  • 60g icing sugar
  • 160g flour
  • 1 tsn baking powder

Filling:

  • 2 tsn instant coffee granules
  • 80g butter
  • 180g icing sugar


Method:

  1. Pre-heat the oven to 180c degrees and line a large baking tray with baking paper.
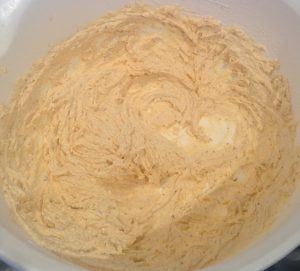
  2. Place the butter and coffee granules in a bowl and using electric beaters whisk until the butter is light and fluffy.
  3. Add the sugar and custard powder and whisk until combine.
  4. Add the flour and baking powder and using a spatula stir until the mix until well combined.
  5. Roll the dough mix into balls of 20g each and place on the tray.
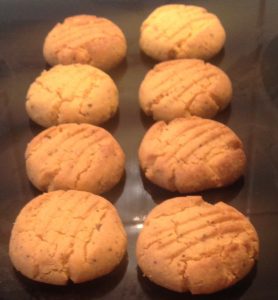
  6. Press each ball with the back of a fork to slightly flatten and place in the oven for 15 minutes or until lightly golden.
  7. Place biscuits on a cooling rack until cold.
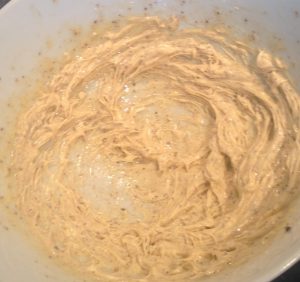
  8. Meanwhile make the icing by placing the ingredients into a bowl and whisk using electric beaters whisk until well combined.
  9. Spoon the icing onto half the biscuits on the bottom flat side and sandwich with the remaining biscuits.
  10. Dust with a little cocoa powder and enjoy.


Coffee Melting Moments recipe
Step 3
Coffee Melting Moments recipe
Step 4
Coffee Melting Moments recipe
Step 6
Coffee Melting Moments recipe
Step 7
Coffee Melting Moments recipe
Step 8
Coffee Melting Moments recipe

Step 10


Like this recipe? Please subscribe via RSS or email to get my new entries and more scrumptious recipes with reviews.


Email, RSS Follow
Print
Leave a comment .
Tags: coffee, coffee melting moments, melting moments .

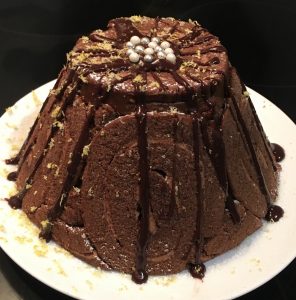
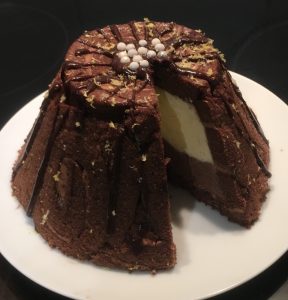
Marsala and Coffee Ice-Cream Ricotta Cheese Cake

Posted on September 29, 2018 Posted in Ice-cream cake .

Marsala and Coffee Ice-Cream Ricotta Cheese Cake

Masala and Coffee Ice-Cream Cheese Cake recipe

Inspired by the outer layer of trifle varieties and flavour combo of delicious Tiramisu, this experiment is one that resulted in a cake that I could just not stop eating.

My all-time favorite sweet treat (as I have mentioned multiple times) is Tiramisu. I wanted to make a version of this dessert that would keep over a generous period of time so I could enjoy the treat multiple times, oppose to the traditional dessert that really does need to be eaten within a few days of creation.

Thus, making an ice-cream cake made sense. It would keep for weeks (in the freezer), not days. Lastly, as the traditional Tiramisu is not exactly light on the hips I did opt for low fat ricotta and down-weighted the cream volume.

This cake is easy, tasty, quick, with no baking required, and as I mentioned above addictive!

Masala and Coffee Ice-Cream Cheese Cake


Ingredients:

  • 400g chocolate swizz roll
  • 100ml Marsala
  • 300g ricotta cheese
  • 200ml sweetened condensed milk
  • 300ml thickened cream
  • 2 tsn vanilla extract
  • 2 tbsn coffee granules
  • 2 tsn cocoa powder
  • 35g chocolate covered coffee beans


Method:

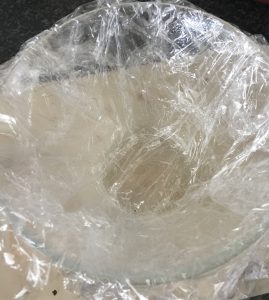
  1. Spray a 1.5-liter pudding tin or bowl with oil spray, following line the sprayed tin with 2 layers of overlapping plastic wrap.
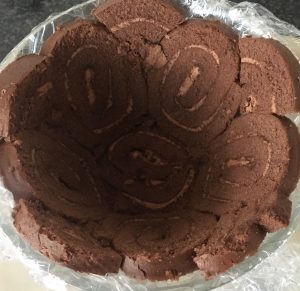
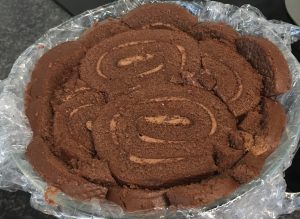
  2. Cut the swizz roll into 1cm thick slices and place on the bottom and slides of the tin, squashing slightly with fingertips to ensure no gaps.
  3. Using a spoon drizzle 40ml of the Marsala over the swizz roll on the bottom and the sides, evenly covering each piece.
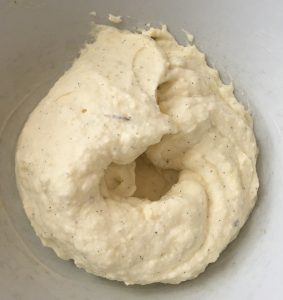
  4. In a food processor blitz the cheese and condensed milk until smooth.
  5. Whisk the cheese mix and 300ml cream with electric beaters in a bowl until peaks start to form (do not over beat or the cream will split).
  6. Spoon half the mix into another bowl and leave aside for later use to make the coffee chocolate layer.
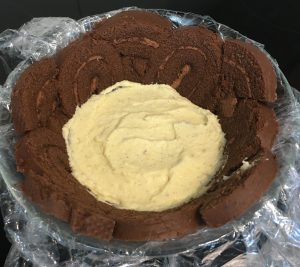
  7. With your original bowl of mix add the vanilla, and remaining 60ml of Marsala, fold until well combined.
  8. Spoon the vanilla & Marsala mix into the bowl on top of the swizz roll and level with the back of a spoon.
  9. Place the tin in the freezer for 30 minutes to firm.
  10. Meanwhile make the coffee mix by placing 15ml of boiling water into a small bowl with the coffee granules, stir until combined, set aside to cool completely before pouring into the remaining bowl of mix.
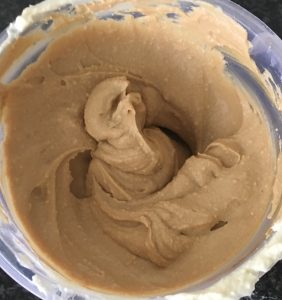
  11. Add the cocoa powder to the coffee mix and beat on low with electric beaters until just combined.
  12. Chop up the coffee beans until finely diced and fold into the mix until combined.
  13. Spoon the coffee mix over the top of the vanilla and Marsala mix and level with the back of a spoon.
  14. Using the remaining swizz roll slices place on the top of the mix to completely cover the top with no gaps.
  15. Pull the plastic wrap tightly and fold to cover the top of the cake completely, then push down the top of the cake with the bottom of a plate.
  16. Freeze for 4 hours until firm (with the plate as a height on top).
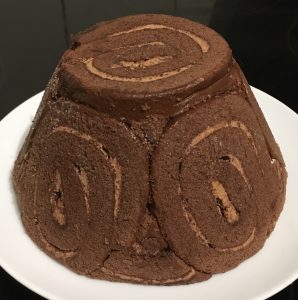
  17. When ready to serve the cake you will need to take the cake out of the freezer 30 mins before. Uncover the plastic wrap on the top and invert (flip) the cake onto a plate.
  18. Remove the plastic wrap completely and top with a drizzle of chocolate ganache (if you desire).
  19. Cut into slices and enjoy!


Masala and Coffee Ice-Cream Cheese Cake recipe
Step 1
Masala and Coffee Ice-Cream Cheese Cake recipe
Step 2
Masala and Coffee Ice-Cream Cheese Cake recipe
Step 7
Masala and Coffee Ice-Cream Cheese Cake recipe
Step 8
Masala and Coffee Ice-Cream Cheese Cake recipe
Step 11
Masala and Coffee Ice-Cream Cheese Cake recipe
Step 14
Masala and Coffee Ice-Cream Cheese Cake recipe
Step 18


Like this recipe? Subscribe via RSS or email to get my new entries and more scrumptious recipes with reviews

Email, RSS Follow
Print
Leave a comment .
Tags: chocolate, coffee, marsala, Marsala and Coffee Ice-Cream Ricotta Cheese Cake, ricotta cheese .

Tiramisu Cottage Cheese and Yoghurt Ice-Cream

Posted on August 11, 2018 Posted in Ice-cream & Sorbet .

Tiramisu Cottage Cheese and Yoghurt Ice-Cream

Tiramisu Cottage Cheese and Yoghurt Ice-Cream

I’ve dabbled with using frozen fruits, yoghurts and varying cheeses as base alternatives to the usually high fat and sometimes not even dairy ice-cream in the past.

So I decided to combine my favourite dessert, Tiramisu, with my 3 go to ice-cream alternative products.

After a bit of trial and error I landed on banana for the fruit (unsurprisingly), natural yoghurt (not Greek, this won’t work with the flavour mix) and cottage cheese (Ricotta was a close second).

The outcome – this recipe is a must for all Tiramisu lovers that want to indulge but want low fat. In fact, apart from a little chocolate and sugar this recipe is natural, satisfying and super healthy.

Ingredients:

  • 4 Bananas, frozen (300g flesh)
  • 3 + ½ tsn coffee granules
  • 20ml water
  • 60g low fat cottage cheese
  • 140g natural low fat yoghurt
  • 85ml Masala
  • 60g icing sugar
  • generous pinch of salt
  • 70g white chocolate
  • 30g dark (70%) chocolate, finely chopped


Method:

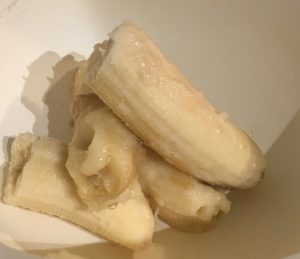
  1. Place the bananas in the microwave until just slightly softened.
  2. Peel the banana’s and place in a bowl.
  3. Boil the water and add the coffee granules, stir. Set aside to cool.
  4. Add the banana, coffee, cheese, yoghurt, Masala, sugar and salt into a food processor and blitz until combine.
  5. Melt the while chocolate in a small bowl in the microwave in 30 second bursts until just melted.
  6. Pour the while chocolate into the mix and blitz again until well combine.
  7. Add the dark chocolate and stir until combine.
  8. Pour the mix into a bowl and place in the freezer for 4 hours to set completely.
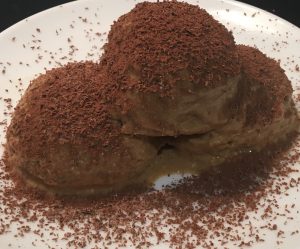
  9. When ready to serve take the ice-cream out of the freezer, scoop and enjoy.


Tiramisu Cottage Cheese and Yoghurt Ice-Cream

Step 2


Tiramisu Cottage Cheese and Yoghurt Ice-Cream

Step 6


Tiramisu Cottage Cheese and Yoghurt Ice-Cream

Step 8


Tiramisu Cottage Cheese and Yoghurt Ice-Cream

Step 9

Like this recipe? Subscribe via RSS or email to get my new entries and more scrumptious recipes with reviews.

Email, RSS Follow
Print
1 Comment .
Tags: bananas, coffee, cottage cheese, masala, tiramisu, yoghurt .

Chocolate Top-Deck Tiramisu Cupcakes

Posted on June 23, 2018 Posted in Cupcakes .

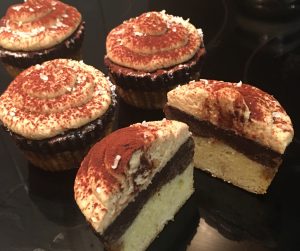
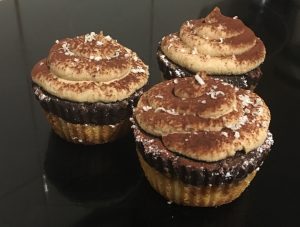
Chocolate Top-Deck Tiramisu Cupcakes  

Chocolate Top-Deck Tiramisu Cupcakes recipe

Tiramisu is my ultimate all-time favorite dessert ever. The only thing with traditional Tiramisu is that its not the easiest thing to eat – a bowl/plate as well as a spoon is a must. Unlike a slice or cupcake Tiramisu can really only be eaten sitting at a table.

So I decided that I would come up with a recipe that tastes like the traditional treat but as a cupcake.

For the cupcake recipe, I modified my never fail white chocolate and dark chocolate wedding cake recipes with the coffee and marsala flavor combo, as well as staying true to the traditional mascarpone cheese for my ‘icing’.

Though I have included the mix of white and dark chocolate in this recipe, in which is not traditional for this dessert, the chocolate batter works flawlessly with the traditional flavors.

Chocolate Top-Deck Tiramisu Cupcakes recipe

Ingredients:

White chocolate layer:

  • 85g butter
  • 85g white chocolate
  • 130g sugar
  • 150ml water
  • 105g self-raising flour
  • 65ml milk
  • 1 egg

Dark chocolate layer:

  • 85g butter
  • 85g dark chocolate
  • 130g sugar
  • 150ml water
  • 20g cocoa powder
  • 85g self-raising flour
  • 10ml marsala
  • 55ml expresso coffee
  • 1 egg

Syrup:

  • 30ml marsala
  • 30ml expresso coffee
  • 15g sugar

Icing:

  • 200g mascarpone cheese
  • 35g icing sugar
  • 25ml marsala
  • 2 tsn expresso coffee


Method:

  1. Pre-heat the oven to 160c degrees and line an 8-capacity cupcake tray with patty cases.
  2. Spray the patty cases with oil spray.
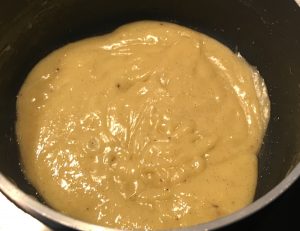
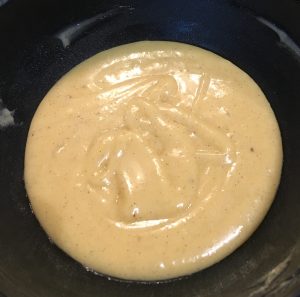
  3. In a saucepan on the stove melt the butter, chocolate, sugar and water on medium heat until smooth and glossy.
  4. Pour the room temperature chocolate mix, milk and egg into a bowl.
  5. Sift the flour to the chocolate mix and whisk with a hand whisk until smooth.
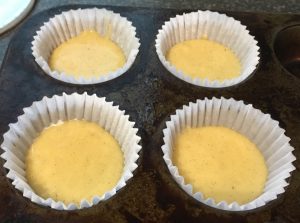
  6. Spoon the mix into the prepared patty cases until 1/3 full.
  7. Place the tin in the freezer for 10 minutes to slightly firm.
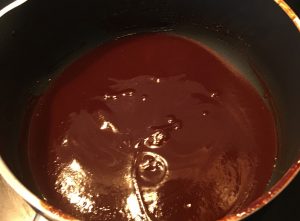
  8. Meanwhile make the dark chocolate batter by placing the butter, chocolate, sugar and water into a saucepan on medium heat until smooth and glossy.
  9. Pour the room temperature chocolate mix, expresso and egg into a bowl.
  10. Sift in the flour and cocoa powder into the chocolate mix and whisk with a hand whisk until smooth.
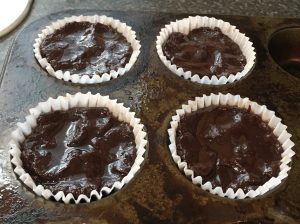
  11. Take the tin out of the freezer and spoon the dark chocolate mix into the prepared patty cases until they are 2/3rds full.
  12. Place the cupcake tin in the oven and bake for 20 minutes or until a skewer inserted in the center comes out clean.
  13. Leave the cupcakes in the tin for 5 minutes before placing onto a cooling rack to cool completely.
  14. Meanwhile make the syrup by placing the ingredient into a bowl and heating in the microwave until bubbling, leave aside.
  15. Brush the syrup on top of the cupcakes with a pastry brush and remove the patty cases.
  16. Make the icing by placing all the icing ingredients into a bowl and using electric beats whisk until the mix thickens.
  17. Spoon the icing into a piping bag with a circle nozzle and pipe on top of the cupcakes.
  18. Finish the cakes with a dust of cocoa powder and some grated white chocolate.


Chocolate Top-Deck Tiramisu Cupcakes recipe

Step 3

Chocolate Top-Deck Tiramisu Cupcakes recipe

Step 5

Chocolate Top-Deck Tiramisu Cupcakes recipe

Step 6

Chocolate Top-Deck Tiramisu Cupcakes recipe

Step 9

Chocolate Top-Deck Tiramisu Cupcakes recipe

Step 11

Chocolate Top-Deck Tiramisu Cupcakes recipe

Step 15

Chocolate Top-Deck Tiramisu Cupcakes recipe

Step 16

Chocolate Top-Deck Tiramisu Cupcakes recipe

Step 18

Like this recipe? Subscribe via RSS or email to get my new entries and more scrumptious recipes with reviews.


Email, RSS Follow
Print
Leave a comment .
Tags: chocolate, Chocolate Top-Deck Tiramisu Cupcakes, coffee, dark chocolate, marsala, mascapone, white chocolate .

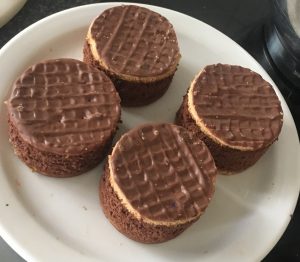
Port Coffee and Chocolate Mousse Sandwiches

Posted on March 3, 2018 Posted in Mousse .

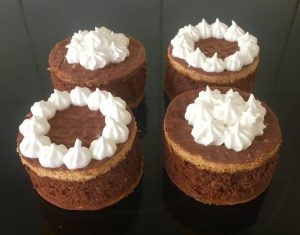
Port Coffee and Chocolate Mousse Sandwiches

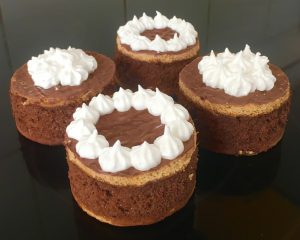
Port Coffee and Chocolate Mousse Sandwiches recipe

I love how coffee intensifies the richness of the flavour of chocolate. In a similar manner, I recently discovered port can also have a similar effect.
So I figured it would be interesting to see what would happen if I used both of these flavours via liquors with the chocolate. Though my expected result didn’t occur the outcome was a success in an alternative way. The chocolate flavour was not enhanced, however the mix of the 3 flavours produced a very tasty and decedent twist to the standard chocolate mousse.

The dark chocolate is still the dominant flavour, but is closely complimented with the liquors profiles.

This recipe is not too crazy out-there, but an interesting twist that has a straightforward and uncomplicated method with no oven required!

Port Coffee and Chocolate Mousse Sandwiches recipe

Ingredients:

Mousse:

  • 155g dark chocolate (75% cocoa)
  • 2 eggs
  • 70ml thickened cream
  • 20ml Kahlua
  • 10ml Port

Biscuits:

  • 1 + 1/2 tbsn Port
  • 2 + 1/2 tbsn Kahlua
  • 12 chocolate coated digestive biscuits

Frosting:

  • 1 egg white
  • Pitch of cream of tartar
  • 15ml water
  • 50g sugar


Method:

  1. Place the chocolate into a saucepan and heat on the stove on low until the chocolate has just melted, take off the heat and leave to cool to room temperature.
  2. Meanwhile, place the 2 egg yolks and cream into a bowl and using electric beaters whisk until soft peaks form.
  3. Add the cooled chocolate, 20ml Kahlua and 10ml Port to the cream mix and beat until just combine.
  4. In a separate bowl beat the 2 egg whites until stiff peaks form.
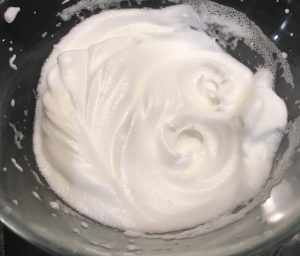
  5. Fold the egg whites into the chocolate mix until just combine, place in the fridge for later use.  
  6. For the biscuits pour the 1+1/2 tbsn Port and 2+1/2 tbsn Kahlua into a shallow bowl and stir with a spoon to combine.
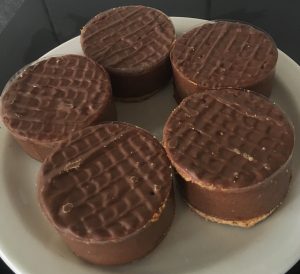
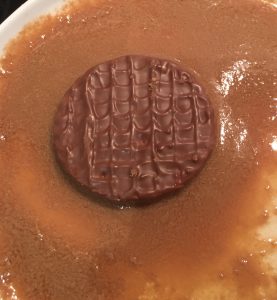
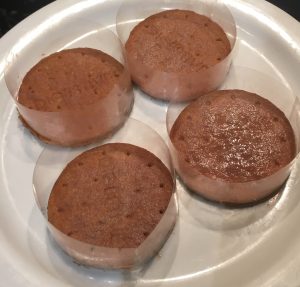
  7. Dip 6 of the biscuits into the liquor mix to absorb some of the liquid, chocolate side up. Place soaked biscuits onto a plate, chocolate side down.
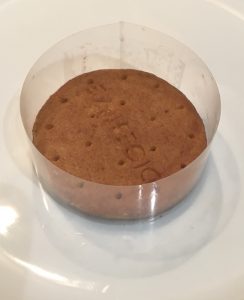
  8. Cut 6 x 3cm strips of acetate paper, place a biscuit on the bench and wrap a strip around each biscuit. Hold the acetate in place with some sticky tape.
  9. Repeat the wrapping process for all 6 soaked biscuits, place the biscuits with rings onto a large plate.
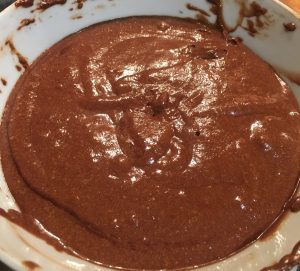
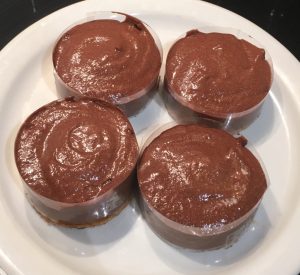
  10. Remove the mousse for the fridge. Spoon the mousse on top of the biscuits until it reaches the top of the ring, then push down the mix softly with the back of a spoon to eliminate any gaps.
  11. Dip the remaining 6 biscuits into the liquor mix, chocolate side up until all the liquor is absorbed.
  12. Top the mousse with the 6 biscuits, chocolate side up.
  13. Use your fingers gently, to push the top biscuit down slightly to sandwich the mousse.
  14. Place the plate in the fridge overnight to set (or 4+ hours).
  15. To make the frosting whisk the egg white and cream of tartar in a bowl with electric beaters until soft peaks form.
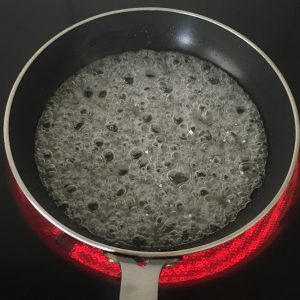
  16. Place the water and sugar into a saucepan on a high heat, stirring until the sugar has dissolved.
  17. Place a candy thermometer into the mix until it reached 120c degrees.
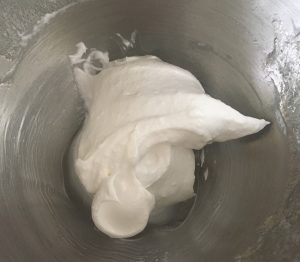
  18. Start the beaters again for the egg whites and while beating pour the sugar syrup into the eggs whites slowly.
  19. Continue beating the egg mix for 10 minutes.
  20. Remove the acetate from the mousse sandwiches.
  21. Place the icing into a piping bag with a star nozzle and pipe the sandwich tops with the frosting.
  22. Slightly torch the tops of the frosting (ONLY the frosting do not melt the chocolate on the biscuit) until golden with a blow torch, place in the freezer for 10 mins.
  23. Remove from the freezer and dust with a little cocoa powder and enjoy.


NOTE: It is completely fine to omit step 22. If you opt for this option then simply frost the sandwich tops then dust with cocoa powder and enjoy!


Port Coffee and Chocolate Mousse Sandwiches recipe

Step 1

Port Coffee and Chocolate Mousse Sandwiches recipe

Step 4

Port Coffee and Chocolate Mousse Sandwiches recipe

Step 5

Port Coffee and Chocolate Mousse Sandwiches recipe

Step 7

Port Coffee and Chocolate Mousse Sandwiches recipe

Step 8

Port Coffee and Chocolate Mousse Sandwiches recipe

Step 9

Port Coffee and Chocolate Mousse Sandwiches recipe

Step 10

Port Coffee and Chocolate Mousse Sandwiches recipe

Step 14

Port Coffee and Chocolate Mousse Sandwiches recipe

Step 17

Port Coffee and Chocolate Mousse Sandwiches recipe

Step 19

Port Coffee and Chocolate Mousse Sandwiches recipe

Step 20

Like this recipe? Subscribe via RSS or email to get my new entries and more scrumptious recipes with reviews


Email, RSS Follow
Print
Leave a comment .
Tags: chocolate, coffee, kahlua, mousse, Port, Port Coffee and Chocolate Mousse Sandwiches, sandwich .

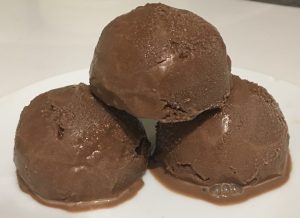
Boozy Mocha Yoghurt Ice-Cream

Posted on February 2, 2018 Posted in Ice-cream & Sorbet .

Boozy Mocha Yoghurt Ice-Cream

You may have noticed that I am a big fan of using healthier alternative ingredients vs. traditional recipe ingredients (as long as taste is not hindered).

I commonly use apple puree to replace butter, cocoa to replace chocolate, and avocado instead of cream etc etc…and the list could go on for a while… So after recently eating a mocha flavoured ice-cream I didn’t surprise myself when I decided to take the coffee and chocolate flavours and reinvent the ice-cream with a more healthier substitute – low fat yoghurt.

And yes I do bake with yoghurt quite a bit but it’s usually via means of cake batter, not as the base of an ice-cream. To continue the substitute trend I used cocoa powder with some brown sugar as a low fat alternative to milk chocolate.

Lastly to make this ice-cream a little cheeky and further its decadence, I added a solid pouring of Baileys to strengthen the coffee flavour and increase the creaminess.

This Mocha Yoghurt Ice-Cream is moreish and additive without it hurting my hips too much!


Ingredients:

  • 160ml espresso coffee
  • 160ml Baileys
  • 100g brown sugar
  • 400ml vanilla yoghurt
  • 60ml cocoa powder


Method:

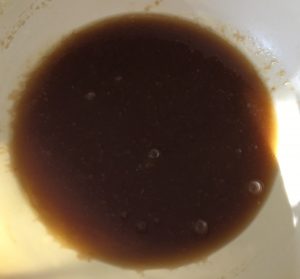
  1. Place the boiling coffee into a bowl with the sugar.
  2. Stir the coffee until the sugar is dissolved, leave aside until cooled.
  3. Add the Baileys to the sugared coffee mix and stir until combine.
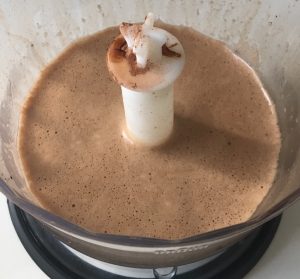
  4. Pour the mix into a food processor, add the cocoa powder and the yoghurt.
  5. Blitz mix until creamy and well combine.
  6. Place the mix into a bowl then into the freezer for 2 hours.
  7. After 2 hours spoon the mix back into the food processor and blitz for 2 minutes, place bowl back in the freezer for 1 hour.
  8. After the 1 hour place the mix into the food processor 1 last time for 1 minute.
  9. Pour the mix into the bowl, freeze for 1 hour or until ice-cream is completely set.
  10. Scoop into a bowl and enjoy!


Espresso Martini Truffles recipes
Step 2
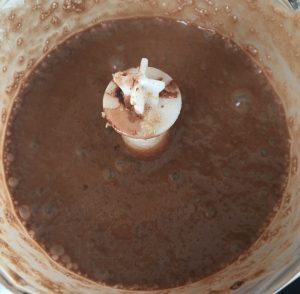
Boozy Mocha Yoghurt Ice-Cream recipe
Step 3
Boozy Mocha Yoghurt Ice-Cream recipe
Step 5

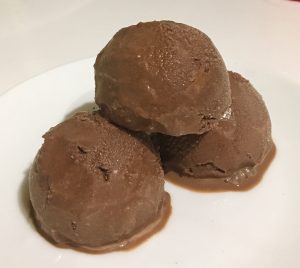
Step 10


Like this recipe? Subscribe via RSS or email to get my new entries and more scrumptious recipes with reviews.

Email, RSS Follow
Print
Leave a comment .
Tags: baileys, Boozy Mocha Yoghurt Ice-Cream, chocolate, coffee, vanilla yoghurt .

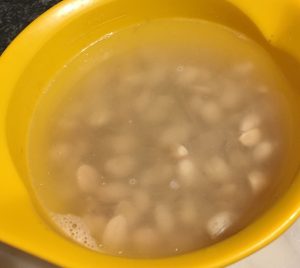
Coconut Peanut and Chocolate Tofu Cheesecake

Posted on December 22, 2017 Posted in Cakes .

Coconut Peanut and Chocolate Tofu Cheesecake

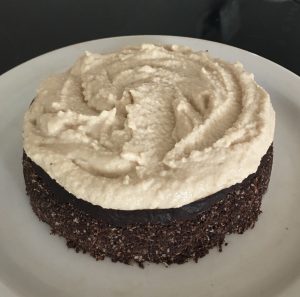
Coconut Peanut and Chocolate Tofu Cheesecake recipe
Thought cheesecake is always a devilish high bad fat treat? Think again, this recipe I have created only has healthy fats from nuts and coconut. Yes, a healthy high protein cheesecake can exist and most importantly, it tastes delicious (what’s the point otherwise)!The tofu provides a high protein low carb and low fat stable base, while low fat ricotta cheese significantly cuts the fat that a normal cream cheese cheesecake has.

And as apparently raw is healthy and hot right now I wanted to make sure this cake was on theme and trend with people’s desires.

Using the nuts and dried fruit makes this cake completely gluten free, while the peanut puree icing is fulfilling and satisfying.

To be honest if I added veggies this cake would be a meal in itself with plenty of healthy fats, protein, calcium, even fruit!

Coconut Peanut and Chocolate Tofu Cheesecake recipe

Ingredients:

Icing:

  • 125g peanuts
  • 100ml coconut cream
  • 60ml honey

Base:

  • 2 tsn coconut oil
  • ¼ tsn salt
  • 90g desiccated coconut
  • 20g dried dates
  • 15g cocoa powder
  • 30ml honey

Filling:

  • 250g firm tofu
  • 220g ricotta cheese
  • 220g brown sugar
  • 70g cocoa powder
  • 2 egg whites
  • 1 tsn vanilla essence
  • 5 tsn coconut oil
  • 100g peanut butter
  • 1 tsn coffee graduals
  • ½ tsn ground cinnamon


Method:

  1. Place the peanuts into a bowl and cover with boiling water. Soak nuts for 5 hours.
  2. Meanwhile, preheat the oven to 175c degrees and line a 25cm spring form cake tin with baking paper.
  3. Toast the coconut by placing in a fry pan on the cooktop on high heat.
  4. Using a spoon move the coconut around to ensure even toasting of the coconut until golden brown in colour. Place aside to cool.
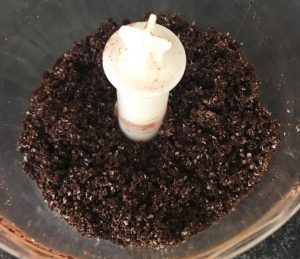
  5. Place the cooled coconut and remaining base ingredients onto a food processor and blitz until well combine and the mix resembles fine breadcrumb texture.
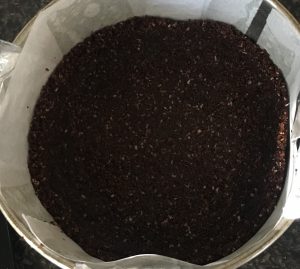
  6. Pour the base mix into the prepared cake tin and using the bottom and sides of a cup flatten the base and sides of the mix in the tin. Place the tin in the fridge to harden.
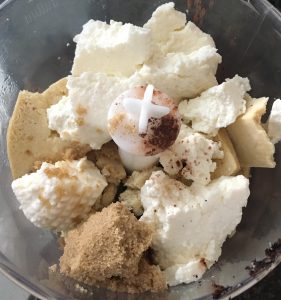
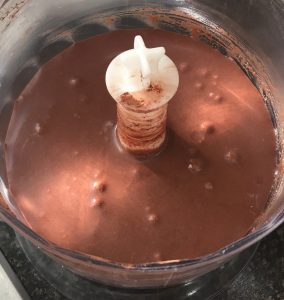
  7. To make the filling place all the filling ingredients into a food processor and blitz until smooth and silky in texture.
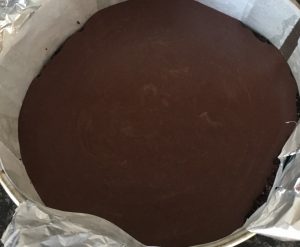
  8. Pour the filling mix into the cake tin over the base.
  9. Place the cake in the oven to bake for 1 hour or until a skewer inserted in the center comes out almost clean (if inserted in the sides it should come out clean).
  10. Move the cake to a cooling rack until cold to touch.
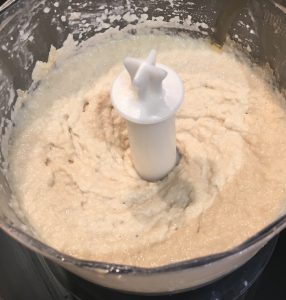
  11. Meanwhile make the icing by draining the peanuts and placing into a food processor along with the coconut cream and honey.
  12. Blitz the icing mix for 5 minutes, scraping down the sides every minute.
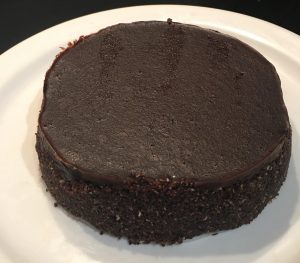
  13. To assemble the cake, remove the cooled cake from the tin and place on a serving plate.
  14. Spread the icing over the top of the cake and place the cake in the fridge for 2 hours to full set.


Note: I have decorated with extra chopped peanuts, extra toasted desiccated coconut and grated chocolate.


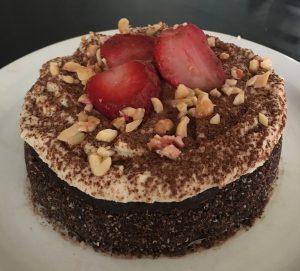
Coconut Peanut and Chocolate Tofu Cheesecake recipe

Step 1

Coconut Peanut and Chocolate Tofu Cheesecake recipe

Step 5

Coconut Peanut and Chocolate Tofu Cheesecake recipe

Step 6

Coconut Peanut and Chocolate Tofu Cheesecake recipe

Step 7

Coconut Peanut and Chocolate Tofu Cheesecake recipe

Step 7

Coconut Peanut and Chocolate Tofu Cheesecake recipe

Step 8

Coconut Peanut and Chocolate Tofu Cheesecake recipe

Step 12

Coconut Peanut and Chocolate Tofu Cheesecake recipe

Step 13

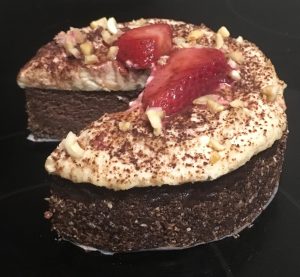
Coconut Peanut and Chocolate Tofu Cheesecake recipe

Step 14


Like this recipe? Subscribe via RSS or email to get my new entries and more scrumptious recipes with reviews.

Email, RSS Follow
Print
Leave a comment .
Tags: chocolate, cinnamon, coconut, coffee, firm tofu, peanut butter, peanuts, ricotta cheese, tofu .

Mocha Marsala and Almond Sandwich Cake

Posted on April 7, 2017 Posted in Cakes .

Mocha Marsala and Almond Sandwich Cake

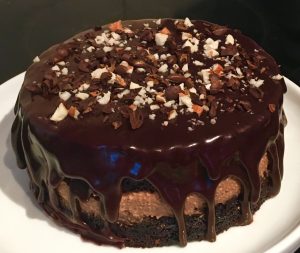
Mocha Marsala and Almond Sandwich Cake recipe

Tiramisu is my ultimate, all-time favorite sweet treat.

I love playing with the flavor combo of chocolate, marsala and coffee, it always reminds me of my birthday as my mum made the dessert every year without fail.

I’ve made many variations on Tiramisu over the years, cake, ice-cream and frozen cheesecake to name a few. Something I have never tried is extending the flavor profile and incorporating multiple nontraditional layered textures.

The additional flavor I have utilised that’s not common with Tiramisu is almonds. I felt that the dessert needed an extra crunch layer therefore opted for chopped almonds to complement the silky ganache and smooth mouthwatering filling texture.


Ingredients:

Cake:

  • 180g butter, softened
  • 1 tsn Marsala
  • 180g brown sugar
  • 3 eggs
  • 150g self-raising flour
  • 30g cocoa powder
  • ½ tsn salt
  • 60g almonds, finely chopped
  • 5 tsn espresso coffee

Filling:

  • 140ml thickened cream
  • 35ml Marsala
  • 35ml espresso coffee
  • 40g dark (70%) chocolate
  • 60ml icing sugar
  • 200g cream cheese, at room temperature

Ganache:

  • 40g cream
  • 100g dark chocolate
  • ½ tsn coffee granules
  • 2 tsn Marsala


Method:

  1. Pre-heat the oven to 175c degrees and line a 25cm cake tin with baking paper.
  2. Place the butter, Marsala and sugar into a bowl and beat with electric beaters for 5 minutes until light and fluffy.
  3. Add the eggs, one at a time beating in between each addition.
  4. Sift the flour, cocoa powder and salt into the mix, pour in the cold coffee and add the chopped almonds.
  5. Carefully mix the batter until just combine.
  6. Pour the mix into the prepared cake tin and bake for 40 minutes or until a skewer inserted into the center comes out clean.
  7. Leave the cake aside to cool on a cooling rack.
  8. Meanwhile, to make the filling place 30ml cream into a bowl along with the coffee and Marsala.
  9. Place the bowl in the microwave and heat until the mix starts to boil.
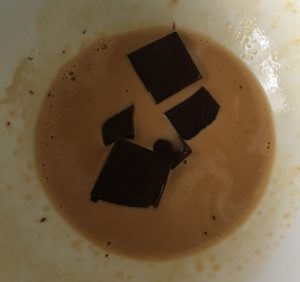
  10. Stir cream mix and add in the chocolate in pieces, leave to sit for 1 minute.
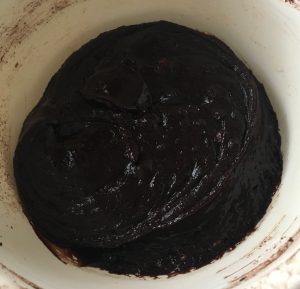
  11. Stir the chocolate into the cream with a metal spoon until smooth and glossy, leave aside to cool.
  12. Place the remaining 110ml cream into a bowl with the icing sugar and beat with electric beaters until soft peaks form, leave aside.
  13. Add the cream cheese into the chocolate mix and beat for 4 minutes or until the mix is smooth and pale in colour.
  14. Add the cream mix to the chocolate cream cheese mix and beat on low until just combine.
  15. Make the ganache by placing the cream, coffee and Marsala into a bowl and heat in the microwave until boiling.
  16. Add the chocolate and leave for 1 minute, stir until smooth and glossy in texture.
  17. To put the cake together, cut the cake in half horizontally and place one layer on a plate.
  18. Add the filling, place the second cake layer on top of the filling.
  19. Pour the ganache over the cake and allow to overflow the sides.
  20. Top with extra chopped almonds and enjoy.
  21. Cut into slices and serve.


Mocha Marsala and Almond Sandwich Cake recipe

Step 4

Mocha Marsala and Almond Sandwich Cake recipe

Step 10

Mocha Marsala and Almond Sandwich Cake recipe
Step 11
Mocha Marsala and Almond Sandwich Cake recipe

Step 12

Tiramisu Meringue Cake recipe
Step 13
Mocha Marsala and Almond Sandwich Cake recipe
Step 14
Mocha Marsala and Almond Sandwich Cake recipe
Step 16
Mocha Marsala and Almond Sandwich Cake recipe
Step 18

Like this recipe? Subscribe via RSS or email to get my new entries and more scrumptious recipes with reviews.

Email, RSS Follow
Print
Leave a comment .
Tags: almonds, cheesecake, chocolate, coffee, marsala, mocha, Mocha Marsala and Almond Sandwich Cake .

Irish Coffee Cake

Posted on February 18, 2017 Posted in Cakes, Traditional .

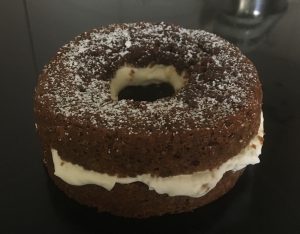
Irish Coffee Cake 

Irish Coffee Cake recipe

For Christmas recently I was given a book on cakes from all over the world. Of course the first thing I did when the Christmas catch-ups were over was start to make the traditional recipes from the book.

12 recipes in and I found 1 that I had to blog about. Now I’m not really sure how ‘traditional’ this recipe actually is but the key ingredients I know at least are. This Irish Coffee Cake is to die for, and that’s coming from someone who has recently been turned off drinking coffee and opts for tea every time.

The key ingredients in this cake that make it special is the incorporation of Irish coffee as well as Irish whiskey.

A super easy and fluffy cake to make and a super tasty treat even to a non-coffee, non-whiskey drinker.

Ingredients:

Cake:

  • 180g butter
  • 1 tsn vanilla essence
  • 180g sugar
  • 3 eggs
  • 180g self-rising flour
  • ½ tsn salt
  • 5 tsn espresso coffee

Syrup:

  • 150 espresso coffee
  • 120g sugar
  • 3 tbsn Irish whiskey

Filling:

  • 300ml cream
  • 1 tsn vanilla essence
  • 50 icing sugar
  • 2 tbsn Irish whiskey


Method:

  1. Pre-heat the oven to 175c degrees and spray a 25cm bundt cake tin with a generous amount of oil spray.
  2. Place the butter, vanilla and sugar into a bowl and beat with electric beaters for 5 minutes until light and fluffy.
  3. Add the eggs, one at a time beating in between each addition.
  4. Sift the flour and salt into the mix and pour in the cold coffee.
  5. Carefully mix the batter until just combine.
  6. Pour the mix into the prepared cake tin and bake for 40 minutes or until a skewer inserted into the center comes out clean.
  7. Leave the cake aside to cool on a cooling rack.
  8. Meanwhile make the syrup by placing all the ingredients into a saucepan on high and stir until the sugar has dissolved and the mix just starts to get syrupy.
  9. Cut the cake in half horizontally.
  10. Using a pastry brush, brush the syrup onto the 2 cut sides of the cake layers.
  11. Make the filling by beating the cream with electric beaters until soft peaks form. Add the remaining filling ingredients and beat on low until peaks form.
  12. Place the bottom layer of the cake on a plate, cut side up.
  13. Spread the cream on the cake layer.
  14. Top with the second cake layer cut side down.
  15. Sprinkle with icing sugar and enjoy!


Irish Coffee Cake recipe

Step 5

Irish Coffee Cake recipe

Step 6

Irish Coffee Cake recipe

Step 8

Spiced Caramel Apple Pie Cake recipe

Step 11


Like this recipe? Subscribe via RSS or email to get my new entries and more scrumptious recipes with reviews.

Email, RSS Follow
Print
Leave a comment .
Tags: coffee, Irish Coffee Cake, traditional irish cake, wishkey .
Next Page »

Pages

  • About Me
  • Baking Metrics
  • Blogroll
  • Common Baking Questions
  • Recipe Index
  • Tips & Tricks
  • Contact

Archives

  • February 2022
  • October 2021
  • September 2021
  • August 2021
  • April 2021
  • February 2021
  • January 2021
  • December 2020
  • November 2020
  • October 2020
  • September 2020
  • August 2020
  • July 2020
  • June 2020
  • May 2020
  • September 2019
  • June 2019
  • May 2019
  • April 2019
  • March 2019
  • February 2019
  • January 2019
  • December 2018
  • November 2018
  • October 2018
  • September 2018
  • August 2018
  • July 2018
  • June 2018
  • May 2018
  • April 2018
  • March 2018
  • February 2018
  • January 2018
  • December 2017
  • November 2017
  • October 2017
  • September 2017
  • August 2017
  • July 2017
  • June 2017
  • May 2017
  • April 2017
  • March 2017
  • February 2017
  • January 2017
  • December 2016
  • November 2016
  • October 2016
  • September 2016
  • August 2016
  • July 2016
  • June 2016
  • May 2016
  • April 2016
  • March 2016
  • February 2016
  • January 2016
  • December 2015
  • November 2015
  • October 2015
  • September 2015
  • August 2015
  • July 2015
  • June 2015
  • May 2015
  • April 2015
  • March 2015
  • February 2015
  • January 2015
  • December 2014
  • November 2014
  • October 2014
  • September 2014
  • August 2014
  • July 2014
  • June 2014
  • May 2014
  • April 2014
  • March 2014
  • February 2014
  • January 2014
  • December 2013

Categories

  • America (5)
  • Arabic (1)
  • Australian (2)
  • Biscuits (24)
  • Brazil (1)
  • Bread (12)
  • Brownies (5)
  • Cakes (141)
  • Croatian (1)
  • Cupcakes (20)
  • Custard (1)
  • Doughnuts (6)
  • Flan (1)
  • France (5)
  • Fudge (3)
  • German (1)
  • Greece (2)
  • Hungary (1)
  • Ice-cream & Sorbet (15)
  • Ice-cream cake (6)
  • Icing (18)
  • Italy (4)
  • Jam (1)
  • Jamaican (1)
  • Lebanese (1)
  • Marshmallows (2)
  • Mexican (1)
  • Morocco (1)
  • Mousse (2)
  • Muffins (1)
  • Panna Cotta (1)
  • Pastries (2)
  • Pies (7)
  • Portugal (1)
  • Pudding (12)
  • Roulade (1)
  • Russia (1)
  • Slice (27)
  • Souffle (1)
  • Sweden (1)
  • Swedish (1)
  • Syrup (1)
  • Tarts (13)
  • Traditional (17)
  • Trifile (1)
  • Truffles (5)
  • Turkey (1)
  • Uncategorized (1)
  • Unique (10)

WordPress

  • Register
  • Log in
  • WordPress

Subscribe

  • Entries (RSS)
  • Comments (RSS)

CyberChimps WordPress Themes

© Sweet Tooth Experiments