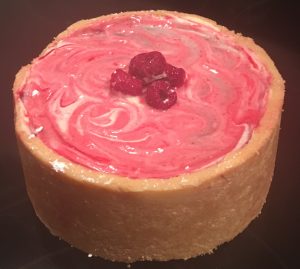
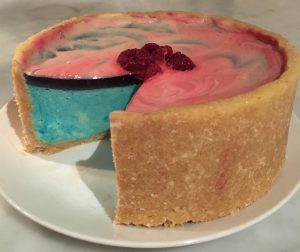
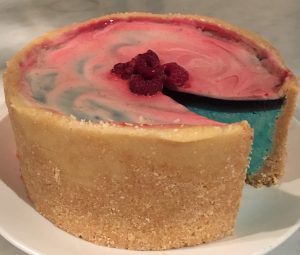
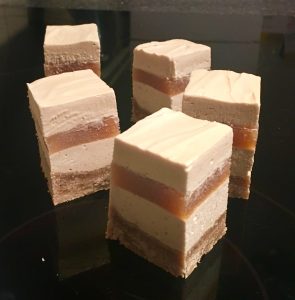
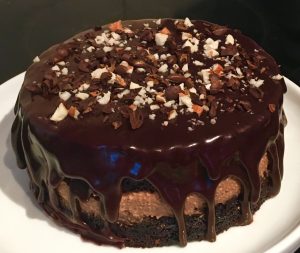
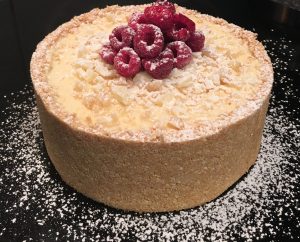
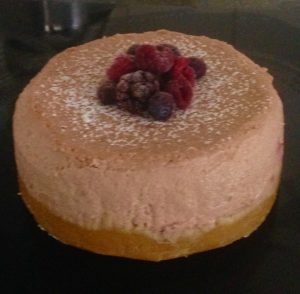
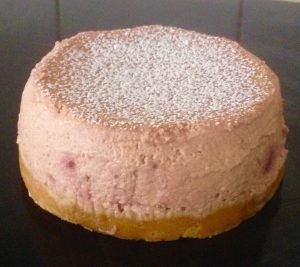
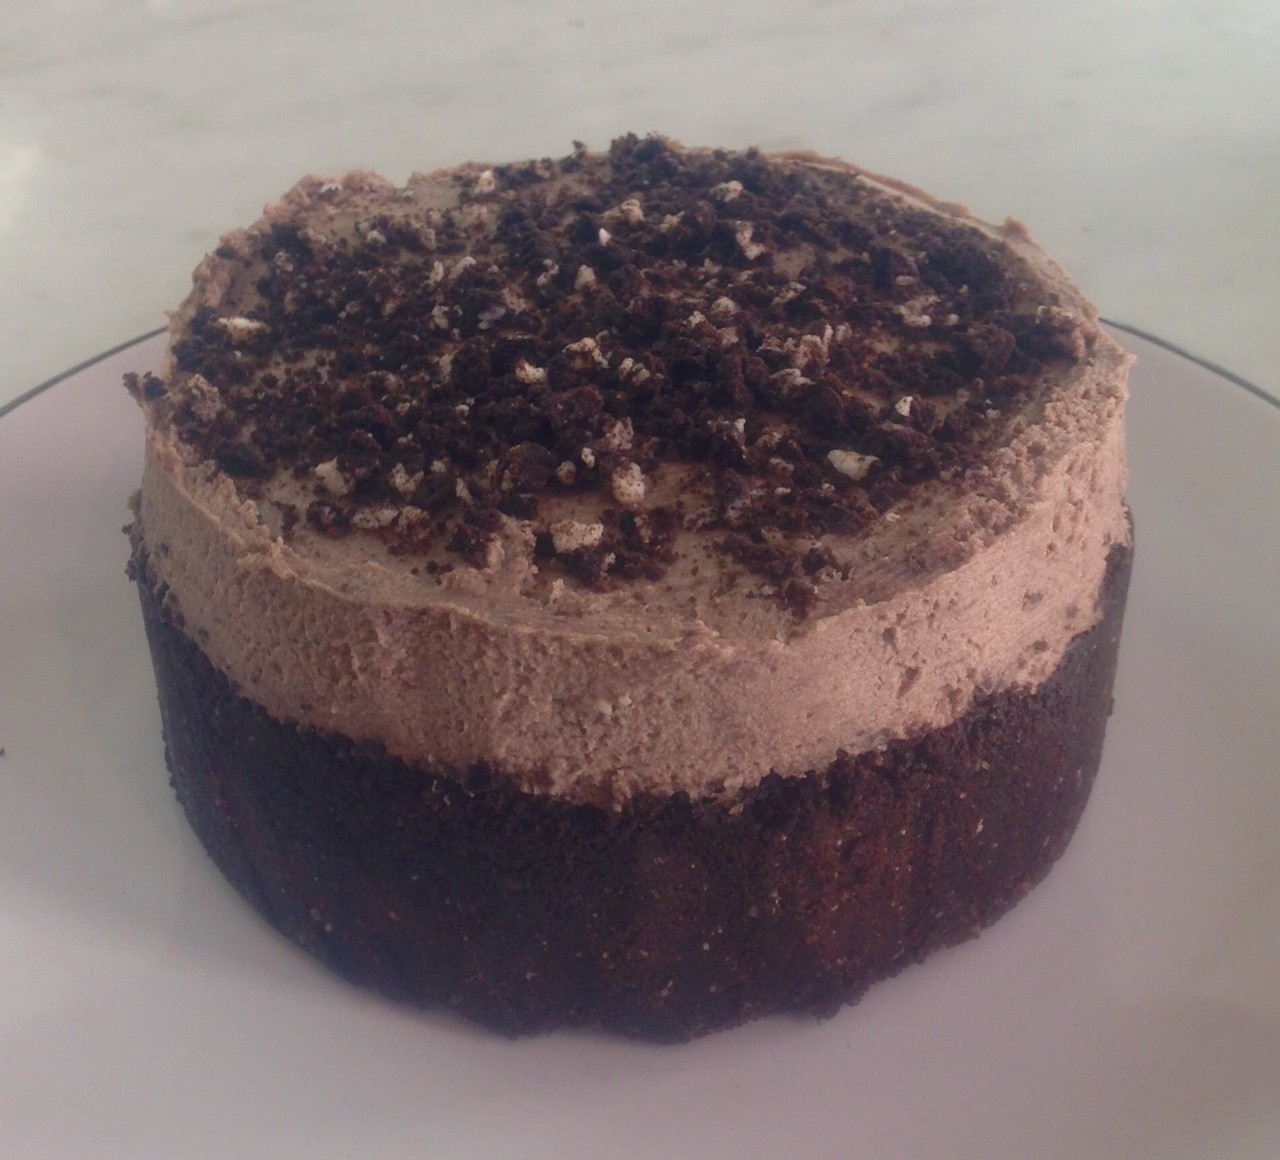
Sweet Tooth Experiments

  • About Me
  • Recipe Index
  • Baking Metrics
  • Tips & Tricks
  • Common Baking Questions
  • Contact

Tag Archives: cheesecake

Clinker Cheesecake

Posted on March 23, 2019 Posted in Cakes .

Clinker Cheesecake

Clinker Cheesecake recipe

It’s been a while since I baked with lollies (see my Red Skin Candy Cake and Musk Candy Cake recipes).

To reignite this baking lollie twist I decided to start looking at chocolate lollies and incorporating these in my recipes.
One of the chocolate types I thought would be interesting and not commonly consumed was Pascall’s Clinkers.

Chocolate covered candy with a surprise of either pineapple, lime or strawberry in the middle…yum!

I have opted for a cheesecake in this instance as chunks of diced Clinkers in a traditional baked cake would leave holes and make the cake unstable when the chocolate and candy melted in the cooking process.


Ingredients:

  • 150g chocolate biscuits
  • 70g butter
  • 500g cream cheese
  • 30g sugar
  • 2 tsn gelatine
  • 60ml water
  • 200g milk chocolate
  • 350g clinkers
  • 240g thickened cream


Method:

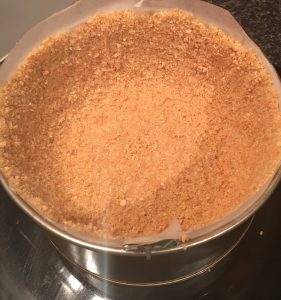
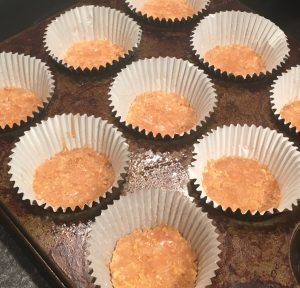
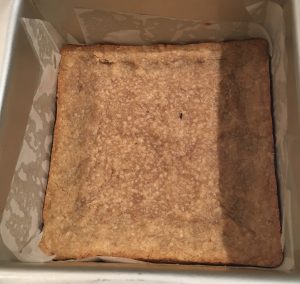
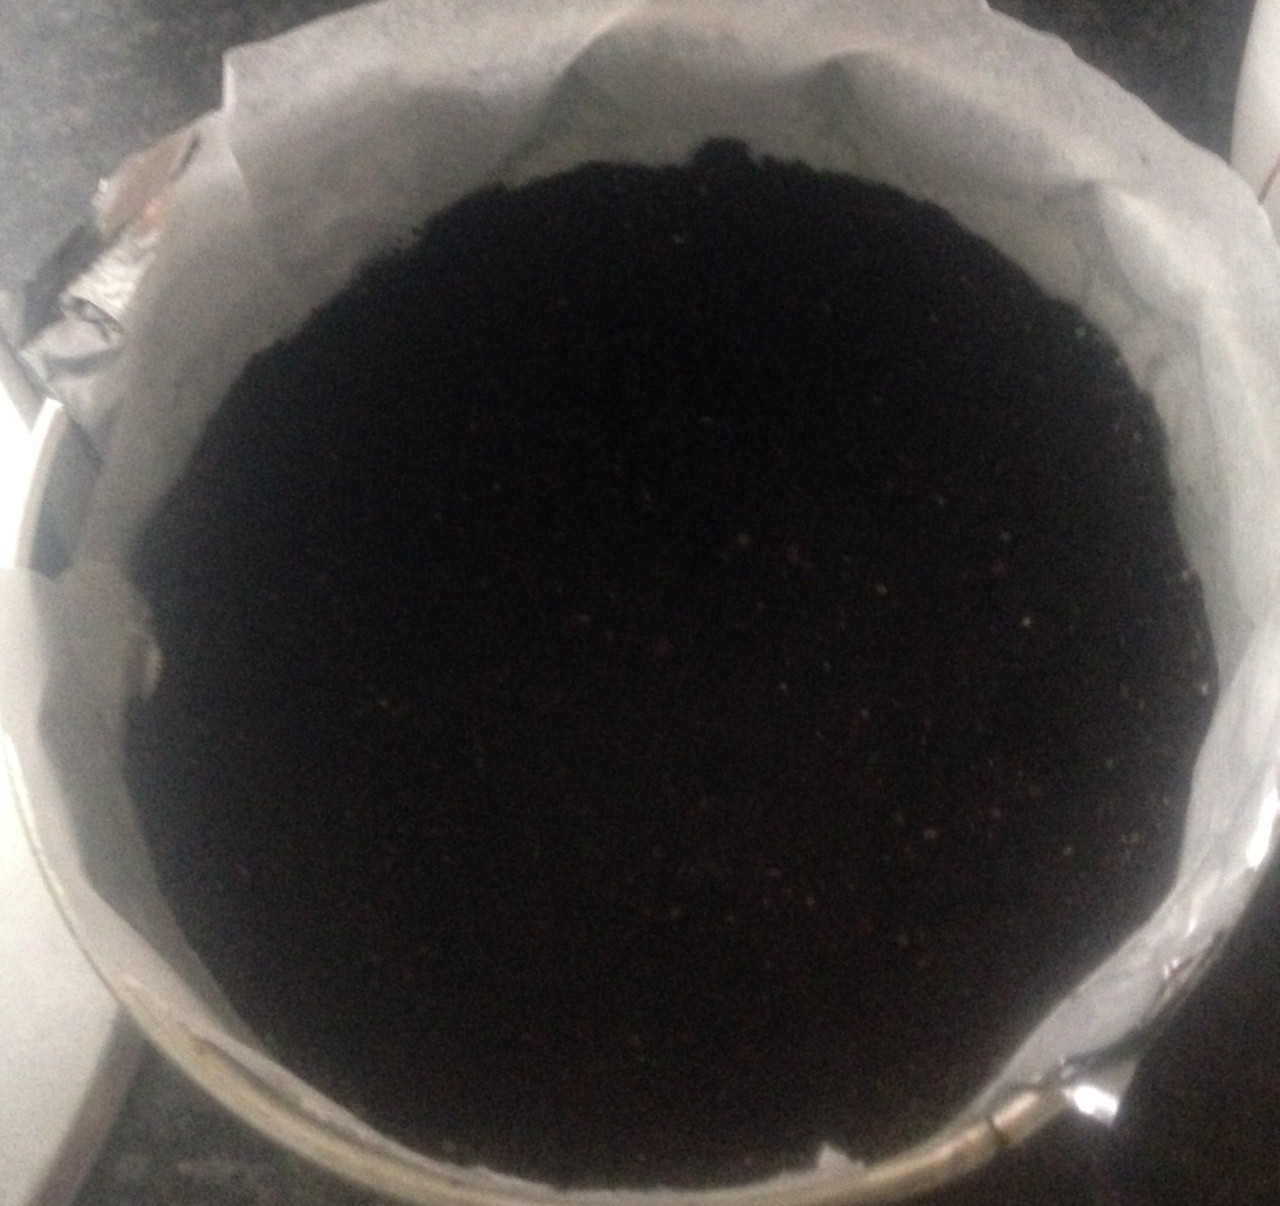
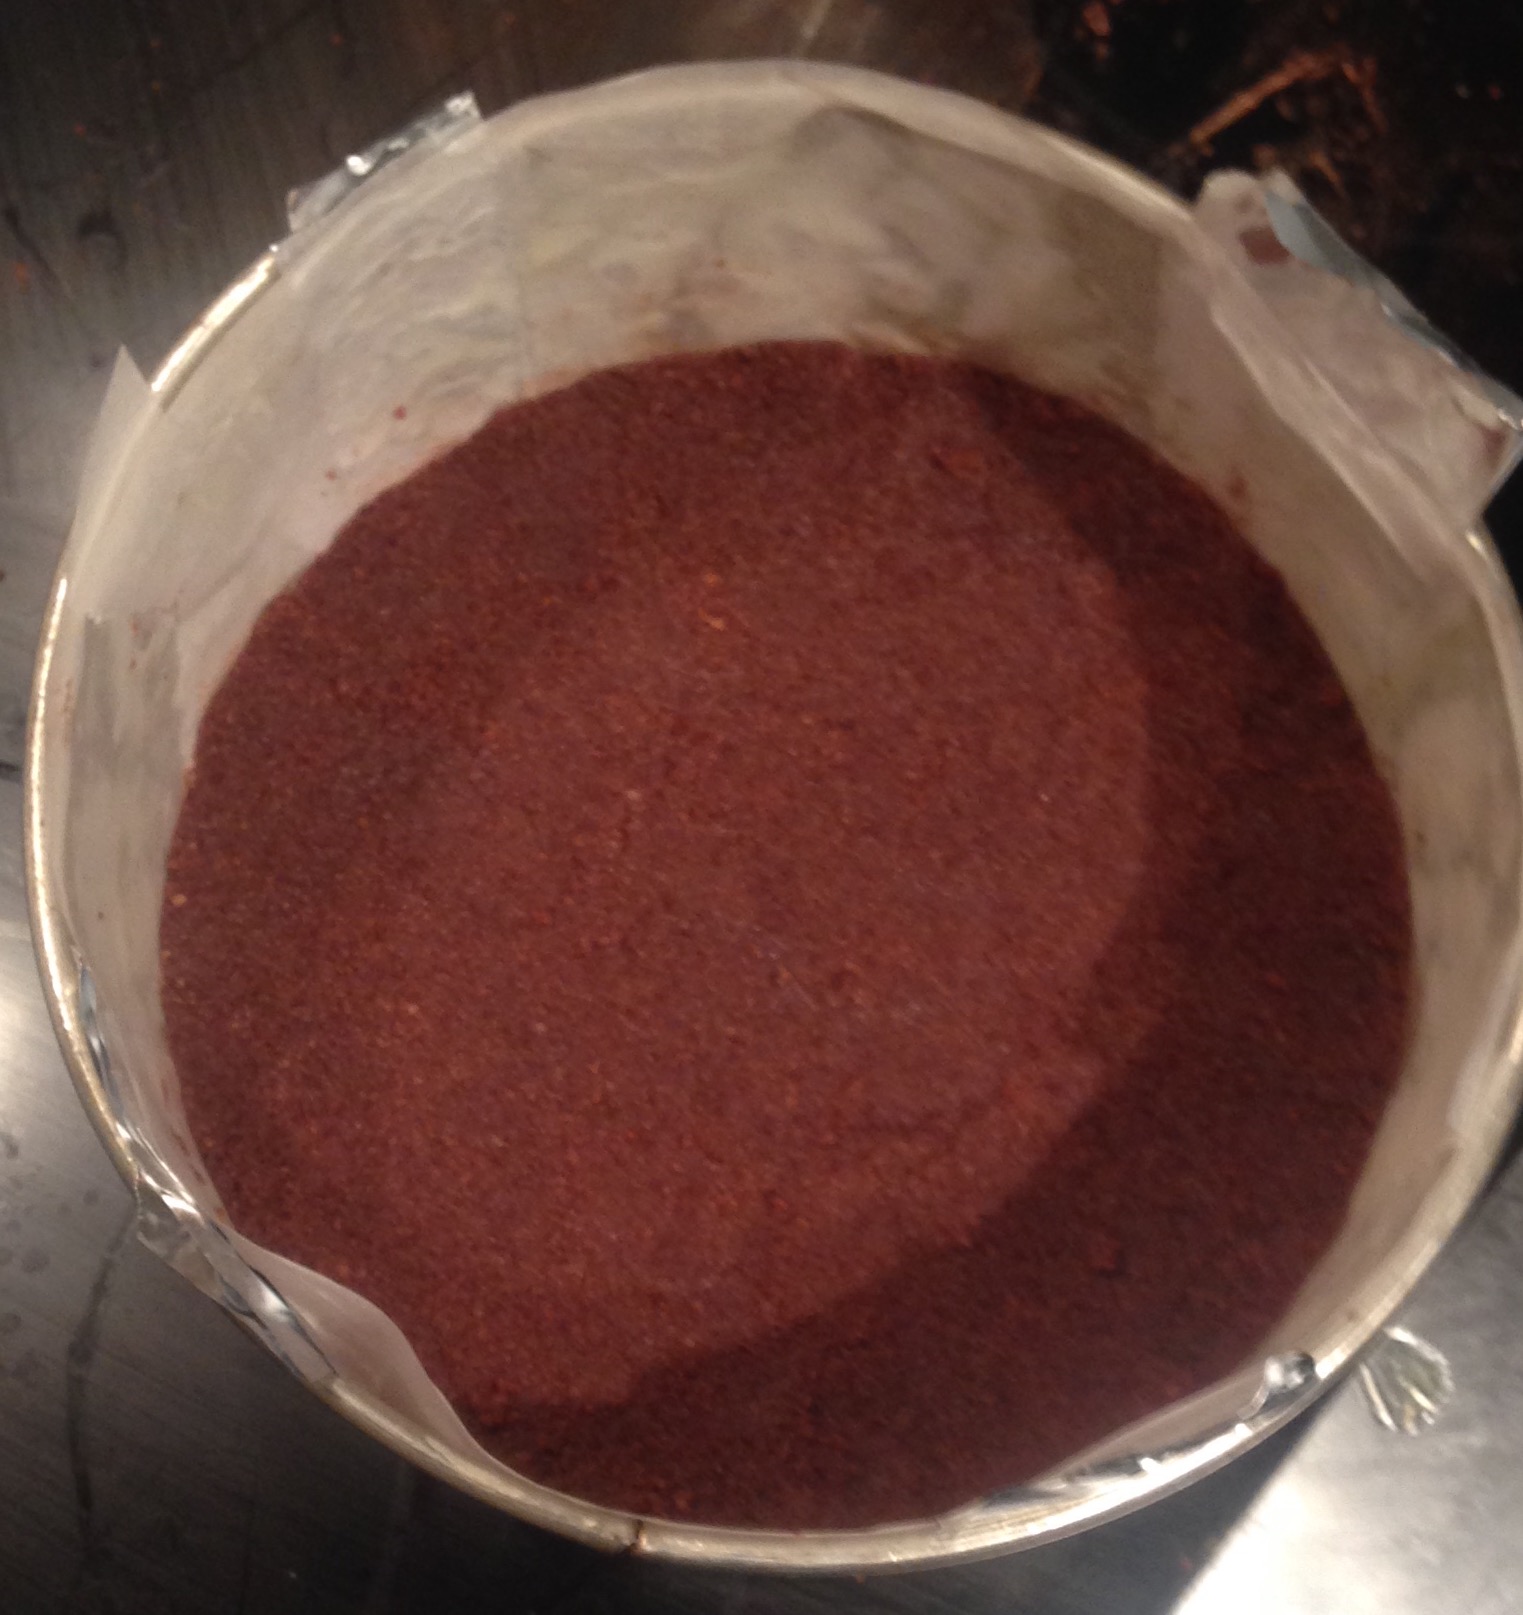
  1. Line a 23cm spring form baking tin with baking paper.
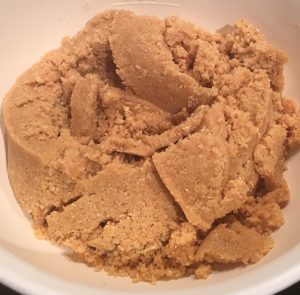
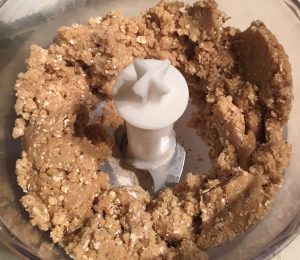
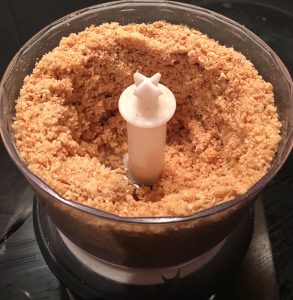
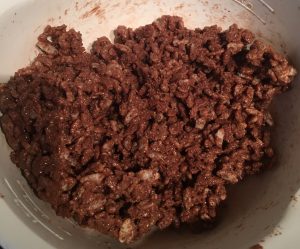
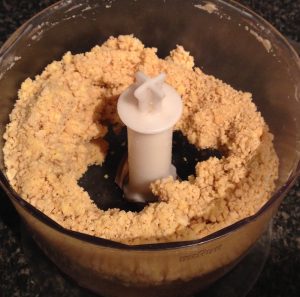
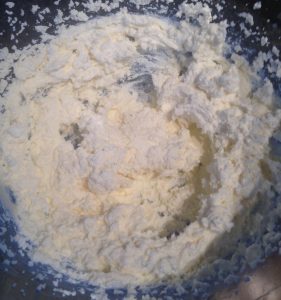
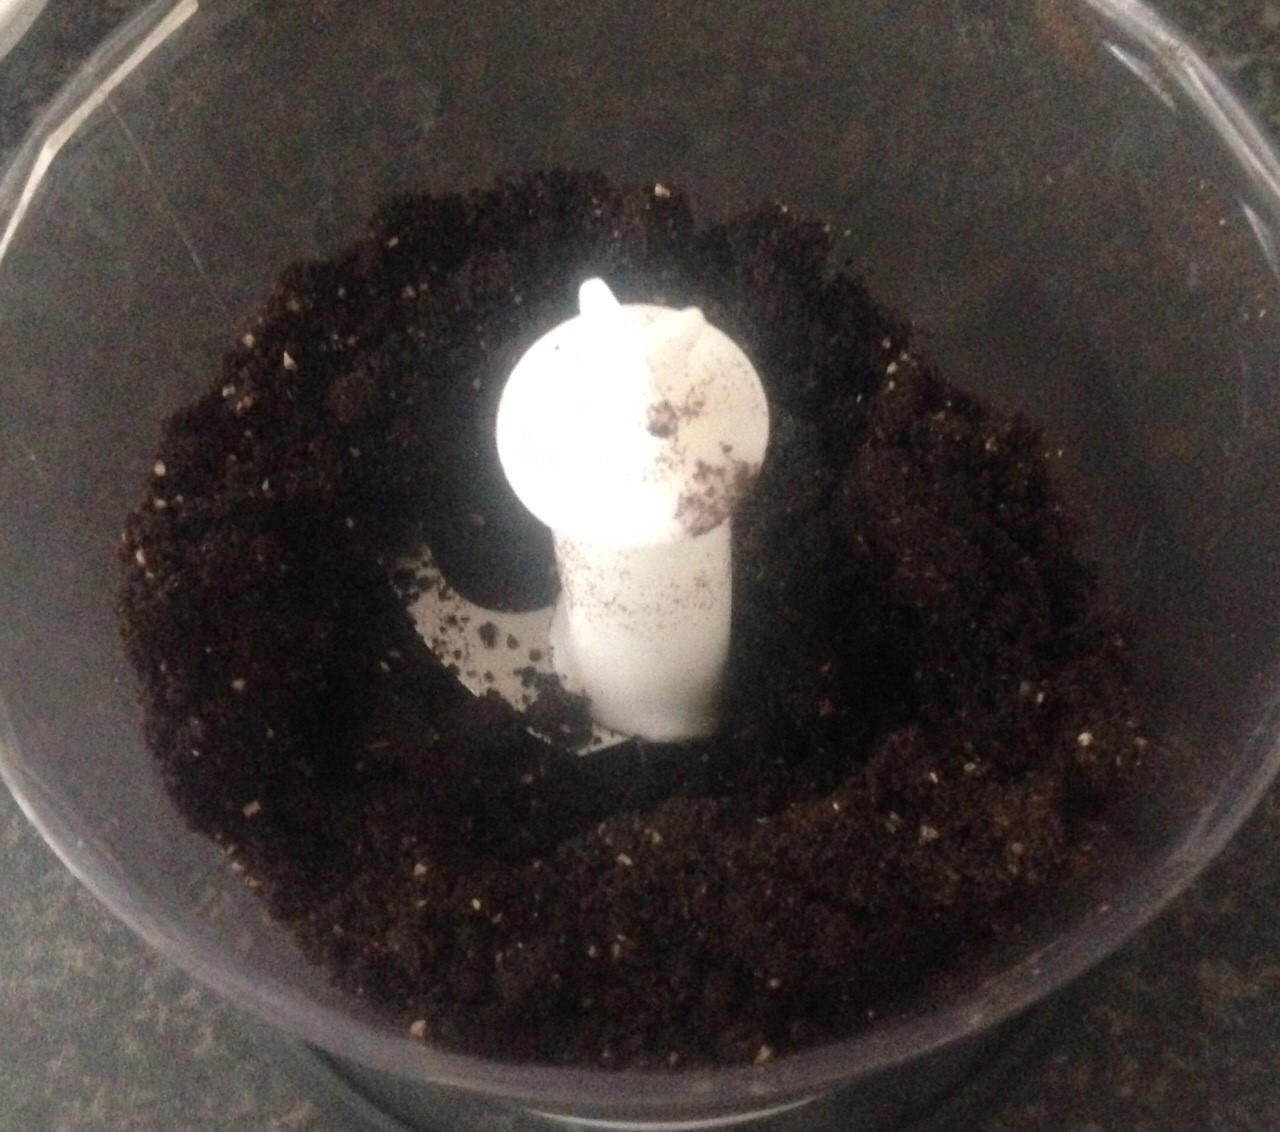
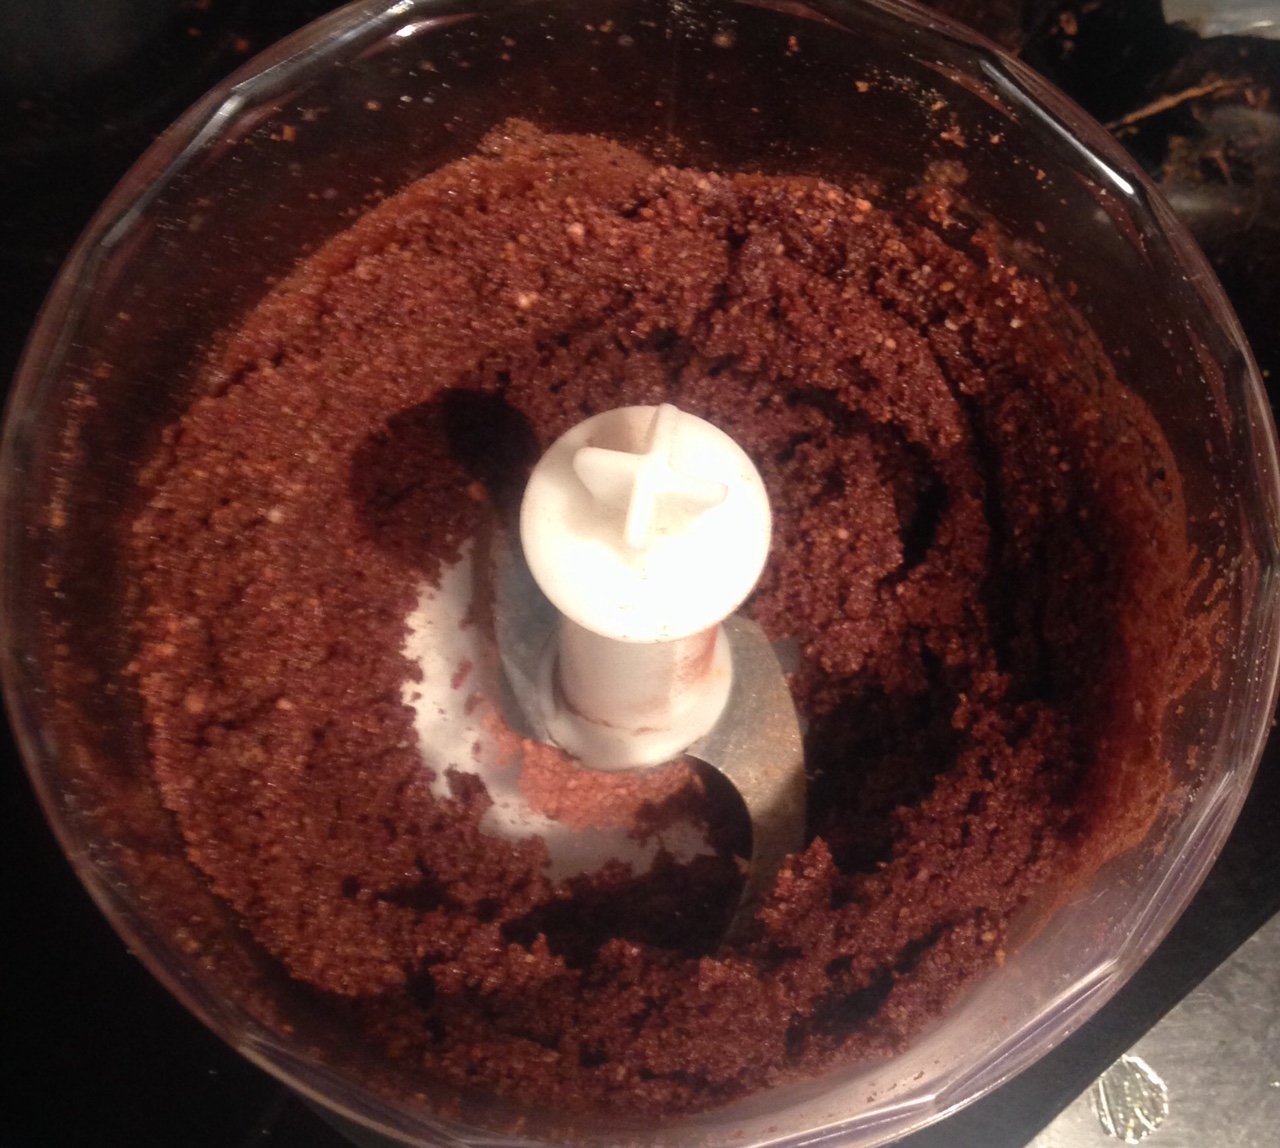
  2. Place the biscuits in a food processor and blitz until they resemble fine breadcrumbs. Melt the butter, add to the biscuits and pulse until well combine.
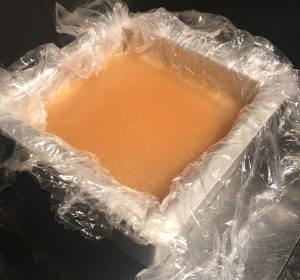
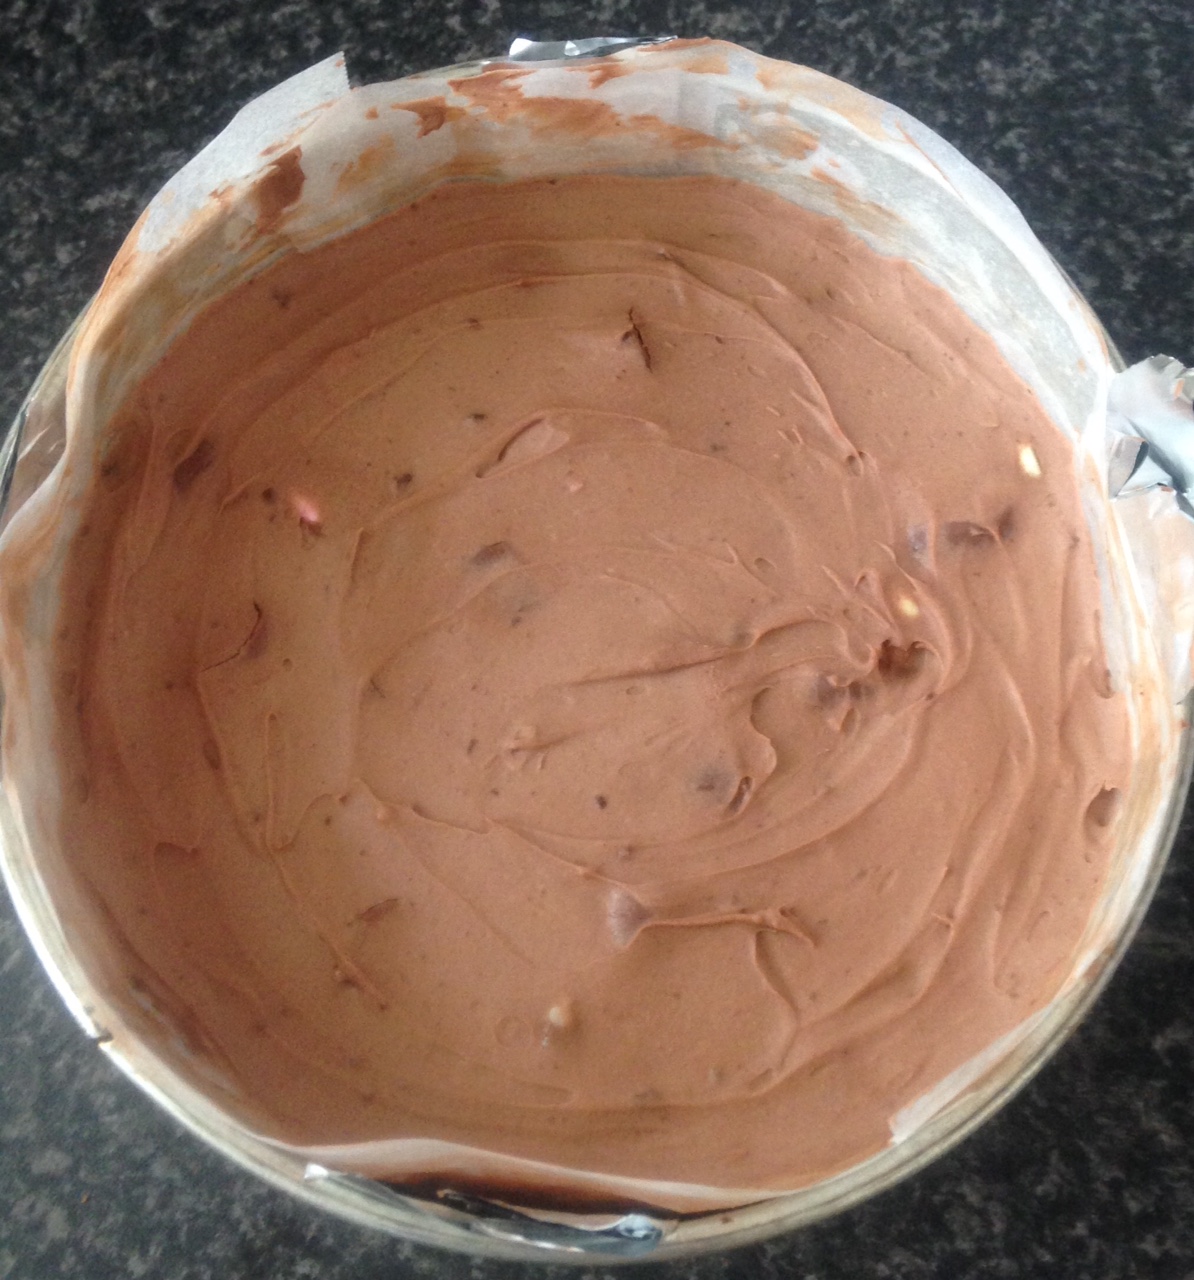
  3. Press biscuit mix into the base of the tin then place in the fridge to firm.
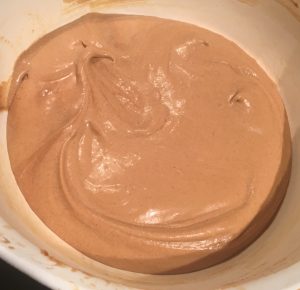
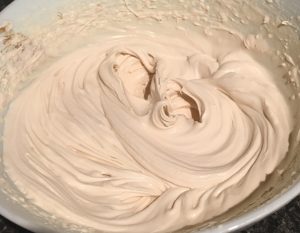
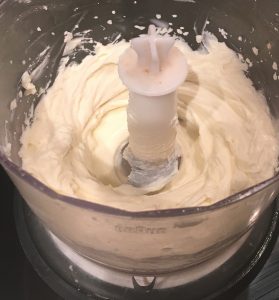
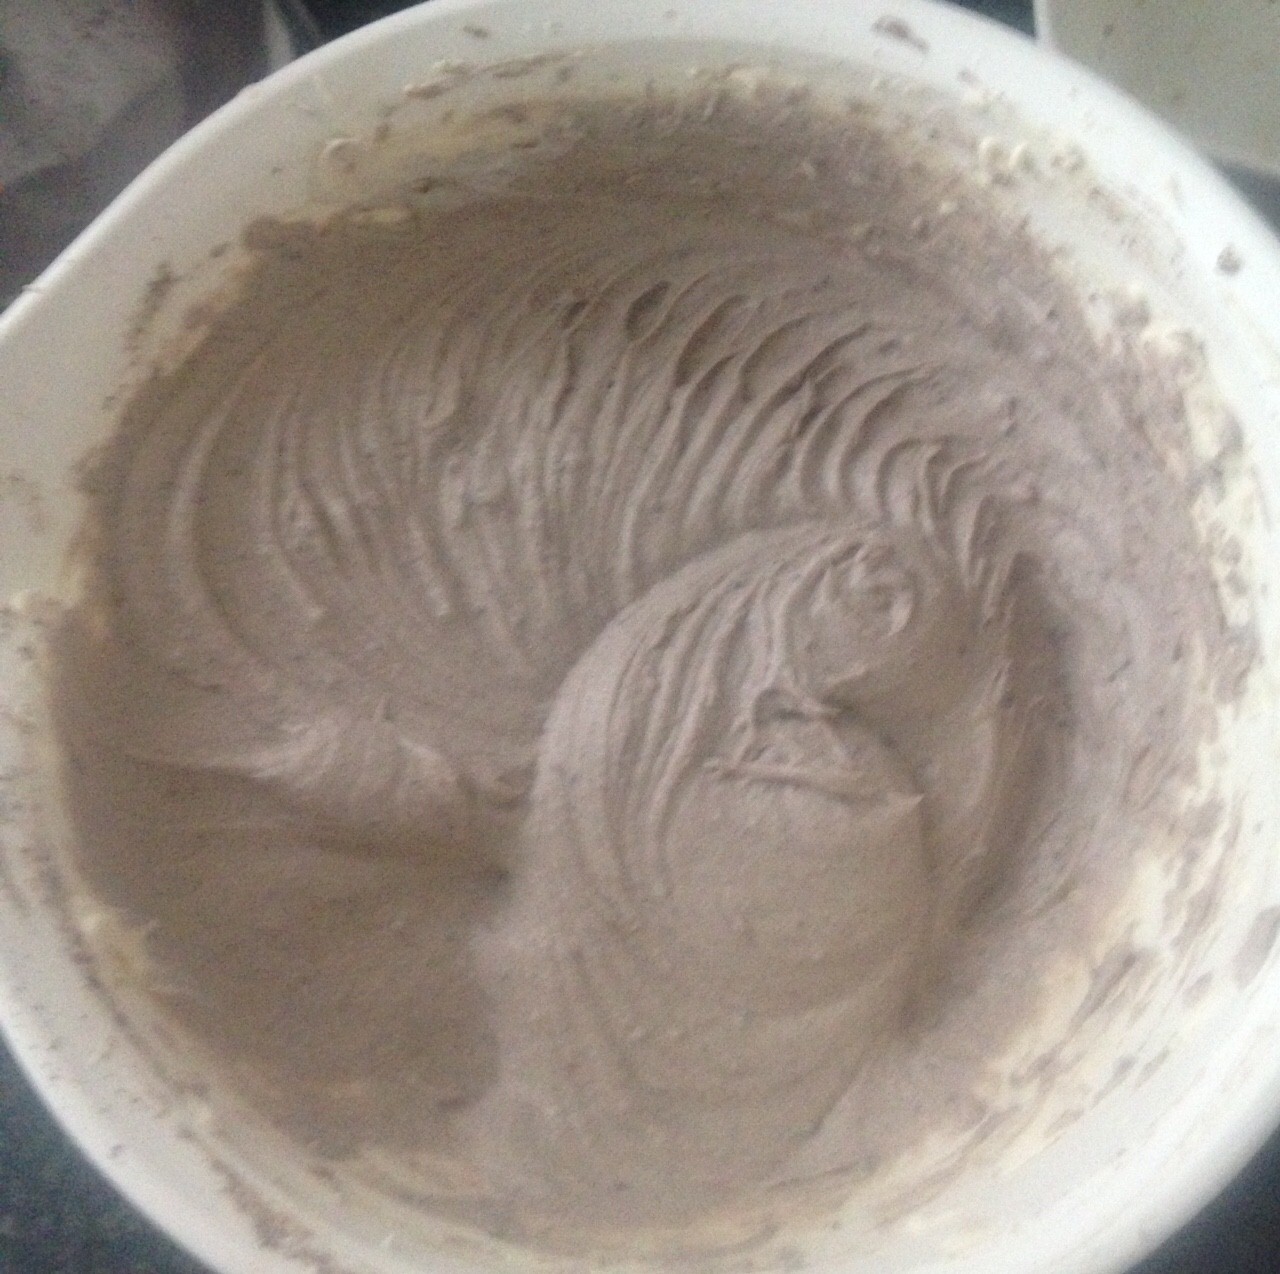
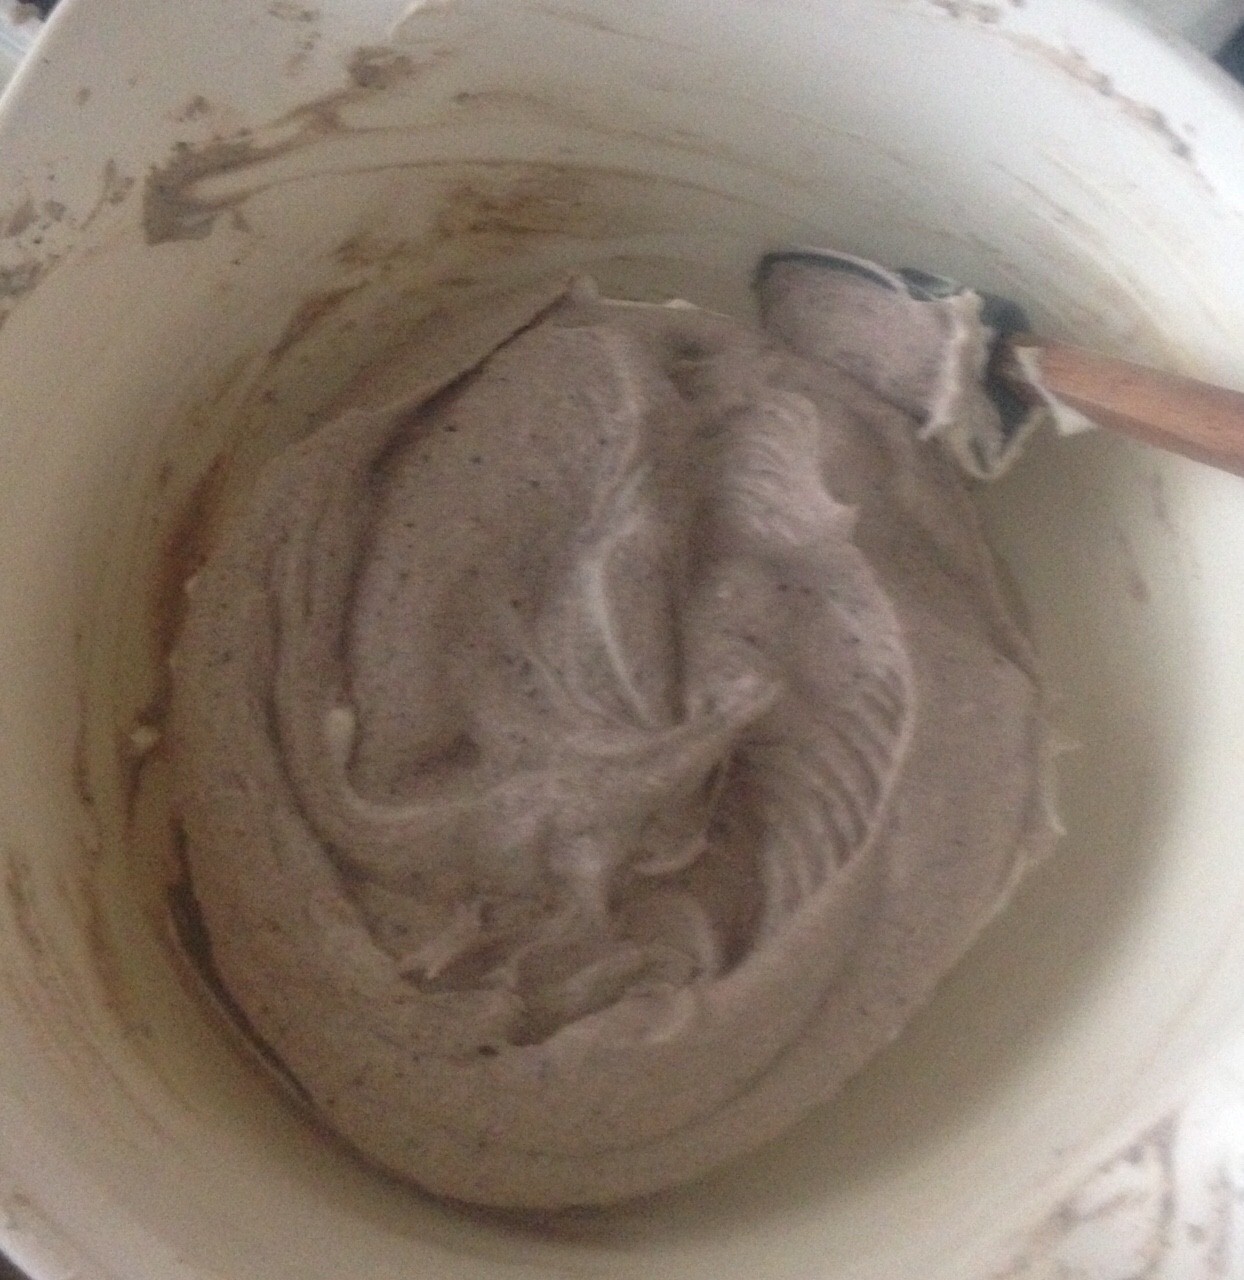
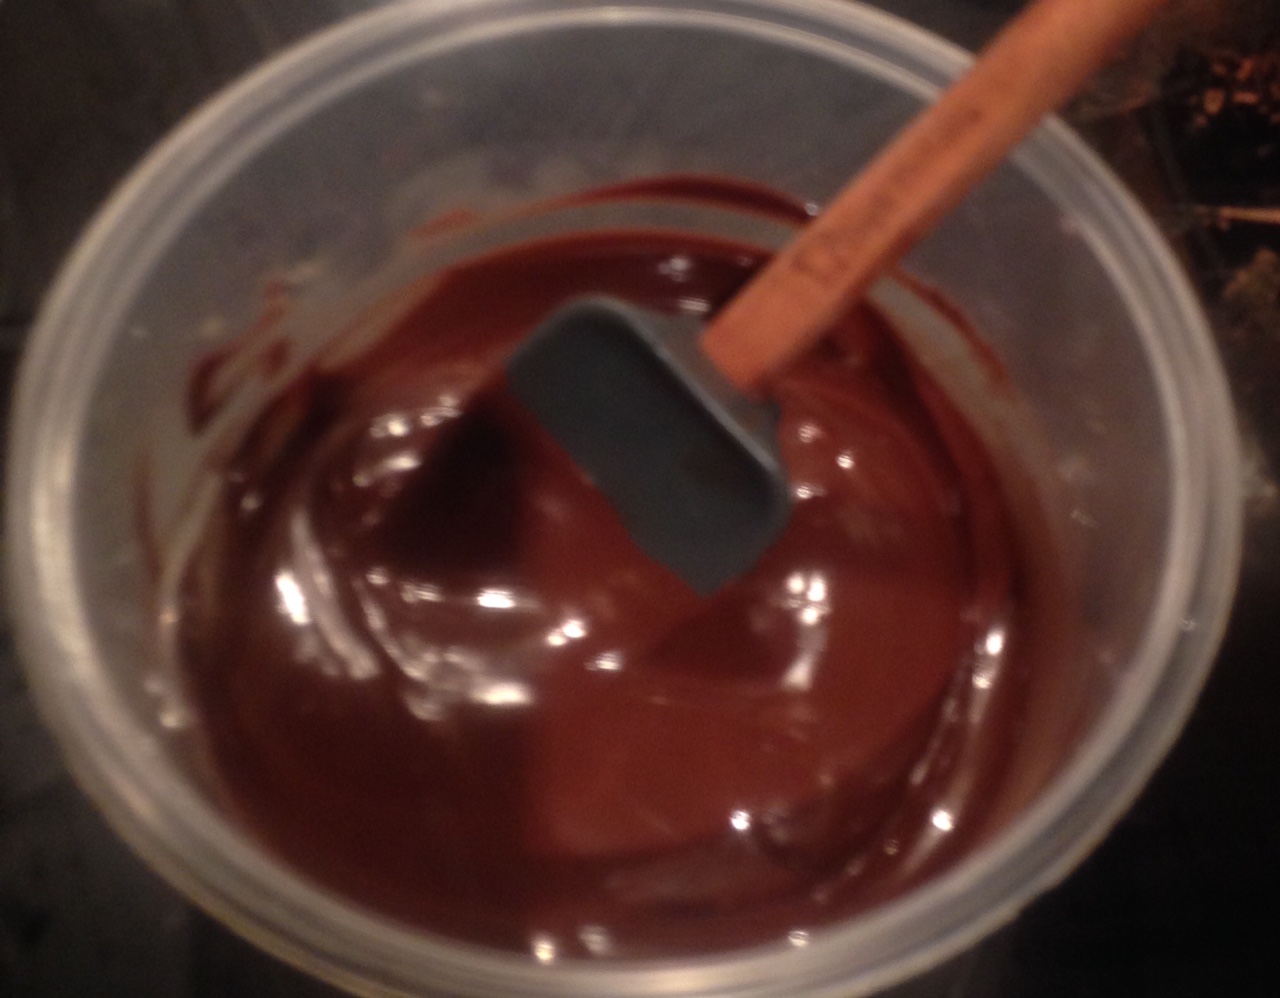
  4. Using electric beaters whisk the cream cheese and sugar until smooth.
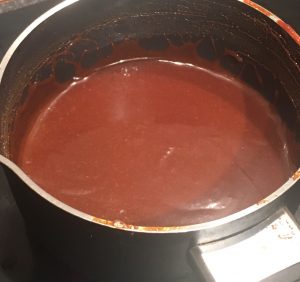
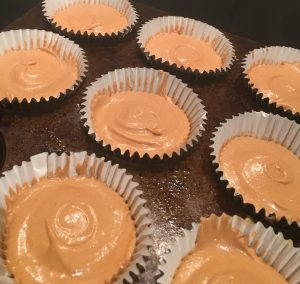
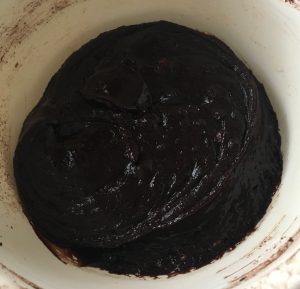
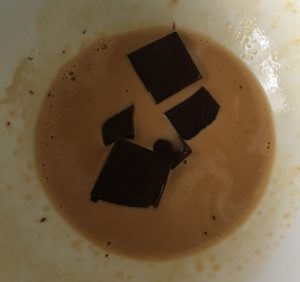
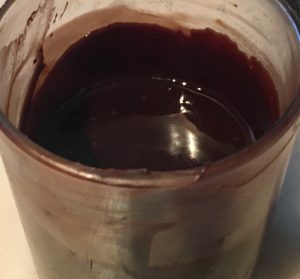
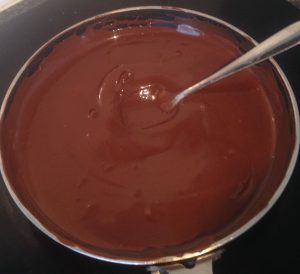
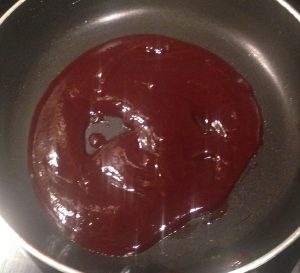
  5. Melt the chocolate and beat into the cheese mix until smooth.
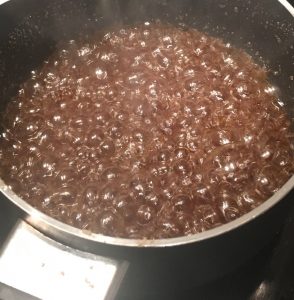
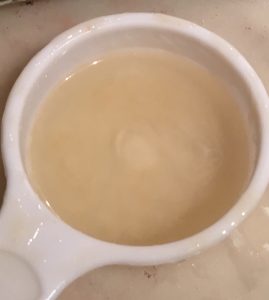
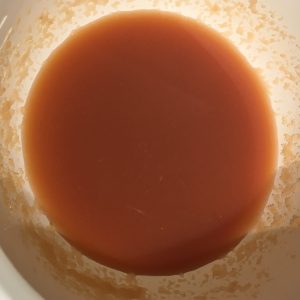
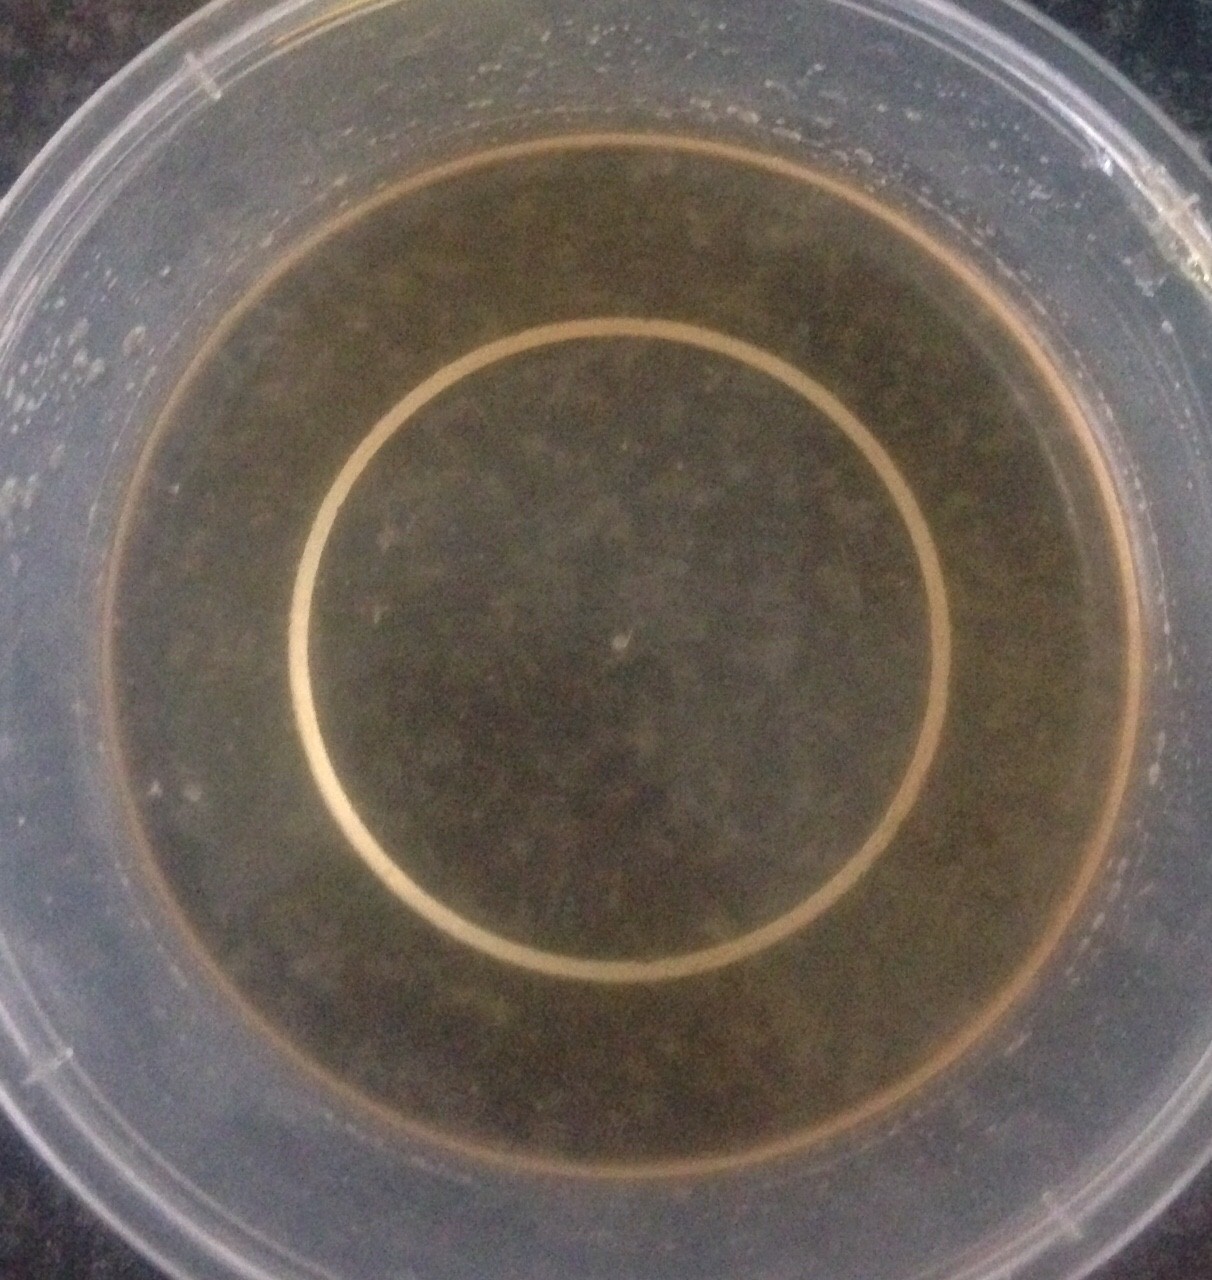
  6. Boil the water and mix the gelatine, using a fork to combine until the mix has no lumps and is silky.
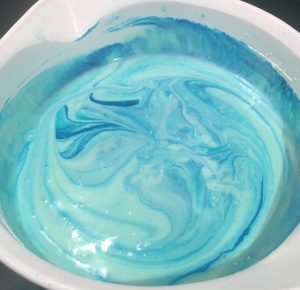
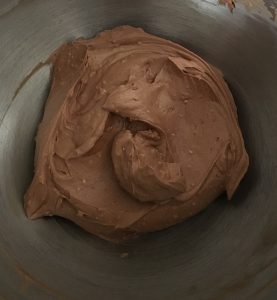
  7. Add the gelatine mix to the cheese mix and beat until well combine.
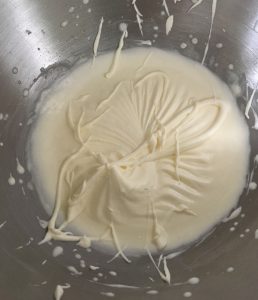
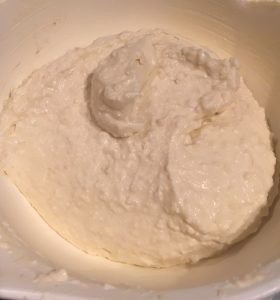
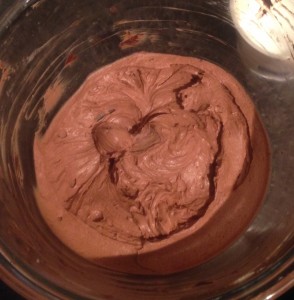
  8. Clean the beaters and whisk the cream until peaks form.
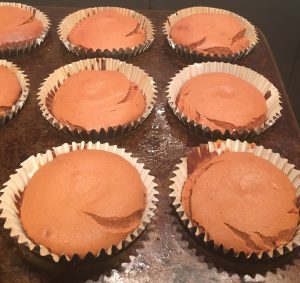
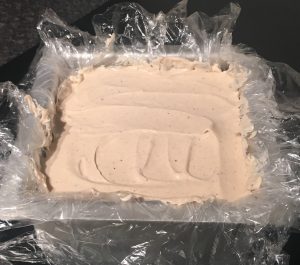
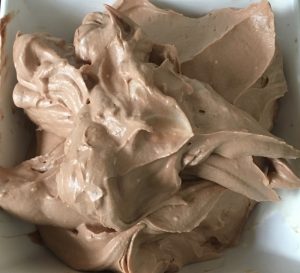
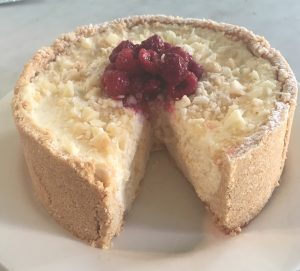
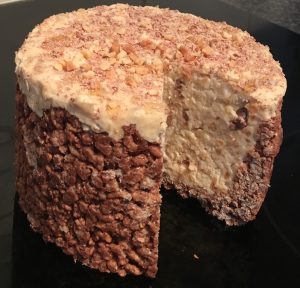
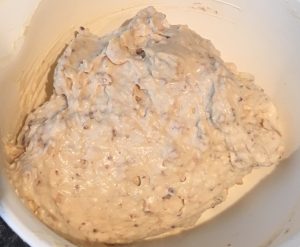
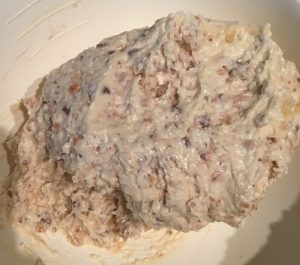
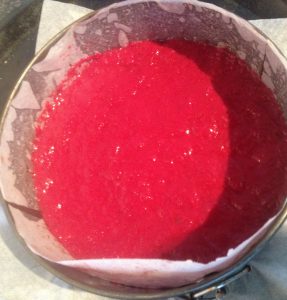
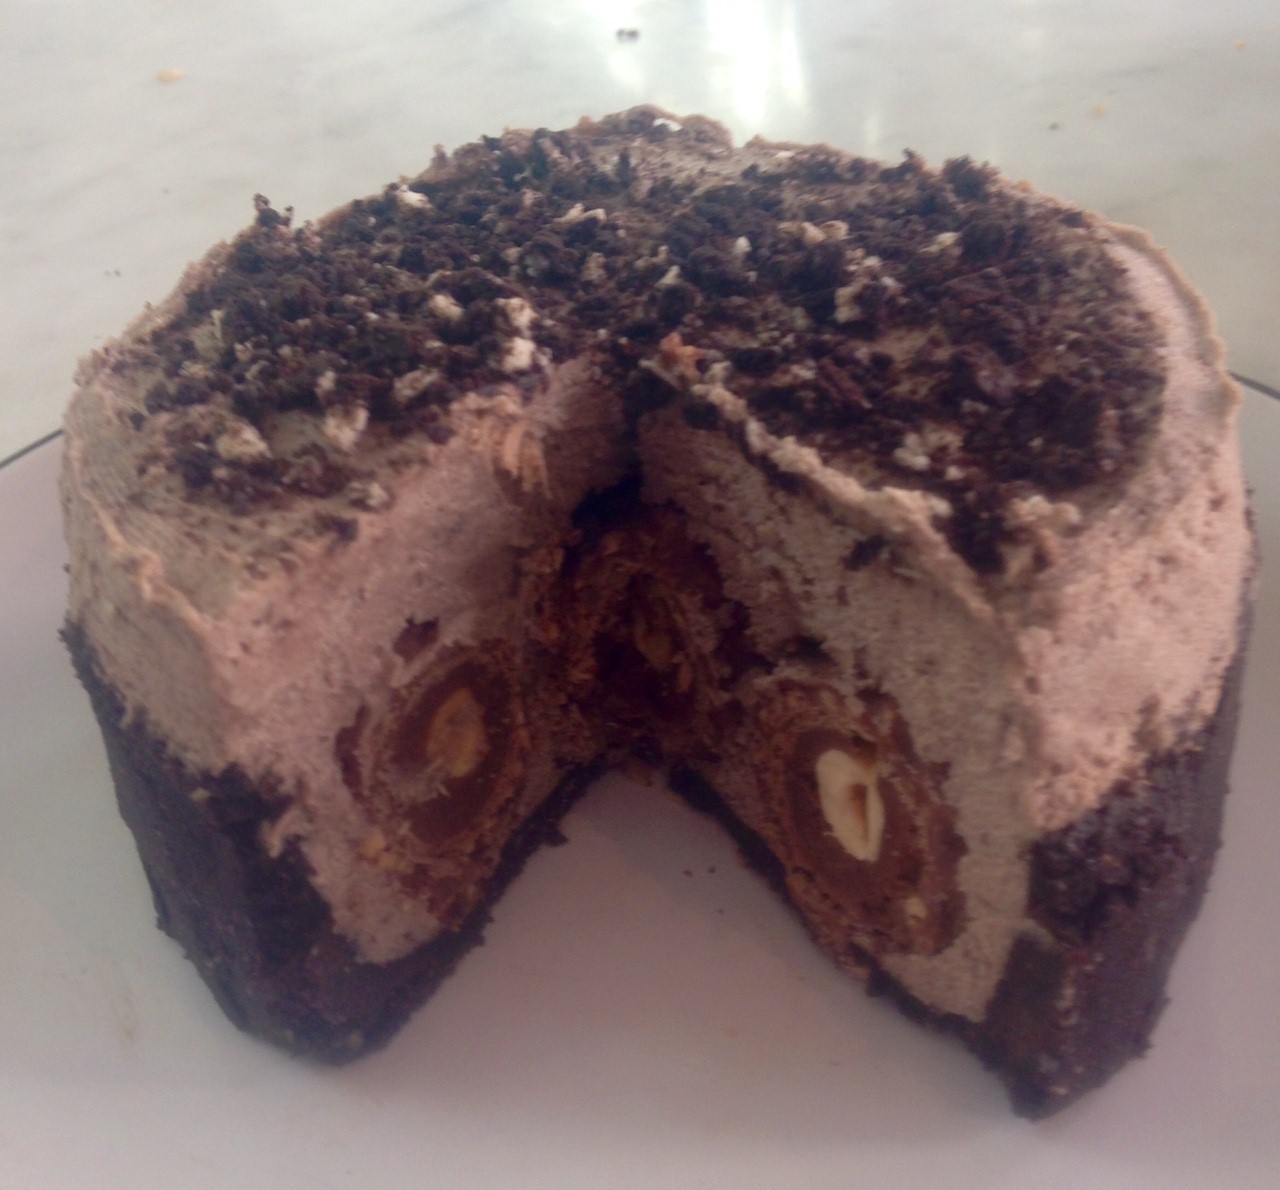
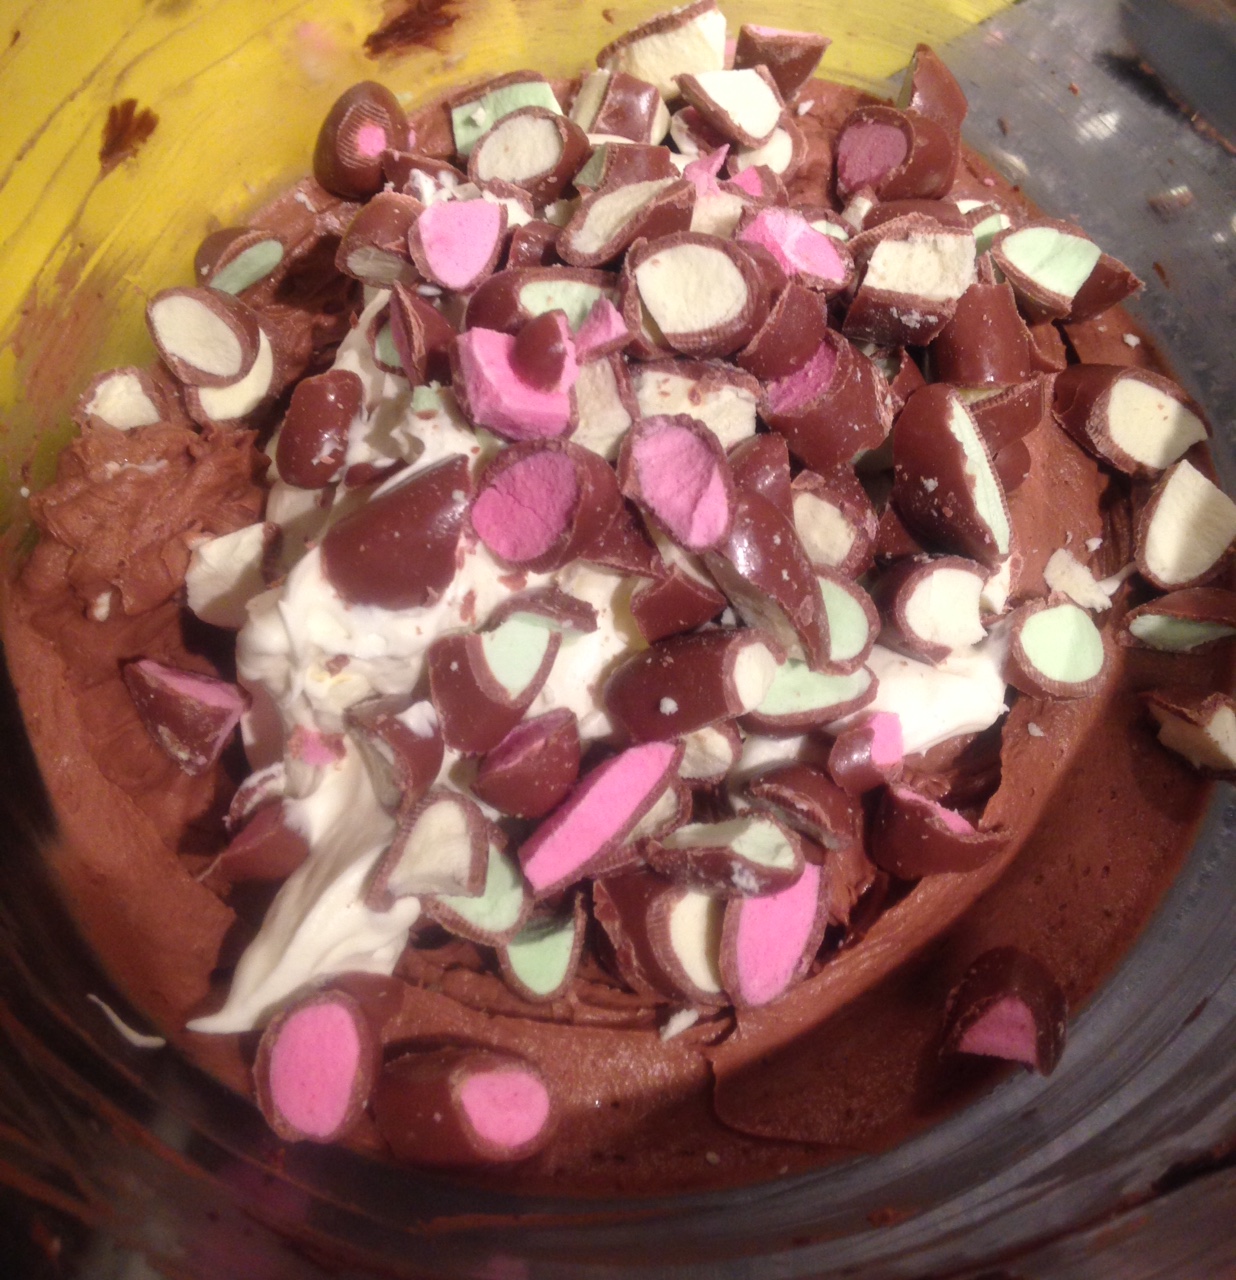
  9. Cut 250g of clinkers into medium sized pieces each so you have nice chunks and fold with the cream into the cheese mix.
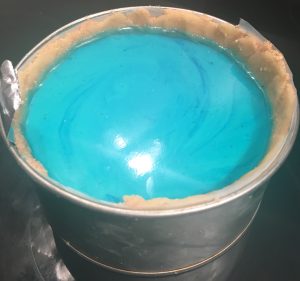
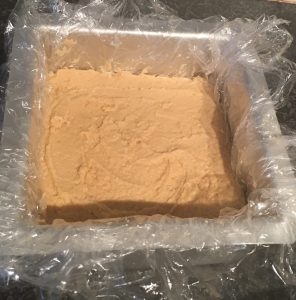
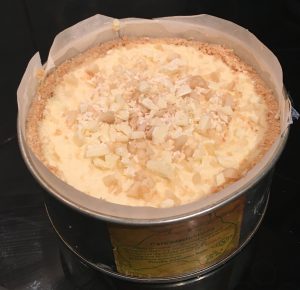
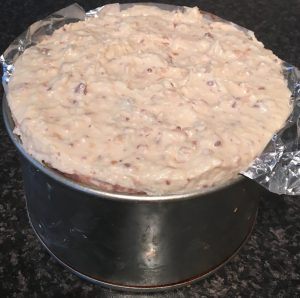
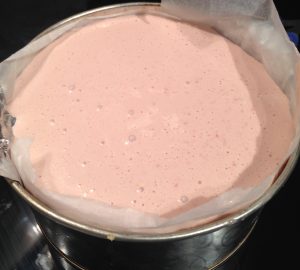
  10. Spoon over the chocolate base and leave in the fridge for at least 3 hours to set.
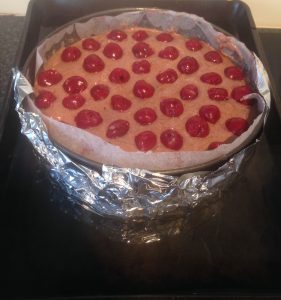
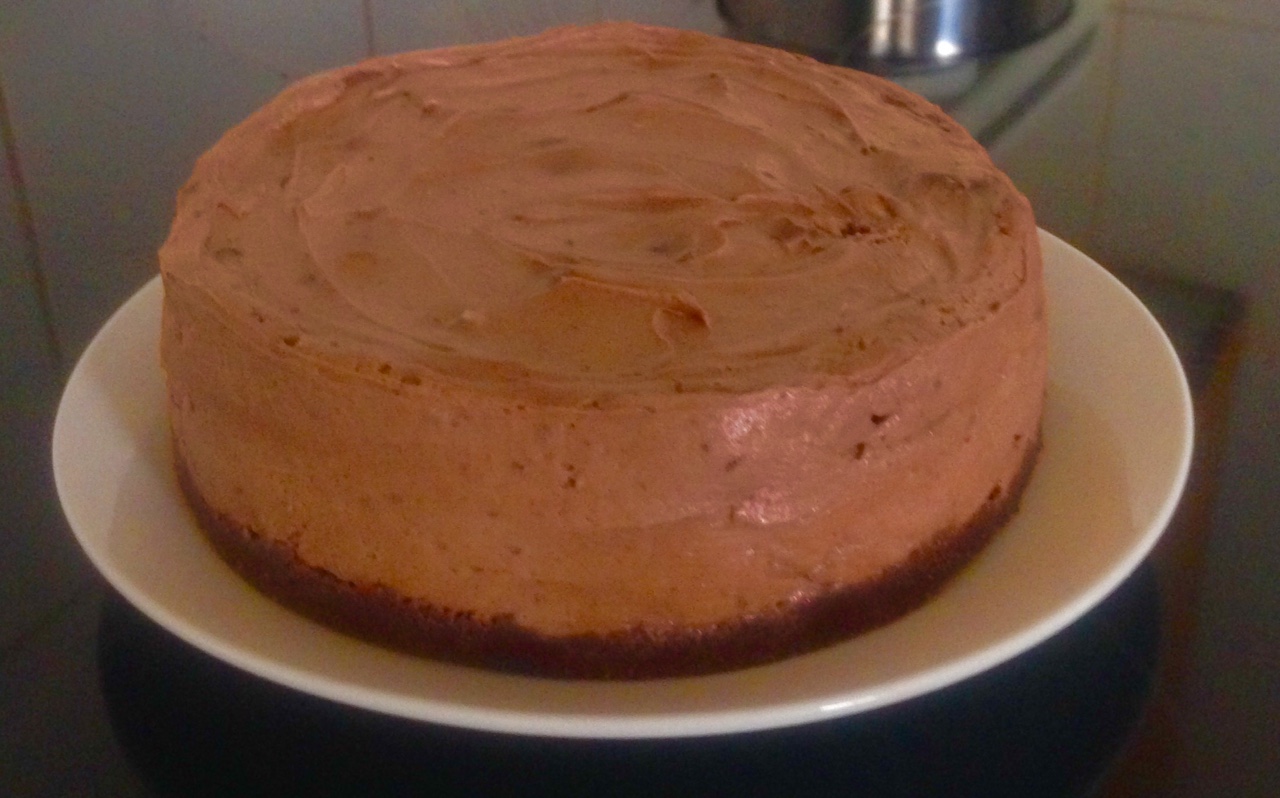
  11. Once set remove from the tin.
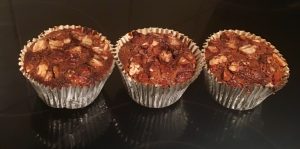
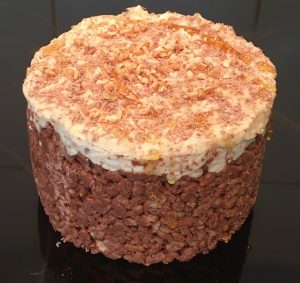
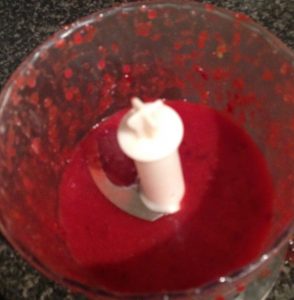
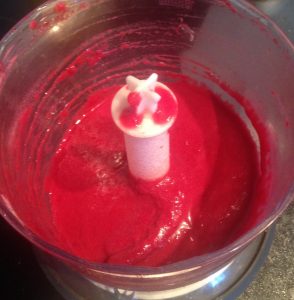
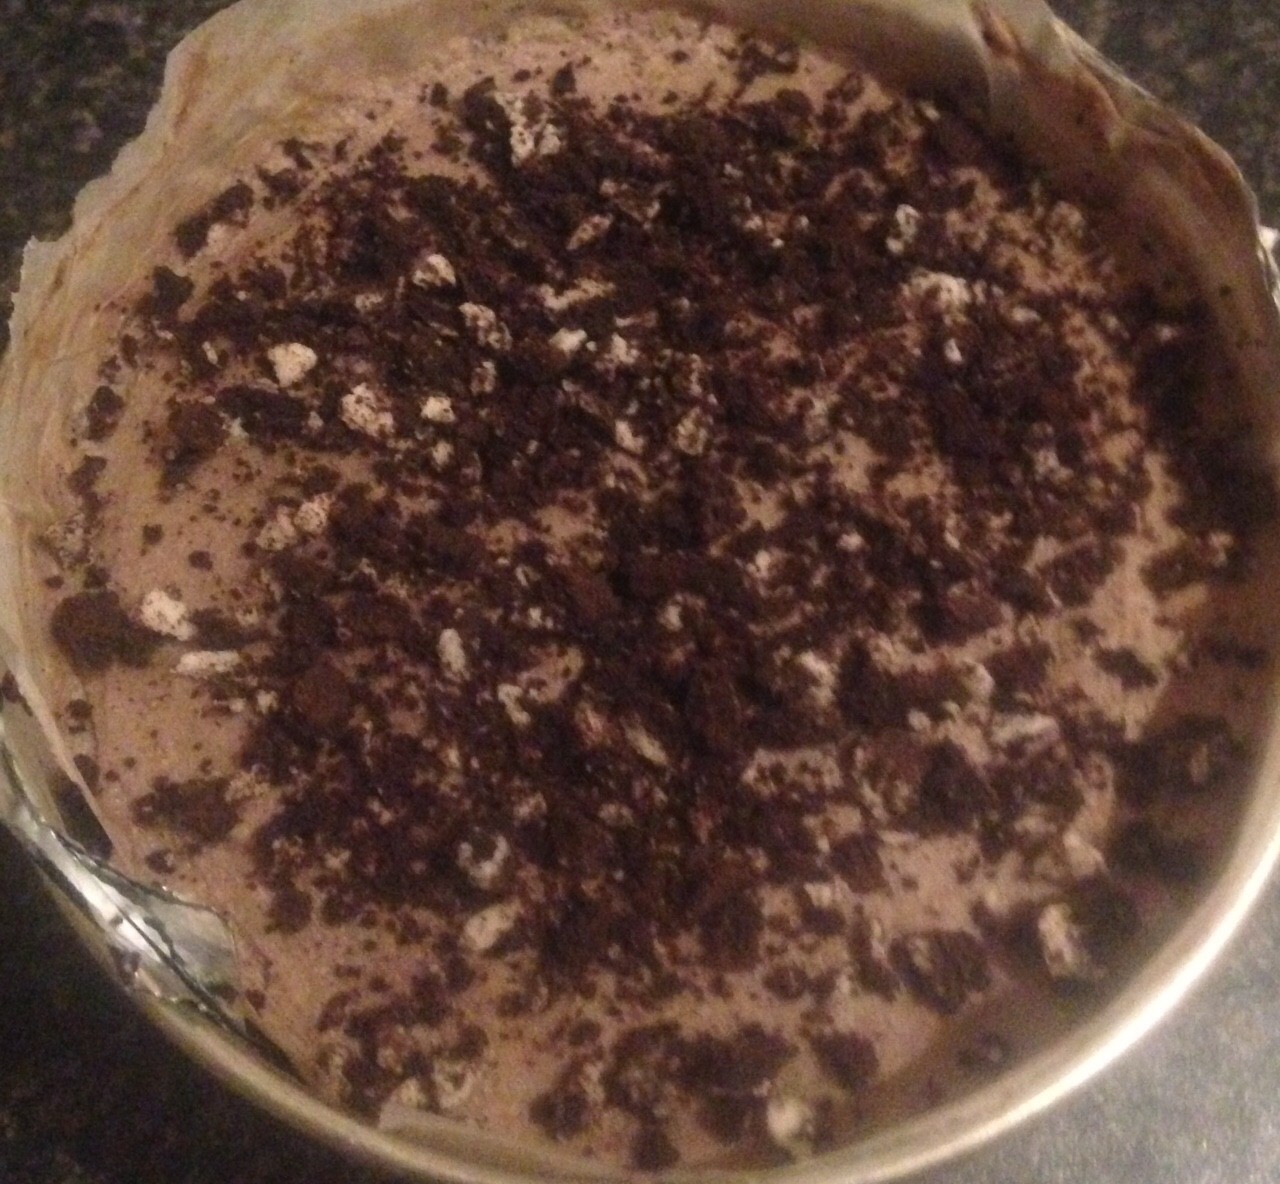
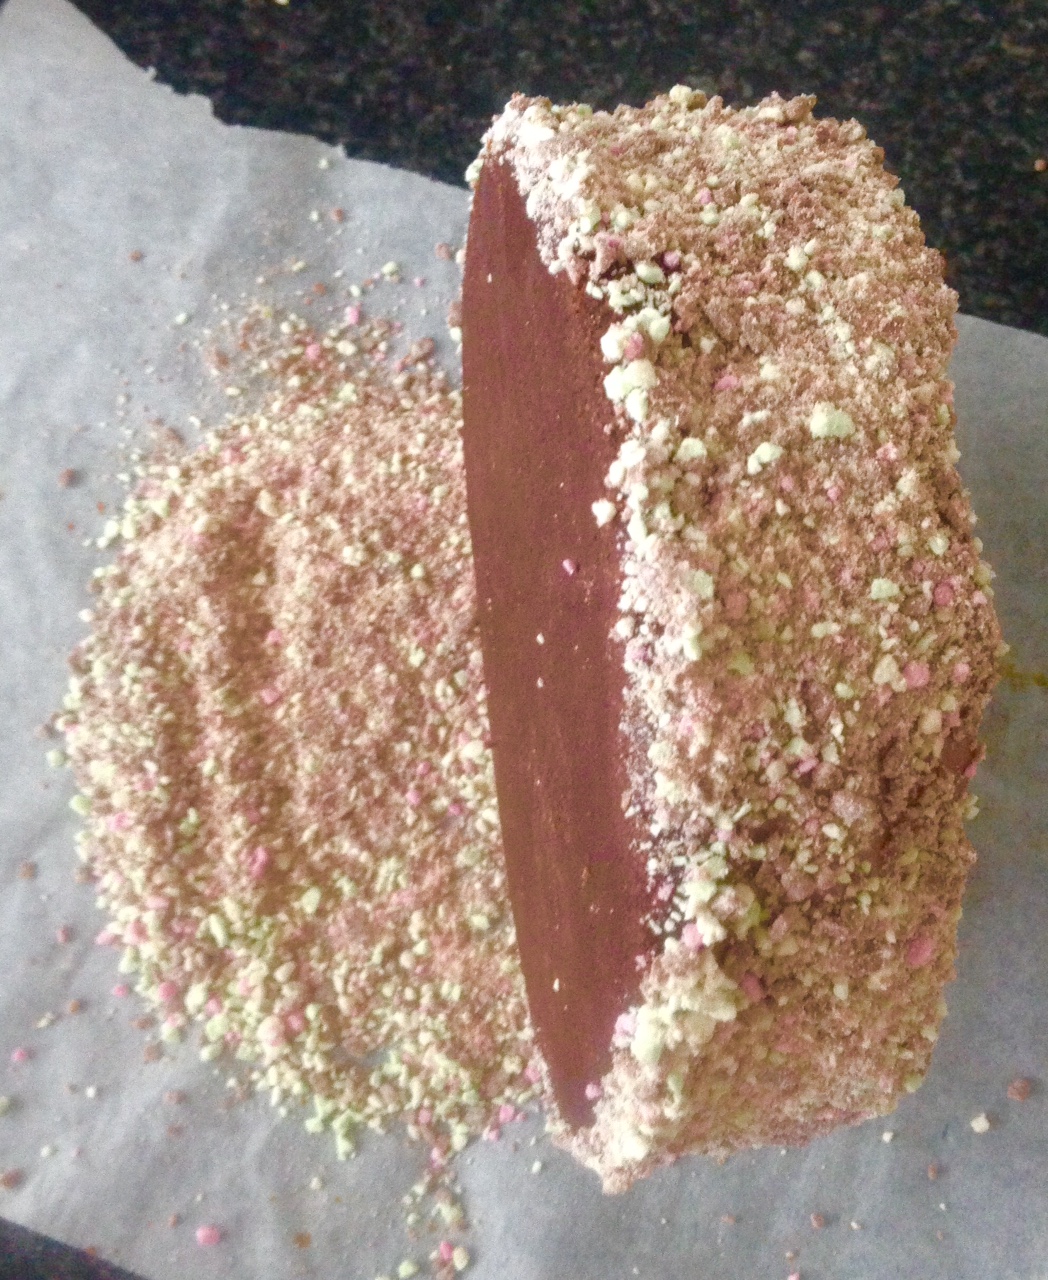
  12. Place 100g of clinkers in the food processor and blitz until the mix resembles breadcrumb consistency.
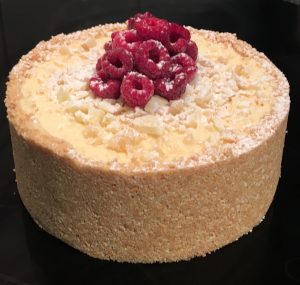
  13. Roll the cake onto its side once set to coat sides of cake with the clinker mix, then sprinkle the remaining on top.


Clinker Cheesecake recipe

Step 2

Clinker Cheesecake recipe

Step 3

Clinker Cheesecake recipe

Clinker Cheesecake recipe

Step 5

Clinker Cheesecake recipe

Step 7

Clinker Cheesecake recipe

Step 9

Clinker Cheesecake recipe

Step 9

Clinker Cheesecake recip

Step 11

Clinker Cheesecake recipe

Step 13


Like this recipe? Subscribe via RSS or email to get my new entries and more scrumptious recipes with reviews.

Email, RSS Follow
Print
Leave a comment .
Tags: cheesecake, chocolate, Clinker, Clinker Cheesecake .

Blue Heaven Cheesecake

Posted on July 14, 2018 Posted in Cakes .

Blue Heaven Cheesecake recipe

I have always loved the flavour of blue heaven and decided that I wanted to make a cake out of it. The only way I could really think of putting this flavour into a cake was by using jelly crystals, thus the cake types I could actually experiment with were limited – making a cheesecake the most obvious option.

If I used the jelly in a cheesecake I wouldn’t need to bake the cake as the jelly would help set the cheesecake to the perfect consistency.

To play to the blue heaven child-hood flavour I added blue food colouring to really make this cake pop and look like it belonged in Willy Wonka’s chocolate factory.

The outcome was exactly as I was hoping for, the flavour reminds me of when I was a child, its super creamy and a satisfying must if you were a fan of blue heaven spiders as a kid!

Blue Heaven Cheesecake recipe

Ingredients:

Base:

  • 200g sweet biscuits
  • 90g butter, softened

Filling:

  • 85g jelly crystals (blue heaven flavored)
  • 100g water
  • 30g sugar
  • 50ml cream
  • 250g cream cheese, softened
  • A few drops of blue food coloring

Jelly layer:

  • 30g jelly crystals (blue heaven flavored)
  • 100g water


Method:

  1. Line a 25cm spring form cake tin with baking paper.
  2. Place the biscuits and soften butter in a food processor and blitz until the mix resembles fine breadcrumbs.
  3. Press mix into the bottom and sides of the lined cake tin.
  4. Place the tin in the fridge to set.
  5. Boil the water and pour into a bowl, add the jelly crystals and stir until the crystals have melted and mixed in well. Set aside to cool to room temperature.
  6. Place the cream in a new bowl and using electric beaters whisk the cream until soft peaks form.
  7. Add the cooled jelly mix, sugar and cream cheese and beat until smooth and silky.
  8. Add the food colouring and fold the mix a few times to achieve a blue swirl.
  9. Pour the cheesecake filling into the prepared tin, smoothing the top with a spoon.
  10. Place the cake tin in the fridge for 3 hours to set.
  11. Meanwhile, boil 50ml water and pour not a bowl. Add the jelly crystals and stir until the crystals have melted and mixed in well. Leave aside to cool.
  12. Once jelly mix is cooled pour the jelly over the cheesecake and place in the fridge for a further 90 mins to set.
  13. Cut the cake into slices and enjoy!


Note: Using electric beaters I whipped up 100ml of thickened cream, 1 tbsn sugar and 1 tsn of vanilla essence to decorate the cake as well as a few raspberries.


Blue Heaven Cheesecake recipe
Step 2
Butterscotch Macadamia and White Chocolate Cheesecake recipe
Step 3
Blue Heaven Cheesecake recipe
Step 8
Blue Heaven Cheesecake recipe
Step 9
Blue Heaven Cheesecake recipe
Step 13


Like this recipe? Subscribe via RSS or email to get my new entries and more scrumptious recipes with reviews.


Email, RSS Follow
Print
Leave a comment .
Tags: Blue Heaven, Blue Heaven Cheesecake, cheesecake, jelly .

Golden Syrup Pecan and Caramel Mini Cheese Cakes

Posted on November 11, 2017 Posted in Cakes .

Golden Syrup Pecan and Caramel Mini Cheese Cakes

Golden Syrup Pecan and Caramel Mini Cheese Cakes recipe

Golden syrup would have to be one of my favorite flavors, it’s the whole reason I eat Anzac biscuits!

I wanted to make a cake with this flavor as the key feature, but to also have a range of textures and additional flavor tones that compliment the luscious golden syrup. Ultimately I wanted to create a golden syrup flavor bomb profile paring.

After playing around with a few spices, nuts and essences I had the ingredient pairing I was looking for.

The after taste and texture of pecans and the salty and sweet combo of salted caramel worked wonderfully with the golden syrup.

After deciding the syrup cake (experiment 1) was delicious but way too super super sweet I opted for a cheesecake instead to tone down the sweetness and add some creaminess to the pecan crunch.

Adding in an Anzac inspired base connected all the flavors and textures together.


Ingredients:

Base:

  • 30g ground pecans
  • 80g Anzac biscuits
  • 40g butter
  • 15g golden syrup

Filling:

  • 150g sugar
  • 40ml water
  • 250g cream cheese
  • ¼ tsn salt
  • 2 tsn salted caramel essence
  • 1 egg

Pecans:

  • 20g butter
  • 40g brown sugar
  • 20g golden syrup
  • 110g pecans

Method:

  1. Pre-heat the oven to 175c degrees and line an 8-cupcake tin with large cupcake patties.
  2. Spray the patties with oil spray.
  3. Place all the base ingredients into a food processor and blitz until the mix resembles breadcrumbs.
  4. Spoon the base mix into the patty cases evenly and using the back of a spoon press down to flatten.
  5. Place the tin in the fridge.
  6. Next make the caramel by placing the water and sugar into a saucepan on a high heated stove top.
  7. Stir the mix until the sugar has dissolved then leave to boil until the mix becomes a golden brown colour.
  8. Remove off the heat and using a hand whisk beat 100g of the cheese until the mix is smooth.
  9. Transfer the mix into a bowl and add the remaining cheese, salt and the essence, whisk with electric beaters until the mix is smooth.
  10. Add the egg and beat until well combined.
  11. Spoon the mix evenly into the patties on top of the base, flatten the mix with the back of a spoon.
  12. Place the tin into the oven and bake for 20 minutes or until the top of the cakes are firmish to touch.
  13. Meanwhile make the pecan topping by placing the butter, sugar and syrup in a bowl and on high in the microwave until the mix is boiling, stir.
  14. Diced the pecans and add into the sugar mix, stir.
  15. Once the cakes are done take them out of the oven and spoon the pecan mix over the top of the cakes evenly.
  16. Place the cakes back in the oven for an additional 20 minutes.
  17. Once time is up remove the cakes from the oven and leave aside to cool.
  18. Place the cakes in the fridge for 4 hours to completely set.
  19. Dust the cakes with icing sugar and serve the cakes with a dollop of thickened cream if desired.


Note:

  • I have placed the cakes in the freezer for 2 hours to completely firm then removed the patty cases.
  • If you don’t have caramel essence you can substitute with vanilla essence.


Golden Syrup Pecan and Caramel Mini Cheese Cakes recipe
Step 4
Golden Syrup Pecan and Caramel Mini Cheese Cakes recipe
Step 7
Golden Syrup Pecan and Caramel Mini Cheese Cakes recipe

Step 8

Golden Syrup Pecan and Caramel Mini Cheese Cakes recipe

Step 10

Golden Syrup Pecan and Caramel Mini Cheese Cakes recipe
Step 11

Golden Syrup Pecan and Caramel Mini Cheese Cakes recipe

Step 14

Golden Syrup Pecan and Caramel Mini Cheese Cakes recipe

Step 15

Golden Syrup Pecan and Caramel Mini Cheese Cakes recipe

Step 17


Like this recipe? Subscribe via RSS or email to get my new entries and more scrumptious recipes with reviews.

Email, RSS Follow
Print
Leave a comment .
Tags: anzac biscuis, cheesecake, golden syrup, Golden Syrup Pecan and Caramel Mini Cheese Cakes, pecans, salted caramel .

Apple Jelly and Peanut Oat Cheesecake Slice

Posted on July 15, 2017 Posted in Slice .

Apple Jelly and Peanut Oat Cheesecake Slice

Apple Jelly and Peanut Oat Cheesecake Slice recipe

Apple is a really interesting ingredient to bake with, it is actually quite a difficult ingredient to hero as a key flavor in desserts.

However, as I still have not accomplished a killed apple unusual treat I was determine to succeed in a bake thus hit the kitchen for some experimenting.

In my experimenting one combo I came up with that I thought would be the winner was the pecan lavender lemon and apple cake, however it was the flavor combo of cinnamon apple peanut oats and caramel that exceeded expectations.

After playing around with this flavor combo with different textures I ended up featuring the nuts oats and spice in a base for a crunch, created a peanut cheesecake for the filling, an apple jelly for an addition textural layer and caramel cream for indulgence.


Oat base:

  • 105g flour
  • 30g peanuts
  • 105g butter
  • 90g brown sugar
  • 60 oatbran
  • 1 + 1/2 tsn ground cinnamon

Peanut cheesecake:

  • 1 + 1/2 tsn gelatin
  • 2 tbsn water
  • 280g cream cheese
  • 75g brown sugar
  • 1 + 1/2 tsn vanilla
  • 210g peanut butter
  • 50ml cream

Apple jelly:

  • 350ml freshly squeezed apple juice
  • 75g brown sugar
  • 1 + 1/2 tsn lemon juice
  • 2 tsn gelatin

Cream:

  • 190ml thickened cream
  • 1 tsn ground cinnamon
  • 45g brown sugar


Method:

  1. Pre-heat the oven to 180c degrees and line a 30cm x 30cm slice tin with baking paper.
  2. Place all the base ingredients into a food processor and blitz until the mix is combine and balls up on the side of the mixer.
  3. Spoon the mix into the cake tin and using the back of a spoon flatten out for even coverage.
  4. Bake in the oven for 20 minutes or until the top is slightly golden, leave aside to cool completely.
  5. Meanwhile make the cheesecake layer by placing the boiling water with the gelatin and whisking with a fork until dissolved.
  6. Place the gelatin mix, cream cheese, sugar, vanilla and peanut butter into a bowl and beat with electric beaters until fluffy and well combine.
  7. Add the cream to the mix and beat until just combine.
  8. Remove the cooled oat base layer and baking paper from the tin and spray the tin with oil spray.
  9. Cut 2mm off the base from 2 opposite sides.
  10. Place 2 sheets of cling wrap over each other with the oat base layer in the center and lift the base back in the tin with the clingwrap overflowing the sides of the tin.
  11. Pour the cheesecake mix on top of the oat base layer and even the mix out with a spoon.
  12. Place the slice in the fridge for 1 hour to set.
  13. To make the jelly add the freshly squeezed apple juice, sugar and lemon into a bowl and heat in the microwave until hot to touch.
  14. Add the gelatin to the apple mix and stir until the gelatin is dissolved, leave aside until cooled completely.
  15. Pour the apple mix over the cheesecake layer and leave in the fridge for 4 hours to set.
  16. Lastly, beat the cream, cinnamon and sugar until peaks form.
  17. Spread the cream over the set jelly layer and leave in the fridge for 1 hour.
  18. To serve, pull the cling wrap up to lift the slice from the tin, remove the cling wrap and place the slice on a plate.
  19. Cut the slice into squares.


Apple Jelly and Peanut Oat Cheesecake Slice recipe
Step 2
Apple Jelly and Peanut Oat Cheesecake Slice recipe
Step 4
Apple Jelly and Peanut Oat Cheesecake Slice recipe
Step 5
Apple Jelly and Peanut Oat Cheesecake Slice recipe
Step 11
Apple Jelly and Peanut Oat Cheesecake Slice recipe
Step 14
Apple Jelly and Peanut Oat Cheesecake Slice recipe
Step 15
Apple Jelly and Peanut Oat Cheesecake Slice recipe
Step 16
Apple Jelly and Peanut Oat Cheesecake Slice recipe
Step 17
Apple Jelly and Peanut Oat Cheesecake Slice recipe
Step 18
Apple Jelly and Peanut Oat Cheesecake Slice recipe
Step 18

Like this recipe? Subscribe via RSS or email to get my new entries and more scrumptious recipes with reviews.

Email, RSS Follow
Print
Leave a comment .
Tags: apple, Apple Jelly and Peanut Oat Cheesecake Slice, cheesecake, jelly, oates, peanut, Peanutbutter .

Mocha Marsala and Almond Sandwich Cake

Posted on April 7, 2017 Posted in Cakes .

Mocha Marsala and Almond Sandwich Cake

Mocha Marsala and Almond Sandwich Cake recipe

Tiramisu is my ultimate, all-time favorite sweet treat.

I love playing with the flavor combo of chocolate, marsala and coffee, it always reminds me of my birthday as my mum made the dessert every year without fail.

I’ve made many variations on Tiramisu over the years, cake, ice-cream and frozen cheesecake to name a few. Something I have never tried is extending the flavor profile and incorporating multiple nontraditional layered textures.

The additional flavor I have utilised that’s not common with Tiramisu is almonds. I felt that the dessert needed an extra crunch layer therefore opted for chopped almonds to complement the silky ganache and smooth mouthwatering filling texture.


Ingredients:

Cake:

  • 180g butter, softened
  • 1 tsn Marsala
  • 180g brown sugar
  • 3 eggs
  • 150g self-raising flour
  • 30g cocoa powder
  • ½ tsn salt
  • 60g almonds, finely chopped
  • 5 tsn espresso coffee

Filling:

  • 140ml thickened cream
  • 35ml Marsala
  • 35ml espresso coffee
  • 40g dark (70%) chocolate
  • 60ml icing sugar
  • 200g cream cheese, at room temperature

Ganache:

  • 40g cream
  • 100g dark chocolate
  • ½ tsn coffee granules
  • 2 tsn Marsala


Method:

  1. Pre-heat the oven to 175c degrees and line a 25cm cake tin with baking paper.
  2. Place the butter, Marsala and sugar into a bowl and beat with electric beaters for 5 minutes until light and fluffy.
  3. Add the eggs, one at a time beating in between each addition.
  4. Sift the flour, cocoa powder and salt into the mix, pour in the cold coffee and add the chopped almonds.
  5. Carefully mix the batter until just combine.
  6. Pour the mix into the prepared cake tin and bake for 40 minutes or until a skewer inserted into the center comes out clean.
  7. Leave the cake aside to cool on a cooling rack.
  8. Meanwhile, to make the filling place 30ml cream into a bowl along with the coffee and Marsala.
  9. Place the bowl in the microwave and heat until the mix starts to boil.
  10. Stir cream mix and add in the chocolate in pieces, leave to sit for 1 minute.
  11. Stir the chocolate into the cream with a metal spoon until smooth and glossy, leave aside to cool.
  12. Place the remaining 110ml cream into a bowl with the icing sugar and beat with electric beaters until soft peaks form, leave aside.
  13. Add the cream cheese into the chocolate mix and beat for 4 minutes or until the mix is smooth and pale in colour.
  14. Add the cream mix to the chocolate cream cheese mix and beat on low until just combine.
  15. Make the ganache by placing the cream, coffee and Marsala into a bowl and heat in the microwave until boiling.
  16. Add the chocolate and leave for 1 minute, stir until smooth and glossy in texture.
  17. To put the cake together, cut the cake in half horizontally and place one layer on a plate.
  18. Add the filling, place the second cake layer on top of the filling.
  19. Pour the ganache over the cake and allow to overflow the sides.
  20. Top with extra chopped almonds and enjoy.
  21. Cut into slices and serve.


Mocha Marsala and Almond Sandwich Cake recipe

Step 4

Mocha Marsala and Almond Sandwich Cake recipe

Step 10

Mocha Marsala and Almond Sandwich Cake recipe
Step 11
Mocha Marsala and Almond Sandwich Cake recipe

Step 12

Tiramisu Meringue Cake recipe
Step 13
Mocha Marsala and Almond Sandwich Cake recipe
Step 14
Mocha Marsala and Almond Sandwich Cake recipe
Step 16
Mocha Marsala and Almond Sandwich Cake recipe
Step 18

Like this recipe? Subscribe via RSS or email to get my new entries and more scrumptious recipes with reviews.

Email, RSS Follow
Print
Leave a comment .
Tags: almonds, cheesecake, chocolate, coffee, marsala, mocha, Mocha Marsala and Almond Sandwich Cake .

Butterscotch Macadamia and White Chocolate Cheesecake

Posted on October 16, 2016 Posted in Cakes .

Butterscotch Macadamia and White Chocolate Cheesecake recipe

For a while now I have been trying to make a delicious dessert with a bottle of butterscotch snapps that I have left over from a cocktail night.

I figured I have never baked with butterscotch before and was really interested in experimenting and making it a hero ingredient.

For flavor pairing inspiration I thought about what works well with butterscotch sauce (hmmm butterscotch sauce). Vanilla and white chocolate seemed to have similar flavor profiles and worked well.

I decided on a cheesecake as the cake type, as I’m not a fan of heaps of cream and fat I decided to use low fat ricotta and mascarpone cheese as the filling foundation. I’ve made cheesecakes with ricotta before and they have worked brilliantly.

To ensure the textures were balanced I added chopped macadamias to provide some crunch, which goes perfectly with vanilla and white chocolate.

The outcome was a luscious and decadent cheesecake with grown up flavors that you can eat and enjoy more guilt free that usual.

Butterscotch Macadamia and White Chocolate Cheesecake recipe

Base:

  • 150g biscuits
  • 75g butter

Filling:

  • 175g ricotta
  • 175g mascarpone cheese
  • 35g icing sugar
  • 1 tsn vanilla essence
  • 50ml butterscotch snaps
  • 120g white chocolate
  • 50g macadamia


Method:

  1. Line a 25cm spring form cake tin with baking paper.
  2. Place the biscuits and soften butter in a food processor and blitz until the mix resembles fine breadcrumbs.
  3. Press mix into the bottom and sides of the lined cake tin.
  4. Place the tin in the fridge to set.
  5. Place the ricotta into a food processor until smooth.
  6. Melt 40g of white chocolate and leave aside until cool to room temprature.
  7. Transfer the ricotta into a large bowl with the mascarpone cheese, icing sugar, vanilla and butterscotch and beat using a hand whisk until just combine.
  8. Add the melted white chocolate and whisk with the hand whisk until combine.
  9. Finley chop up the remaining 80g white chocolate and the macadamia nuts and stir into the filling.
  10. Pour the filling onto the base and place into the fridge for 3 hours to set.


Note: I have decorated with some extra chocolate and nuts chopped up as well as a few raspberries for decoration.


Butterscotch Macadamia and White Chocolate Cheesecake recipe

Step 2

Butterscotch Macadamia and White Chocolate Cheesecake recipe

Step 3

Butterscotch Macadamia and White Chocolate Cheesecake recipe

Step 5

Butterscotch Macadamia and White Chocolate Cheesecake recipe

Step 9

Butterscotch Macadamia and White Chocolate Cheesecake recipe

Step 10

Butterscotch Macadamia and White Chocolate Cheesecake recipe

Like this recipe? Subscribe via RSS or email to get my new entries and more scrumptious recipes with reviews.


Email, RSS Follow
Print
Leave a comment .
Tags: butterscotch, Butterscotch Macadamia and White Chocolate Cheesecake, cheesecake, macadamia, white chocolate .

Honey Nougat Crackle Cheesecake

Posted on September 4, 2016 Posted in Cakes .

Honey Nougat Crackle Cheesecake

Honey Nougat Crackle Cheesecake recipe

Being a massive fan of Summer Rolls and Honey Nougat Chocolate Bars I decided I wanted to bake a dessert that would turned these bars into a luscious cake.

Honey, nougat, vanilla, peanuts and coconut are all ingredients that would work fabulously with a creamy textured cake, thus cheesecake it is.

Both bars are covered with chocolate so to replicate this layer I opted to use the chocolate as the base to hold the cheesecake together. As cheesecake is creamy and missing crunch I decided on using rice bubbles for a chocolate crackle base.

A very simple no bake cheesecake that replicates the chocolate bars flavours wonderfully.

Deliciously tasty.

Honey Nougat Crackle Cheesecake recipe


Ingredients:

Base:

  • 100g rice bubbles
  • 40g desiccated coconut
  • 200g chocolate, melted

Filling:

  • 500g cream cheese, at room temperature
  • 160ml honey
  • 1 tsn vanilla essence
  • 45g peanuts, chopped
  • 70g desiccated coconut
  • 2 tsn gelatin
  • 40ml water
  • 110g thickened cream
  • 2 summer roll chocolate bars, chopped
  • 2 honey nougat chocolate bars, chopped


Method:

  1. Line a 25cm spring form cake tin with baking paper.
  2. Place the rice bubbles and coconut into a bowl.
  3. Add the melted chocolate and stir until well combine and all rice bubbles are covered.
  4. Press 1/3rd of the crackle mix on the bottom of the cake base and the remaining up the sides of the cake tin by pressing into the tin with damp hands.
  5. Place the tin in the fridge to set.
  6. Meanwhile, to make the filling place the cream cheese, honey and vanilla into a bowl and whip until creamy and smooth with electric beaters.
  7. Boil the water and add in the gelatin, stir until dissolved and no lumps.
  8. Add the peanuts and coconut to the cheese mix and beat for 1 minute.
  9. Add the cream and gelatin mix and beat for 1 minute.
  10. Finely chop up the chocolate bars and add to the mix, beat for 1 minute.
  11. Pour the mixture into the prepared cake tin and leave in the fridge to set for 5 hours.
  12. Remove the cake from the tin and top with grated chocolate, extra peanuts and drizzles of honey.


Honey Nougat Crackle Cheesecake recipe
Step 3
Honey Nougat Crackle Cheesecake recipe

Step 8

Honey Nougat Crackle Cheesecake recipe

Step 10

Honey Nougat Crackle Cheesecake recipe

Step 10

Honey Nougat Crackle Cheesecake recipe

Step 11

Honey Nougat Crackle Cheesecake recipe

Step 12


Like this recipe? Subscribe via RSS or email to get my new entries and more scrumptious recipes with reviews.

Email, RSS Follow
Print
Leave a comment .
Tags: cheesecake, chocolate crackle, honey, Honey Nougat Crackle Cheesecake, no bake, nougat, peanuts .

Yoghurt Plum and Port Cheesecake

Posted on July 31, 2016 Posted in Cakes .

Yoghurt Plum and Port Cheesecake

Yoghurt Plum and Port Cheesecake recipe

This cake, is a killer. Who knew plum and port went so well together! I don’t even really like Port, but the sweet taste of the plum makes the Port flavor absolutely addictive.

I made five cakes yesterday when I made this one and none of the others come close to being anywhere near as good.

Cheesecake is another one that is not really a favorite, so to challenge myself I decided that I would incorporate these two flavors into a cheesecake. If I could make a cheesecake that I adored then it would definitely be an amazing cake.

To try to cut down the fat content I opted for a little low fat yoghurt in the mix.

If you’re looking for an unusual but soooo tasty cake this one is a must try!

Ingredients:

Base:

  • 250g nice biscuits
  • 100g butter

Filling:

  • 600g plums
  • 120ml port
  • 500g low fat cream cheese
  • 130g brown sugar
  • 120g vanilla low fat yoghurt
  • 1 tsn vanilla essence
  • 2 eggs
  • 2 egg whites


Method:

  1. Pre-heat the oven to 150c degrees and line a 20cm spring form cake tin with baking paper.
  2. Place the butter and biscuits in a food processor and blitz until the mix resembles bread crumbs.
  3. Place in the tin and flatten out with fingertips.
  4. Place the tin in the fridge to set.
  5. Meanwhile,  cut the plum up into slices and place into a saucepan with the port on a medium heat for 5 minutes or until the liquid reduces. Place aside to cool.
  6. Add the cheese, yoghurt, vanilla and sugar into a bowl and using electric beaters whisk for 5 minutes.
  7. Place half the plums with the liquid into a food processor and blitz until smooth, add to the cheese mix.
  8. Add the 2 eggs to the mix, one at a time beat well between each addition.
  9. Place the egg whites into a bowl and beat until peaks form.
  10. Dice up the remaining plums and add to the mix with the egg whites and fold until just combine.
  11. Pour the mix on top of the base and place in the oven for 60 minutes or until the top of the cake is slightly brown.
  12. Turn off the oven and open the door slightly to be jarred.
  13. Leave the cake to completely cool for 2 hours then place in the fridge for 2 hours to set.
  14. Release the tin and place the cake on a plate.
  15. Sieve icing sugar over the top and serve.


Yoghurt Plum and Port Cheesecake recipe

Step 2

Yoghurt Plum and Port Cheesecake recipe

Step 3

Yoghurt Plum and Port Cheesecake recipe

Step 5

Yoghurt Plum and Port Cheesecake recipe

Step 7

Yoghurt Plum and Port Cheesecake recipe

Step 11

Yoghurt Plum and Port Cheesecake recipe

Step 15


Like this recipe? Please subscribe via RSS or email to get my new entries and more scrumptious recipes with reviews.


Email, RSS Follow
Print
Leave a comment .
Tags: cheesecake, plums, Port, yoghurt, Yoghurt Plum and Port Cheesecake .

Black Forest Ricotta Cheesecake

Posted on June 20, 2016 Posted in Cakes .

Black Forest Ricotta Cheesecake

Black Forest Ricotta Cheesecake recipe

For a while I have been wanting to make a cheesecake with low fat ricotta instead of the rich and weighty creamcheese cheesecakes traditionally have. I wanted to make this cheesecake ‘melt in your mouth’, which I felt the ricotta could deliver on.

My flavor inspiration for this cake came from originally thinking of making a dark chocolate cheesecake and then adding in some cherries (berries and cheesecake go together like magic).

This though was still a little boring, where I needed a twist, therefore I decided to add the extra elements required to turn this into a ricotta cheesecake black forest cake.

The cherries, chocolate, kirsch and cream would enhance the flavor profiles in the cake and add depth to the creamy ricotta.

I opted to water bath cook the cake to make the ricotta smooth but sturdy and added layers of the cherries in varying forms to allow for cherry hits throughout.

After eating this cake I doubt I would ever make a normal black forest cake other this recipe again!

Ricotta Black Forest Cheesecake recipe

Ingredients:

  • 200g chocolate ripple biscuit
  • 40g cocoa powder
  • 80g butter
  • 670g jar of Morello cherries (you need 450g of the cherries and 100ml of juice)
  • 5g flour
  • 70g kirsch
  • 400g ricotta
  • 100g sour cream
  • 90g sugar, plus 1 tbsn extra
  • 3 eggs
  • 1 tsn cherry essence
  • 230g dark chocolate
  • 230g cream, plus 20ml extra
  • 1 tbsn icing sugar


Method:

  1. Pre-heat the oven to 170c degrees and line a 25cm spring form cake tin with baking paper.
  2. Place the biscuits into a food processor and blitz until they resemble breadcrumbs.
  3. Add the cocoa and melted butter, stir until well combined and place in the fridge to set.
  4. Place 200g cherries in the food processor with flour and blitz.
  5. Spread the cherry mix over the biscuit base and place in the freezer.
  6. Meanwhile, using electric beaters whisk the ricotta in a bowl until smooth.
  7. Place 200g chocolate in a bowl and microwave on medium in 30 second blasts. Stir between each burst until melted and silky smooth. Leave aside for 5 minutes to cool.
  8. Add the sour cream and sugar to the ricotta mix and whisk until well combined.
  9. Add 2 eggs and 1 egg yolk and whisk until well combined.
  10. Add the cherry essence as well as the cooled chocolate and whisk until well combined.
  11. Pour the mix into the cake tin on top of the cherry mix and flatter with the back of a spoon.
  12. Place 125g of  the cherries on top of the ricotta mix to cover the top of the cake.
  13. Wrap 2 layers of aluminum foil over the bottom and sides of the tin.
  14. Place the cake tin into a large roasting pan and fill the sides with water until half way up the cake tin.
  15. Place the cake in the oven for 90 minutes or until a skewer inserted in the middle comes out clean.
  16. Allow the cake to cool then release the tin and place the cake in the fridge for 2 hours to fully set.
  17. Whip 230ml cream, 20ml kirsch and 1 tbsn of icing sugar with electric beaters until peaks form.
  18. Spread the cream over the cake and top with the remaining 125g more of the cherries.
  19. Place 100ml of the cherry juice into a saucepan with 1 tbsn of extra sugar and on a medium heat allow to reduce to ¼ of the volume. Allow to cool.
  20. Pour the reduction over the cake.
  21. Place the remaining 30g of chocolate into a saucepan with 20ml of cream. Stir on a medium heat until the mix is smooth and silky. Allow to cool.
  22. Pour over the cake.


Black Forest Ricotta Cheesecake recipe

Step 4

Black Forest Ricotta Cheesecake recipe

Step 5

Black Forest Ricotta Cheesecake recipe

Step 6

Black Forest Ricotta Cheesecake recipe

Step 7

Black Forest Ricotta Cheesecake recipe

Step 11

Black Forest Ricotta Cheesecake recipe

Step 13

Black Forest Ricotta Cheesecake recipe

Step 14

Black Forest Ricotta Cheesecake recipe

Step 15

Blackberry and Lemon Quadruple Trifle recipe

Step 17

Black Forest Ricotta Cheesecake recipe
Step 21


Like this recipe? Please subscribe via RSS or email to get my new entries and more scrumptious recipes with reviews.


Email, RSS Follow
Print
Leave a comment .
Tags: Black Forest Ricotta Cheesecake, bloack forest, cheesecake, cherries, dark chocolate, ricotta .

Ferrero Oreo and Frangelico Chocolate Cheesecake

Posted on December 7, 2015 Posted in Cakes .

Ferrero Oreo and Frangelico Chocolate Cheesecake

Ferrero Oreo and Frangelico Chocolate Cheesecake recipe

I was given a packed of Ferrero Roche’s recently and decided I wanted to incorporate them into a cake. I figured if I made a recipe with these chocolates in them a cake that is baked would be a flop (as the Ferrero’s would just melt) so I needed to make a cake that didn’t require baking. I know this is not very imaginative but all I could think of was a cheesecake.

So now I knew what cake I would make and I knew one of the key ingredients but I still needed to come up with a flavour combo and structure of the cake.

So Ferrero Roche’s are the collaboration of chocolate and hazelnut flavours. To make this cake a little unusual I decided to take these flavours to the next level. How I was planning to do this?

An intense chocolate hazelnut biscuit base (Oreo happiness), Hazelnut liquor (hello Frangelico) spiking the cheesecake filling with textural oreo chunks and of course the whole Ferrero Roche’s scattered within the cake its self for a special surprise.

This resulted in a very amazing hazelnut, chocolate surprise cake that is super easy, no oven required and has a silky texture.

This is the perfect celebration cake for the choc hazelnut fan. A little goes a long way and is a guaranteed epic birthday cake.

Ferrero Oreo and Frangelico Chocolate Cheesecake recipe


Ingredients:

  • 240g Oreo biscuits
  • 30g hazelnuts
  • 60g butter
  • 340g cream cheese
  • 40g sugar
  • 80ml Frangelico
  • 1 +1/2 tsn gelatin powder
  • 140ml which chocolate
  • 170ml thickened cream
  • 10 Ferrero Roches

Method:

  1. Line a 25cm spring form cake tin with baking paper.
  2. Twist the Oreo biscuits and scrape off the cream in the center.
  3. Place the biscuits in a food processor with the hazelnuts and blitz until the mix resembles fine breadcrumbs.
  4. Set aside 70g of the Oreo mix for later.
  5. Place room temperature butter into the blender with the oreo mix and blitz until combined with the Oreo mix.
  6. Place the mix in the cake tin and using a cup press the mix into the sides and bottom of the tin. Place in the fridge to set.
  7. Beat the cream cheese and sugar until well combine with electric beaters.
  8. Place the Frangelico in a bowl and heat in the microwave until boiling.
  9. Add the gelatin powder and whisk until the gelatin has dissolved.
  10. Pour the cooled Frangelico mix into the cheese mix and beat until well combined.
  11. Place the white chocolate in a bowl and in the microwave until melted. Beat into the cheese mix until well combined.
  12. In a separate bowl with clean beaters use the electric beaters to whisk the cream until peaks form.
  13. Add the cream to the cheese mix as well as the remaining 70g of processed Oreo biscuits and beat on low until just combine.
  14. Pour half the mix into the cake tin and spread to flatten.
  15. Add the Ferrero Roches into the cheese mix in a circular pattern and push lightly into the mix.
  16. Add the remaining cheese mix over the top and flatten out.
  17. Place the cake in the fridge to set for 3 hours+.


Ferrero Oreo and Frangelico Chocolate Cheesecake recipe

Step 3

Ferrero Oreo and Frangelico Chocolate Cheesecake recipe

Step 6

Ferrero Oreo and Frangelico Chocolate Cheesecake recipe

Step 9

Ferrero Oreo and Frangelico Chocolate Cheesecake recipe

Step 11

Ferrero Oreo and Frangelico Chocolate Cheesecake recipe

Step 13

Ferrero Oreo and Frangelico Chocolate Cheesecake recipe

Step 14

Ferrero Oreo and Frangelico Chocolate Cheesecake recipe

Step 17

Ferrero Oreo and Frangelico Chocolate Cheesecake recipe


Like this recipe? Subscribe via RSS or email to get my new entries and more scrumptious recipes with reviews.


Email, RSS Follow
Print
Leave a comment .
Tags: Avocado Chocolate and Orange Mousse Tart, Blueberry and White Chocolate Hazelnut Layer Cake, cheesecake, ferrero, Ferrero Oreo and Frangelico Chocolate Cheesecake, Frangelico, oreo .
Next Page »

Pages

  • About Me
  • Baking Metrics
  • Blogroll
  • Common Baking Questions
  • Recipe Index
  • Tips & Tricks
  • Contact

Archives

  • February 2022
  • October 2021
  • September 2021
  • August 2021
  • April 2021
  • February 2021
  • January 2021
  • December 2020
  • November 2020
  • October 2020
  • September 2020
  • August 2020
  • July 2020
  • June 2020
  • May 2020
  • September 2019
  • June 2019
  • May 2019
  • April 2019
  • March 2019
  • February 2019
  • January 2019
  • December 2018
  • November 2018
  • October 2018
  • September 2018
  • August 2018
  • July 2018
  • June 2018
  • May 2018
  • April 2018
  • March 2018
  • February 2018
  • January 2018
  • December 2017
  • November 2017
  • October 2017
  • September 2017
  • August 2017
  • July 2017
  • June 2017
  • May 2017
  • April 2017
  • March 2017
  • February 2017
  • January 2017
  • December 2016
  • November 2016
  • October 2016
  • September 2016
  • August 2016
  • July 2016
  • June 2016
  • May 2016
  • April 2016
  • March 2016
  • February 2016
  • January 2016
  • December 2015
  • November 2015
  • October 2015
  • September 2015
  • August 2015
  • July 2015
  • June 2015
  • May 2015
  • April 2015
  • March 2015
  • February 2015
  • January 2015
  • December 2014
  • November 2014
  • October 2014
  • September 2014
  • August 2014
  • July 2014
  • June 2014
  • May 2014
  • April 2014
  • March 2014
  • February 2014
  • January 2014
  • December 2013

Categories

  • America (5)
  • Arabic (1)
  • Australian (2)
  • Biscuits (24)
  • Brazil (1)
  • Bread (12)
  • Brownies (5)
  • Cakes (141)
  • Croatian (1)
  • Cupcakes (20)
  • Custard (1)
  • Doughnuts (6)
  • Flan (1)
  • France (5)
  • Fudge (3)
  • German (1)
  • Greece (2)
  • Hungary (1)
  • Ice-cream & Sorbet (15)
  • Ice-cream cake (6)
  • Icing (18)
  • Italy (4)
  • Jam (1)
  • Jamaican (1)
  • Lebanese (1)
  • Marshmallows (2)
  • Mexican (1)
  • Morocco (1)
  • Mousse (2)
  • Muffins (1)
  • Panna Cotta (1)
  • Pastries (2)
  • Pies (7)
  • Portugal (1)
  • Pudding (12)
  • Roulade (1)
  • Russia (1)
  • Slice (27)
  • Souffle (1)
  • Sweden (1)
  • Swedish (1)
  • Syrup (1)
  • Tarts (13)
  • Traditional (17)
  • Trifile (1)
  • Truffles (5)
  • Turkey (1)
  • Uncategorized (1)
  • Unique (10)

WordPress

  • Register
  • Log in
  • WordPress

Subscribe

  • Entries (RSS)
  • Comments (RSS)

CyberChimps WordPress Themes

© Sweet Tooth Experiments