Sweet Tooth Experiments

  • About Me
  • Recipe Index
  • Baking Metrics
  • Tips & Tricks
  • Common Baking Questions
  • Contact

Tag Archives: almonds

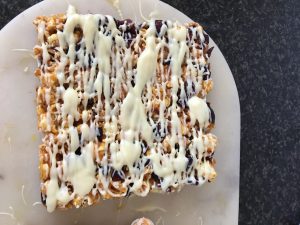
Festive Popcorn Honey Bark

Posted on March 30, 2019 Posted in Slice .

Festive Popcorn Honey Bark

This recipe was inspired by playing around with left over ingredients that I had in the cupboard from previous bakes that I wanted to turn into something. I hate wasting food and tend to buy quite a lot of ingredients in which I only use ¼ of for a recipe.

Therefore I decided to make my own version of ‘chocolate bark’, but instead of using chocolate as the base I would use caramel and instead of the usual nuts, seeds and dried fruits that go into ‘bark’, I opted for what I had in the cupboard.

I made 5 different varieties where this recipe I am posting was the star from the afternoon of experimenting.

Marshmallow, popcorn, coconut and white chocolate came close but it was the coconut, cranberry, orange, almond, popcorn and white chocolate recipe that was the tastiest.

Ingredients:

Popcorn mix:

  • 40g popcorn, pre-popped and lightly salted
  • 50g flaked coconut
  • 50g cranberries, diced
  • 1 tsn orange zest
  • 40g roasted almonds, finely diced

Caramel:

  • 40g butter
  • 120g honey
  • 160g sugar
  • 1 tsn bi carbonate soda

Extra:

  • 50g white chocolate


Method:

  1. Line a 25cmx25cm slice tin with baking paper.
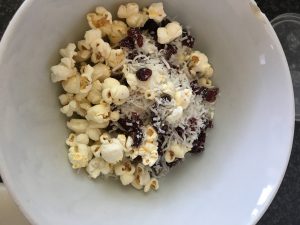
  2. In a bowl place the popcorn, coconut, cranberries and zest, stir to combine.
  3. In a saucepan place the butter, honey and sugar on a medium heat, stir until combine.
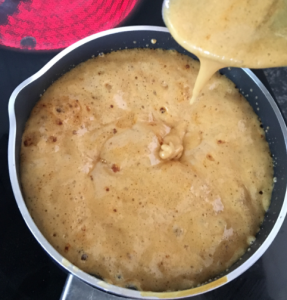
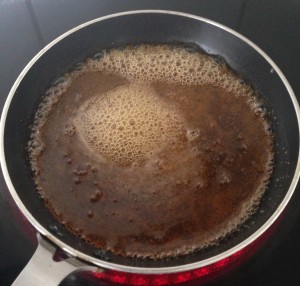
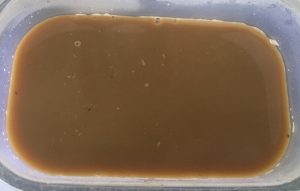
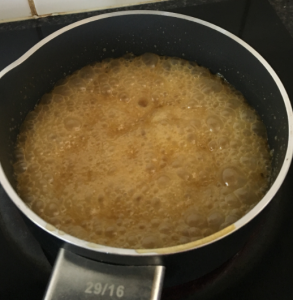
  4. Turn heat to high until golden and thickened. You will know the caramel is done when you stir a spoon in the mix and place it in a cup of cold water, if the caramel is hard it’s ready.
  5. Take off the heat and add ½ tsn of the bicarbonate soda to the mix and stir.
  6. Add the almonds and stir.
  7. Pour the caramel mix into the prepared tin, ensuring even distribution.
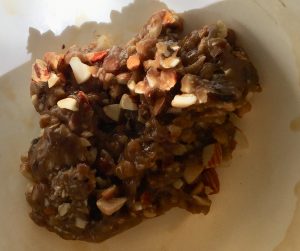
  8. Working quickly sprinkle the popcorn mix over the caramel as evenly as possible and flatten with palms and fingertips to ensure the mix is in the caramel.
  9. Place slice in the fridge to set for 15 minutes.
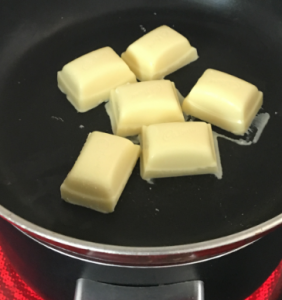
  10. Meanwhile place the white chocolate over a double boiler and melt the chocolate.
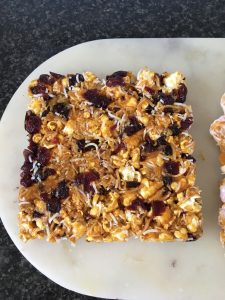
  11. Drizzle the melted white chocolate on the bark and place back in the fridge for 30 minutes or until the white chocolate is set.
  12. Cut the bark into slices and enjoy.


Festive Popcorn Honey Bark recipe
Step 2
Marshmallow Popcorn Honey Bark recipe

Step 4

Marshmallow Popcorn Honey Bark recipe
Step 5
Festive Popcorn Honey Bark recipe
Step 9
Marshmallow Popcorn Honey Bark recipe
Step 10
Festive Popcorn Honey Bark recipe

Step 11

Like this recipe? Subscribe via RSS or email to get my new entries and more scrumptious recipes with reviews.



Email, RSS Follow
Print
Leave a comment .
Tags: almonds, caramel, coconut, cranberries, Festive Popcorn Honey Bark, honey, orange, popcorn .

Florentines

Posted on March 16, 2019 Posted in Biscuits .

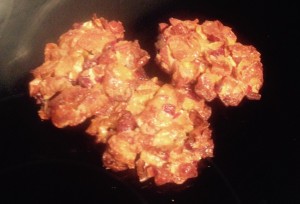
Florentines

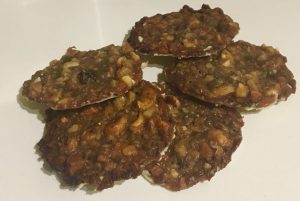
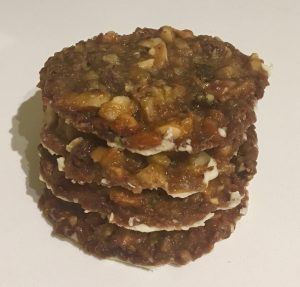
Florentines recipe

A Florentine biscuit (or, more correctly, a Florentine) is a sweet treat attributed to being invented in France, though is generally seen as an Italian delicacy.

Florentine’s are most commonly made from nuts and glaze cherries, in which are mixed with sugar, honey and butter and completed with their signature bottom chocolate coating.

There are many many version of this biscuit, and after baking 5 different versions I have worked up what I think is the best from multiple recipes. I know this is a little controversial but has resulted in an easy-as, ever-so-tasty gluten and egg free cookie.

Ingredients:

  • 30g dried cranberries
  • 25g almonds
  • 25g walnuts
  • 50g glaze cherries
  • 30g cornflakes
  • 90g condensed milk
  • 150g dark chocolate


Method:

  1. Pre-heat the oven to 170c degrees and line a baking tray with baking paper.
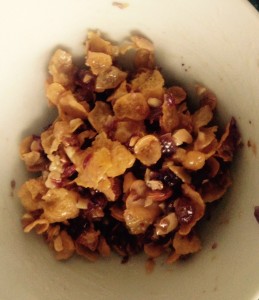
  2. Dice up the cranberries, almonds, walnuts and cherries into small pieces and place in a bowl.
  3. Add the corn flakes and condensed milk and mix until well combined.
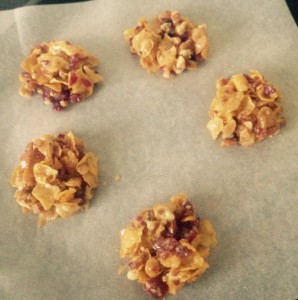
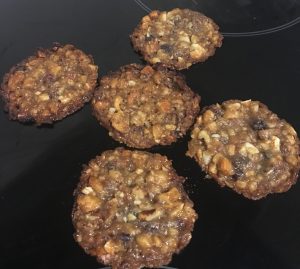
  4. Place spoonfuls of the mix onto the baking paper and bake in the oven for 10 minutes.
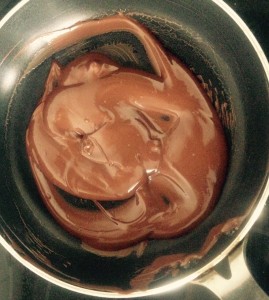
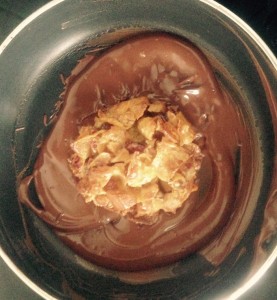
  5. Once the biscuits have cooled place the chocolate in a pan over a pan of simmering water on the stove.
  6. Stir the chocolate until it has melted then dip in the biscuits, bottom side to the chocolate ensuring an even layer of chocolate.
  7. Place the biscuits on a cooling rack, bottom side up until the chocolate has set.


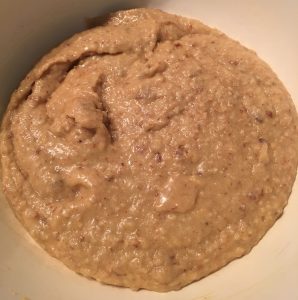
Florentines recipe

Step 2

Florentines recipe

Step 3

Florentines recipe

Step 4

Florentines recipe

Step 5

Florentines recipe

Step 6


Like this recipe? Subscribe via RSS or email to get my new entries and more scrumptious recipes with reviews.
Email, RSS Follow
Print
Leave a comment .
Tags: almonds, cherry, cornflakes, Florentines, walnuts .

Alegria

Posted on December 8, 2018 Posted in Mexican .

Alegria

Alegria recipe

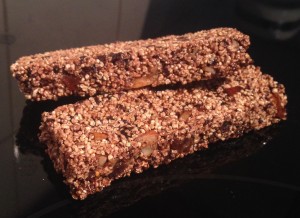
Alegria is a Mexican sweet treat, similar to a muesli bar, however instead of oats as the main ingredient this recipe uses puffed amaranth.

Similar to most traditional countries dishes Alegria has endless versions, with many variations on nuts, dried fruits and seeds.

The traditional version is generally a simple amaranth and honey mix.

For something a little different and to put my spin on the recipe I opted to add in bitter dark chocolate pieces. Additionally, I added my chosen dried fruit and nut combination that works brilliantly with honey. Using salted nuts will add a salty savory offset to the honey, while the sweet fig will complement the bitter chocolate.

Amaranth, itself is an ancient grain, similar to quinoa (a super grain with high protein and is gluten-free). Amaranth is a great source of vitamins and minerals, it keeps you regular and is said to lower bad cholesterol. Based on this, how could you not want to eat this ‘muesli bar’ alternative that has no processed sugar and is packed full of body loving nutrition.

Amaranth is fast becoming a health isle stable, where I was able to buy the puffed amarath (and grain amaranth) at my local supermarket.

Ingredients:

  • 70g dried figs
  • 80g lightly salted almonds
  • 125g 85% cocoa dark chocolate
  • 100g popped/puffed amaranth
  • 185g honey
  • ¼ tsn salt

Method:

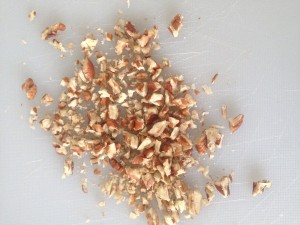
  1. Dice the figs, almonds and chocolate into very small pieces and place in a bowl.
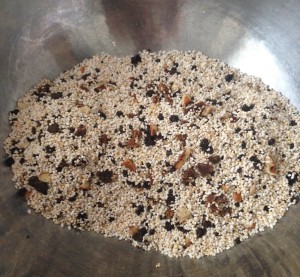
  2. Add the amaranth to the fig mix and stir until well combined.
  3. Place the honey into a saucepan on a medium heat and cook for 4 minutes or until the honey is about to caramelize.
  4. Take the honey off the heat and stir through the salt.
  5. Pour the honey over the amaranth mix and stir until the mix is well combine and the honey is evenly covering all the mix.
  6. Line a 20cm x 20cm slice tin with baking paper.
  7. Spoon the mix into the slice tin and flatten the top until completely level.
  8. Place the slice in the fridge for 30 mins minumum to set.
  9. Remove the slice from the tin and cut into bars, enjoy!
Alegria recipe
Step 1
Alegria recipe
Step 2
Alegria recipe
Step 3
Alegria recipe
Alegria recipe

Like this recipe? Subscribe via RSS or email to get my new entries and more scrumptious recipes with reviews.

Email, RSS Follow
Print
Leave a comment .
Tags: alegria, almonds, amaranth, figs, honey, mexican .

Rosemary Lemon and Carrot Loaf

Posted on September 15, 2018 Posted in Cakes .

Rosemary Lemon and Carrot Loaf

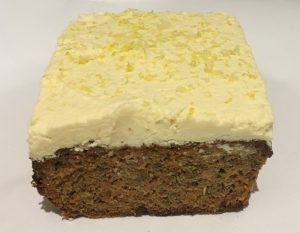
Rosemary Lemon and Carrot Loaf recipe

This recipe derived from wanting to make something sweet (but not too sweet), to deliver on the healthy side of baking, while being gluten free & process ingredient free, though still featuring an interesting mix of flavours for a dessert.

Lemon is very common in my baking and I have used Rosemary in a few of my recipes in the past (see my Mandarin and Rosemary Cake – one of my favs), and carrot cake is quite a common favourite for many. So how is this recipe unique and different? These 3 flavours combine, though are super delicious and complementary of each other, are not typical at all.

Add in nuts, seeds and natural sugar (well honey) and you end up with a tasty dessert that will keep you satisfied while being friendly to your hips (well more so than standard baking treats that’s for sure)!

For a bit more deliciousness I whipped up an easy and quick cream cheese based icing.

This recipe hits the dessert craving spot without the ‘naughty’ feeling.

Rosemary Lemon and Carrot Loaf recipe

Loaf:

  • 80g walnuts
  • 80g almond meal
  • 40g LSA
  • 2 tbsn phylum husk powder
  • 1 tsn baking powder
  • ½ tsn salt
  • 22g dried rosemary
  • 60g chia seeds
  • 2 carrots (a 130g carrot will produce 120g grated carrot)
  • 2 eggs
  • 4 tsn lemon infused olive oil (or normal EVOO)
  • 2 tbsn almond milk
  • 60g honey
  • 2 tsn lemon zest

Frosting:

  • 60g butter
  • 60g cream cheese
  • 1 + ½ tsn lemon zest
  • 30ml honey
  • 150ml cream


Method:

  1. Pre-heat the oven to 180c degrees and line a loaf tin with baking paper.
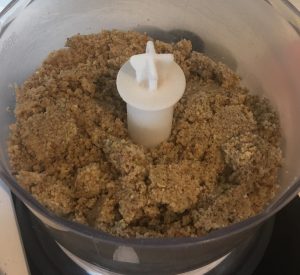
  2. Place the walnuts into a food processor and blitz until fine breadcrumb consistency.
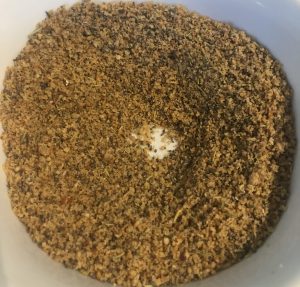
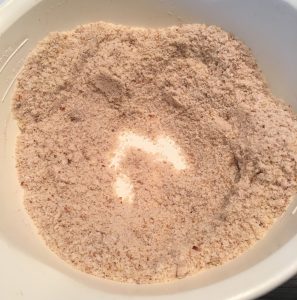
  3. Add the almond meal, LSA, psylium, powder, salt and rosemary to the food processor and pulse until well combine.
  4. Pour the mix into a bowl and stir in the chia seeds.
  5. In a separate bowl place the grated carrot, eggs, olive oil, honey and lemon zest, beat with a hand whisk until combine.
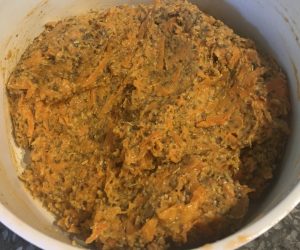
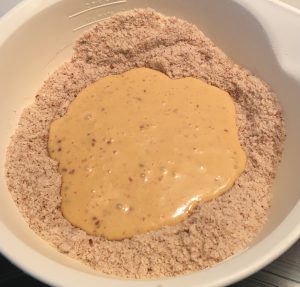
  6. Pour the carrot mix into the rosemary mix and stir until well combine.
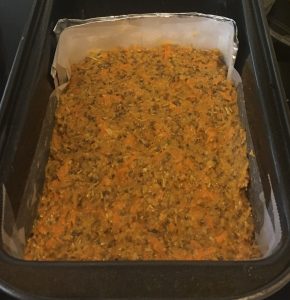
  7. Spoon the loaf batter mix into the tin, flattening the mix with the back of a spoon to even the top.
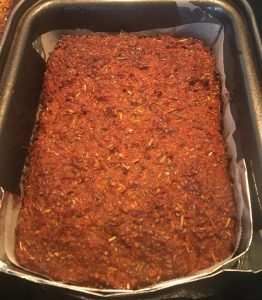
  8. Bake for 50 minutes or until a skewer inserted in the center comes out clean.
  9. Allow the loaf to cool in the tin.
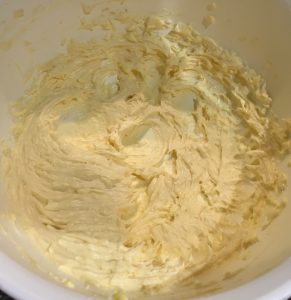
  10. Meanwhile, make the frosting by whisking the butter, cheese, lemon zest and honey with electric beaters in a bowl until smooth and creamy.
  11. In a separate bowl whisk the cream with electric beaters until soft peaks form.
  12. Add the butter mix to the cream mix and beat until combine.
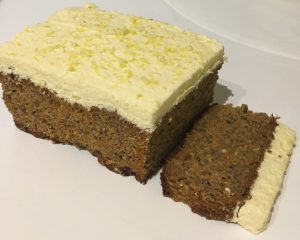
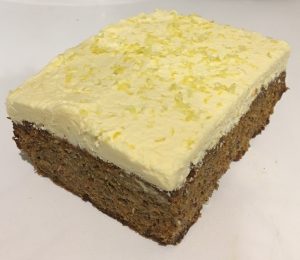
  13. Remove the now cold loaf from the tin and top with the frosting, enjoy.


Rosemary Lemon and Carrot Loaf recipe

Step 3

Rosemary Lemon and Carrot Loaf recipe

Step 4

Rosemary Lemon and Carrot Loaf recipe

Step 6

Rosemary Lemon and Carrot Loaf recipe

Step 7

Rosemary Lemon and Carrot Loaf recipe

Step 9

Rosemary Lemon and Carrot Loaf recipe

Step 12

Rosemary Lemon and Carrot Loaf recipe

Step 13


Like this recipe? Subscribe via RSS or email to get my new entries and more scrumptious recipes with reviews.

Email, RSS Follow
Print
Leave a comment .
Tags: almond milk, almonds, carrot, chia seeds, honey, lemon, LSA, rosemary, Rosemary Lemon and Carrot Loaf, walnuts .

Natural Rice Almond and Coconut Muffins

Posted on July 7, 2018 Posted in Muffins .

Natural Rice Almond and Coconut Muffins

Rice Almond and Coconut Muffin recipe

Gluten free, process-free, butter-free and natural sugar…sound too good to be true? OR too good to taste delicious? Think again.

Processed flour is not even missed in this recipe as the almond meal and rice flour produce just as good a result.

The honey and dates provide a scrumptious sweetness, while the yoghurt adds some lovely creaminess.

Add to the flavour coconut with a pinch of cinnamon and vanilla and you have yourself a moreish, nutritiously healthy, satisfying, tasty treat that can be eaten anytime throughout the day.


Ingredients:

  • 130g rice flour
  • 90g almond meal
  • 35g desiccated coconut
  • 1 + ½ tsn baking powder
  • ½ tsn ground cinnamon
  • 30g brown sugar
  • ¼ tsn salt
  • 70g dried dates
  • 200ml vanilla yoghurt
  • 50g coconut oil
  • 40g honey
  • ½ tsn vanilla essence
  • 2 eggs
  • 40g dark chocolate


Method:

  1. Pre-heat the oven to 200c degrees and spray a medium sized (12-capacity) muffin tin with oil spray.
  2. Place the rice flour, almond meal, coconut, baking powder, cinnamon, sugar and salt into a bowl and stir until well combined.
  3. Make a well in the center of the mix.
  4. Place the dates, yoghurt, coconut oil, honey and vanilla in a food processor and blitz until the dates are pureed through the mix.
  5. Add the eggs and blitz for 1 minute.
  6. Pour the blitzed mix into the dry mix. Fold until all ingredients are just combined.
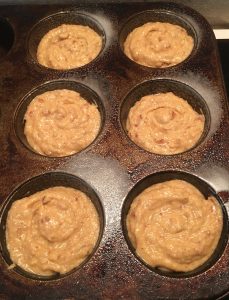
  7. Spoon the batter into the prepared muffin tin and bake for 15 minutes or until a skewer inserted into the center comes out clean.
  8. Place the muffins on a cooling tray to cool completely.
  9. Meanwhile place the chocolate in a sealable plastic bag then in the microwave on medium heat until the chocolate just starts to melt.
  10. Cut the tip off the corner of the bag and squeeze chocolate over the muffins in a zig zag pattern.
  11. Allow to set then enjoy!


Rice Almond and Coconut Muffin recipe
Step 3
Rice Almond and Coconut Muffin recipe
Step 6
Rice Almond and Coconut Muffin recipe
Step 6
Rice Almond and Coconut Muffin recipe
Step 7
Rice Almond and Coconut Muffin recipe
Step 8
Rice Almond and Coconut Muffin recipe
Step 11


Like this recipe? Subscribe via RSS or email to get my new entries and more scrumptious recipes with reviews.


Email, RSS Follow
Print
Leave a comment .
Tags: almonds, coconut, dates, honey, low processed ingredients, Rice Almond and Coconut Muffins, rice flour, yoghurt .

White Chocolate Golden Syrup Cranberry Florentines

Posted on January 20, 2018 Posted in Biscuits .

White Chocolate Golden Syrup Cranberry Florentines

White Chocolate Cherry Florentines recipe
There are many many many versions of Florentine recipes that exist in magazines, recipe books, online etc so it’s quite rare for me to post a recipe that has so many variations and is so well known. Though most florentine recipes use the same standard base ingredients of cornflakes, condensed milk, milk chocolate and glaze cherries the secondary ingredients can span wide.


So when I came across a florentine in a café that had no cornflakes and was completely addictive I decided to create my own version, though deliberately without the 4 base ingredients for a good challenge.
I made a thin biscuit batter instead of the cornflakes, golden syrup instead of the condensed milk, dried cranberries instead of the glaze fruit, 4 different nuts instead of just focusing on 1 and lastly white chocolate instead of the traditional milk.


I identified that the golden syrup provides a malty caramel flavour which with the nuts tastes absolutely delicious. The white chocolate allows the nuts, golden syrup and cranberries to shine as it’s not as overwhelming in flavour as milk chocolate.A warning, this biscuit is moreish-ly addictive!
White Chocolate Cherry Florentines recipe


Ingredients:

  • 50g brown sugar
  • 50g butter
  • 30ml golden syrup
  • 45g plain flour
  • 75g mixed roasted nuts (I used cashews, pecans, walnuts and almonds)
  • 40g cranberries
  • 90g white chocolate


Method:

  1. Preheat the oven to 180c degrees and line 2 baking trays with baking paper.
  2. Place the sugar, butter and golden syrup into a bowl and heat in the microwave until the mix bubbles.
  3. Using a hand whisk beat until the mix is well combine.
  4. Sieve the flour over the butter mix and beat until combine.
  5. Chop the nuts into small pieces and add to the sugar butter mix.
  6. Slightly dice up the cranberries and add to the butter mix.
  7. Stir the mix until all ingredients are combined.
  8. Roll the mix into balls, 15g each and place them onto the baking paper ensuring at least 5cm between each ball.
  9. Place the trays in the oven and bake for 10 minutes or until golden brown.
  10. Allow the biscuits to cool and harden on the trays.
  11. Place the while chocolate into a bowl and on a low/medium level heat in the microwave in 1 minute intervals until the chocolate is melted.
  12. Use a bread knife or spatula spread the chocolate over the bottom of each cooled biscuits placing the biscuits chocolate side up onto a plate.
  13. Place the plate into the fridge until the chocolate has set hard.


Boozy Mocha Yoghurt Ice-Cream recipe

Step 3
White Chocolate Cherry Florentines recipe
Step 7
White Chocolate Cherry Florentines recipe
Step 10
White Chocolate Cherry Florentines recipe
Step 12

Like this recipe? Subscribe via RSS or email to get my new entries and more scrumptious recipes with reviews.

Email, RSS Follow
Print
Leave a comment .
Tags: almonds, cashews, cranberries, Florentines, nuts, pecans, walnuts, white chocolate, White Chocolate Golden Syrup Cranberry Florentines .

Baklava Cake

Posted on July 22, 2017 Posted in Cakes .

Baklava Cake

Baklava Cake Recipe

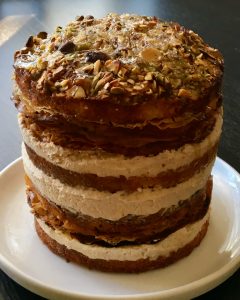
I’m quite the fan of baklava so it’s no surprise that one day I decided to ‘steal’ the flavors and some of the baking techniques to reproduce the treat into a cake version. The crunch of the filo works in perfect harmony with the velvet mascarpone cheese texture, while the syrup connects and amplifies the cake layers to a new level. When combined, the crunch, smoothness, sticky and fluffiness of textures all complement each other for a seriously satisfying dessert.

Thus here is my Baklava Cake recipe.


Ingredients:

Cake:

  • 250g butter
  • ½ tsn almond essence
  • 220g sugar
  • 4 eggs
  • 80ml cup milk
  • 225g self-raising flour
  • 60g ground almonds
  • 120g slivered almonds
  • 200g shelled pistachios

Syrup:

  • 290g sugar
  • 340ml water
  • 4 tsn honey
  • Lemon rind strip
  • 3 tbsn lemon juice
  • 3/4 tsn rosewater essence

Filling:

  • 450g mascarpone cheese
  • 1 tbsn honey
  • 1 tsn ground cinnamon
  • ½ ground cardomom

Filo Layers:

  • 70g pistachios
  • 2 tbsn sugar
  • 1 tsn cinnamon
  • ½ ground cardomom
  • 7 sheets filo
  • 80g butter


Method:

  1. Pre-heat the oven to 180c degrees and line 2 x 25cm cake tins with baking paper.
  2. With electric beaters beat the butter and sugar for 5 minutes or until light and fluffy.
  3. Add the eggs, one at a time beating in between each addition until well combined.
  4. Add the milk, sift in the flour and ground almonds. Fold together until combine.
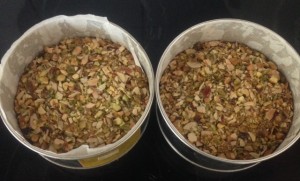
  5. Spread the batter into the 2 prepared cake tins. 1 with 1/3rd of the mix and the 2nd tin with the remaining mix, flatten the tops with the back of a spoon.
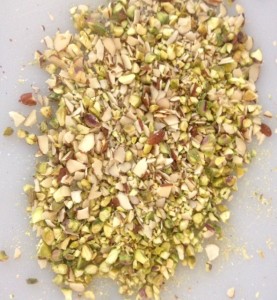
  6. Roughly chop up the nuts together and then sprinkle ontop of the cakes. Push the nuts softly with your hand to ensure they stick into the cake.
  7. Bake cakes for 35 minutes or until a skewer inserted in the center comes out clean. The larger cake will take longer (around 50 minutes).
  8. Leave the cooked cakes in the tins and reduce the oven temperature down to 160c degrees.
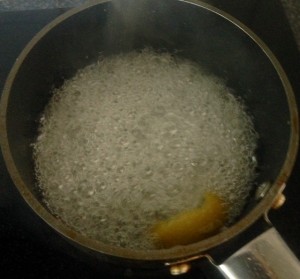
  9. To make the syrup place the sugar, water, honey and lemon strip into a saucepan and stir on medium heat until the mix boils.
  10. Continue boiling until the mix becomes thicker and syrupy.
  11. Take the syrup off the heat, remove the rind and add in the rosewater and lemon juice, stir to combine. Place 4 tbsn aside in a small bowl for the filling.
  12. With the cakes still in their tins use a skewer to poke holes in the top of the cakes.
  13. Pour the syrup over the cakes evenly, leaving them in the tins to cool completely.
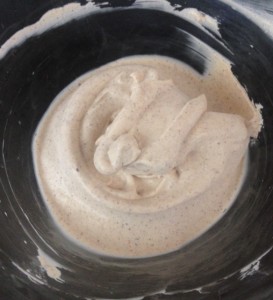
  14. Meanwhile make the filling by beating the cheese, honey, cinnamon and cardamom with the 4 tbsn of the left-over syrup with electric beaters until combine. Set aside.
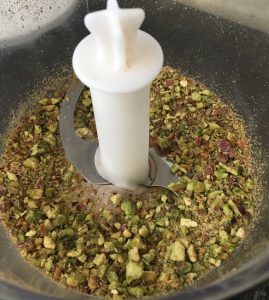
  15. To make the filo layer place the pistachios, sugar and spices into a food processor and blitz until finely chopped.
  16. Line a large baking tray with baking paper.
  17. Melt the butter and using a pastry brush brush some of the butter to cover 1 filo sheet.
  18. Using the cake tin as a guide place the tin on the buttered filo and cut around the tin, repeat with the leftover filo from your buttered sheets so you now have 2 circles from the 1 piece of filo.
  19. Place the 2 filo pieces onto the lined baking tray.
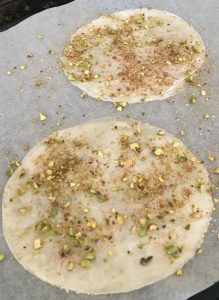
  20. Sprinkle 1 tsn of the nut mix over the buttered filo circles.
  21. Brush the butter onto a 2nd piece of filo and repeat the cutting of 2 circles.
  22. Add the 2 newly cut circle layers ontop of the filo circles on the tray and top with 1 tsn of nut mix.
  23. Repeat the butter, nut, filo process until 7 sheets have been used and you have 2 filo stacks of 7 layers each.
  24. Bake the stacks in the oven for 15 minutes or until golden in colour, leave the tray aside to cool the stacks completely.
  25. Once the cakes have cooled place the smaller cake onto a plate (nut side up).
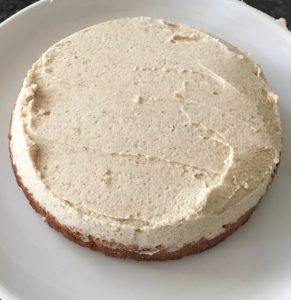
  26. Spread with ½ the cheese filling then place a filo stack on top.
  27. Cut the larger cake in half horizontally.
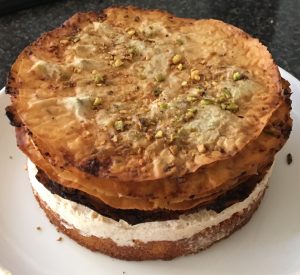
  28. Add a 2nd cake layer (the layer with no nuts) ontop of the filo, spread with the remaining filling and the remaining filo stack.
  29. Add the last (3rd) cake layer nut side up and enjoy.


Baklava Cake recipe

Step 6

Baklava Cake recipe

Step 7

Baklava Cake recipe

Step 10

Baklava Cake recipe

Step 14

Baklava Cake Recipe

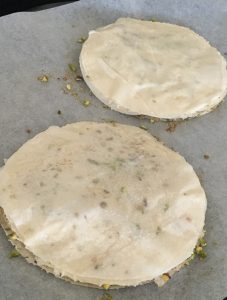
Step 15

Baklava Cake Recipe

Step 18

Baklava Cake Recipe
Step 20
Baklava Cake Recipe

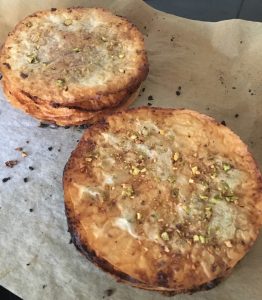
Step 23

Baklava Cake Recipe

Step 24

Baklava Cake Recipe

Step 26

Baklava Cake Recipe

Step 26


Like this recipe? Subscribe via RSS or email to get my new entries and more scrumptious recipes with reviews
Email, RSS Follow
Print
Leave a comment .
Tags: almonds, Baklava, Baklava Cake, cinnamon, cloves, nuts, pistachios .

Sour Cream Fig and Almond Ice-Cream

Posted on June 17, 2017 Posted in Ice-cream & Sorbet .

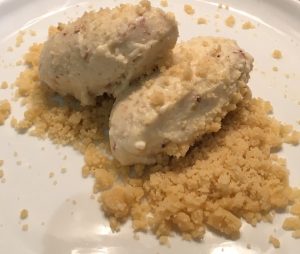
Sour Cream Fig and Almond Ice-Cream

Sour Cream Fig and Almond Ice-Cream

This baking experiment session was actually planned to be for baking a sour cream cake, however once I had drafted up a recipe to play with I realized that a sour cream cake is actually a lot more common that I originally first though.

Therefore, after a bit of brainstorming and playing around in the kitchen I ended up landing on something completely different – in sour cream ice-cream.

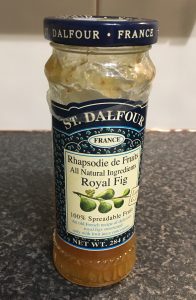
As I had a jar of fig jam I decided that I would have fig as the base flavour of the ice-cream.

Knowing that honey and almonds are great flavour parings with figs I used these 2 additional ingredients as complementary flavours.

The outcome is a stunning, slightly zesty (thanks to the sourness of the sour cream) textured unique ice-cream that is super easy to make and requires minimal prep time.


Ingredients:

  • 300g sour cream
  • 170g fig jam
  • 40ml honey
  • 70g roasted almonds


Method:

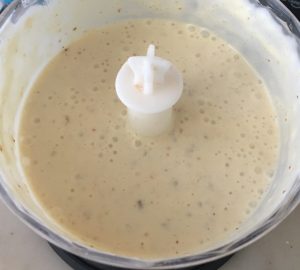
  1. Place the sour cream, jam and honey into a food processor and blitz until the mix is well combine.
  2. Add the almonds to the mix and pulse until the nuts are slightly diced and well combined.
  3. Pour the mix unto a bowl and place in the freezer for 4 hours to set.
  4. Place the mix back into the food processor and pulse until creamy.
  5. Place the mix back into the bowl and freeze for an additional 2 hours or until completely set.
  6. Place the mix back into the food processor one last time and pulse.
  7. Place the mix back into the bowl and freeze for an additional 2 hours or until completely set.
  8. Quenelle over some biscuit crumbs or enjoy as is for a creamy and satisfying end to a meal.


Sour Cream Fig and Almond Ice-Cream
Fig Jam widely available from Coles Supermarket
Sour Cream Fig and Almond Ice-Cream
Step 2


Like this recipe? Subscribe via RSS or email to get my new entries and more scrumptious recipes with reviews.

Email, RSS Follow
Print
Leave a comment .
Tags: almonds, fig, fig jam, honey, sour cream, Sour Cream Fig and Almond Ice-Cream .

Mocha Marsala and Almond Sandwich Cake

Posted on April 7, 2017 Posted in Cakes .

Mocha Marsala and Almond Sandwich Cake

Mocha Marsala and Almond Sandwich Cake recipe

Tiramisu is my ultimate, all-time favorite sweet treat.

I love playing with the flavor combo of chocolate, marsala and coffee, it always reminds me of my birthday as my mum made the dessert every year without fail.

I’ve made many variations on Tiramisu over the years, cake, ice-cream and frozen cheesecake to name a few. Something I have never tried is extending the flavor profile and incorporating multiple nontraditional layered textures.

The additional flavor I have utilised that’s not common with Tiramisu is almonds. I felt that the dessert needed an extra crunch layer therefore opted for chopped almonds to complement the silky ganache and smooth mouthwatering filling texture.


Ingredients:

Cake:

  • 180g butter, softened
  • 1 tsn Marsala
  • 180g brown sugar
  • 3 eggs
  • 150g self-raising flour
  • 30g cocoa powder
  • ½ tsn salt
  • 60g almonds, finely chopped
  • 5 tsn espresso coffee

Filling:

  • 140ml thickened cream
  • 35ml Marsala
  • 35ml espresso coffee
  • 40g dark (70%) chocolate
  • 60ml icing sugar
  • 200g cream cheese, at room temperature

Ganache:

  • 40g cream
  • 100g dark chocolate
  • ½ tsn coffee granules
  • 2 tsn Marsala


Method:

  1. Pre-heat the oven to 175c degrees and line a 25cm cake tin with baking paper.
  2. Place the butter, Marsala and sugar into a bowl and beat with electric beaters for 5 minutes until light and fluffy.
  3. Add the eggs, one at a time beating in between each addition.
  4. Sift the flour, cocoa powder and salt into the mix, pour in the cold coffee and add the chopped almonds.
  5. Carefully mix the batter until just combine.
  6. Pour the mix into the prepared cake tin and bake for 40 minutes or until a skewer inserted into the center comes out clean.
  7. Leave the cake aside to cool on a cooling rack.
  8. Meanwhile, to make the filling place 30ml cream into a bowl along with the coffee and Marsala.
  9. Place the bowl in the microwave and heat until the mix starts to boil.
  10. Stir cream mix and add in the chocolate in pieces, leave to sit for 1 minute.
  11. Stir the chocolate into the cream with a metal spoon until smooth and glossy, leave aside to cool.
  12. Place the remaining 110ml cream into a bowl with the icing sugar and beat with electric beaters until soft peaks form, leave aside.
  13. Add the cream cheese into the chocolate mix and beat for 4 minutes or until the mix is smooth and pale in colour.
  14. Add the cream mix to the chocolate cream cheese mix and beat on low until just combine.
  15. Make the ganache by placing the cream, coffee and Marsala into a bowl and heat in the microwave until boiling.
  16. Add the chocolate and leave for 1 minute, stir until smooth and glossy in texture.
  17. To put the cake together, cut the cake in half horizontally and place one layer on a plate.
  18. Add the filling, place the second cake layer on top of the filling.
  19. Pour the ganache over the cake and allow to overflow the sides.
  20. Top with extra chopped almonds and enjoy.
  21. Cut into slices and serve.


Mocha Marsala and Almond Sandwich Cake recipe

Step 4

Mocha Marsala and Almond Sandwich Cake recipe

Step 10

Mocha Marsala and Almond Sandwich Cake recipe
Step 11
Mocha Marsala and Almond Sandwich Cake recipe

Step 12

Tiramisu Meringue Cake recipe
Step 13
Mocha Marsala and Almond Sandwich Cake recipe
Step 14
Mocha Marsala and Almond Sandwich Cake recipe
Step 16
Mocha Marsala and Almond Sandwich Cake recipe
Step 18

Like this recipe? Subscribe via RSS or email to get my new entries and more scrumptious recipes with reviews.

Email, RSS Follow
Print
Leave a comment .
Tags: almonds, cheesecake, chocolate, coffee, marsala, mocha, Mocha Marsala and Almond Sandwich Cake .

Low Fat Dark Chocolate Balsamic and Almond Cupcakes

Posted on February 25, 2017 Posted in Cupcakes .

Low Fat Dark Chocolate Balsamic and Almond Cupcakes

Low Fat Dark Chocolate Balsamic and Almond Cupcakes


Low fat, sound too good to be true? I’d say less than 6g of butter per cupcake is pretty damn good! How does this treat still tastes amazing with such little butter content? A little trick, replacing 60% of the butter with apple puree as I promise no one will even notice!

How chocolate, balsamic and almonds was invented? So balsamic vinegar works brilliantly with strawberries as it brings out the sweetness and intensifies the flavor profile. So I figured if I used the balsamic with the dark chocolate it would have a similar effect and I was right

Additionally, the almond provides a lovely complementary texture and satisfying crunch to the recipe.

This recipe is a lovely twist on the usual chocolate cupcake and you can eat with a clear conscious!

Ingredients:

  • 200g flour
  • 50g cocoa powder
  • 4 tsn baking powder
  • 80g sugar
  • 160g 70% dark chocolate
  • 80g roasted almonds
  • 70g butter
  • 100g apple puree
  • 2 eggs
  • 140ml milk
  • 2 + 1/2 tbsn Balsamic vinegar

Icing:

  • 300g icing sugar
  • 25g cocoa powder
  • 70g balsamic vinegar


Method:

  1. Pre-heat the oven to 200c degrees and line a 12 hole cupcake tin with patty cases.
  2. Sieve the flour, baking powder, cocoa powder and sugar in a bowl and stir to combine.
  3. Chop the chocolate and almonds into really small pieces and place into the flour mix, stir.
  4. Melt the butter in a bowl in the microwave and add the milk, puree, vinegar and eggs. Whisk with a hand whisk until well combined.
  5. Pour the milk mix into the flour mix and using a hand whisk beat until just combine.
  6. Pour the batter into the patty cases and bake in the oven for 20 minutes or until and skewer in the center comes out clean.
  7. Place the cupcakes onto a cooling rack until cool.
  8. Meanwhile to make the icing beat the ingredients until well combined.
  9. Using a spatula spread the icing over the cupcake evenly.
  10. Grate extra chocolate and dice almonds over the icing.


Low Fat Dark Chocolate Balsamic and Almond Cupcakes
Step 3
Low Fat Dark Chocolate Balsamic and Almond Cupcakes
Step 6
Low Fat Dark Chocolate Balsamic and Almond Cupcakes
Step 7
Low Fat Dark Chocolate Balsamic and Almond Cupcakes

Step 8


Like this recipe? Subscribe via RSS or email to get my new entries and more scrumptious recipes with reviews.

Email, RSS Follow
Print
Leave a comment .
Tags: almonds, balsamic vinegar, cupcakes, dark chocolate, low fat, Low Fat Dark Chocolate Balsamic and Almond Cupcakes .
Next Page »

Pages

  • About Me
  • Baking Metrics
  • Blogroll
  • Common Baking Questions
  • Recipe Index
  • Tips & Tricks
  • Contact

Archives

  • February 2022
  • October 2021
  • September 2021
  • August 2021
  • April 2021
  • February 2021
  • January 2021
  • December 2020
  • November 2020
  • October 2020
  • September 2020
  • August 2020
  • July 2020
  • June 2020
  • May 2020
  • September 2019
  • June 2019
  • May 2019
  • April 2019
  • March 2019
  • February 2019
  • January 2019
  • December 2018
  • November 2018
  • October 2018
  • September 2018
  • August 2018
  • July 2018
  • June 2018
  • May 2018
  • April 2018
  • March 2018
  • February 2018
  • January 2018
  • December 2017
  • November 2017
  • October 2017
  • September 2017
  • August 2017
  • July 2017
  • June 2017
  • May 2017
  • April 2017
  • March 2017
  • February 2017
  • January 2017
  • December 2016
  • November 2016
  • October 2016
  • September 2016
  • August 2016
  • July 2016
  • June 2016
  • May 2016
  • April 2016
  • March 2016
  • February 2016
  • January 2016
  • December 2015
  • November 2015
  • October 2015
  • September 2015
  • August 2015
  • July 2015
  • June 2015
  • May 2015
  • April 2015
  • March 2015
  • February 2015
  • January 2015
  • December 2014
  • November 2014
  • October 2014
  • September 2014
  • August 2014
  • July 2014
  • June 2014
  • May 2014
  • April 2014
  • March 2014
  • February 2014
  • January 2014
  • December 2013

Categories

  • America (5)
  • Arabic (1)
  • Australian (2)
  • Biscuits (24)
  • Brazil (1)
  • Bread (12)
  • Brownies (5)
  • Cakes (141)
  • Croatian (1)
  • Cupcakes (20)
  • Custard (1)
  • Doughnuts (6)
  • Flan (1)
  • France (5)
  • Fudge (3)
  • German (1)
  • Greece (2)
  • Hungary (1)
  • Ice-cream & Sorbet (15)
  • Ice-cream cake (6)
  • Icing (18)
  • Italy (4)
  • Jam (1)
  • Jamaican (1)
  • Lebanese (1)
  • Marshmallows (2)
  • Mexican (1)
  • Morocco (1)
  • Mousse (2)
  • Muffins (1)
  • Panna Cotta (1)
  • Pastries (2)
  • Pies (7)
  • Portugal (1)
  • Pudding (12)
  • Roulade (1)
  • Russia (1)
  • Slice (27)
  • Souffle (1)
  • Sweden (1)
  • Swedish (1)
  • Syrup (1)
  • Tarts (13)
  • Traditional (17)
  • Trifile (1)
  • Truffles (5)
  • Turkey (1)
  • Uncategorized (1)
  • Unique (10)

WordPress

  • Register
  • Log in
  • WordPress

Subscribe

  • Entries (RSS)
  • Comments (RSS)

CyberChimps WordPress Themes

© Sweet Tooth Experiments