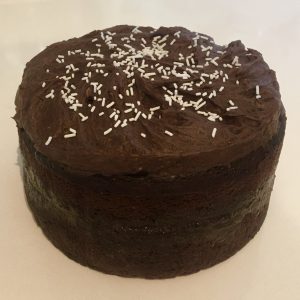
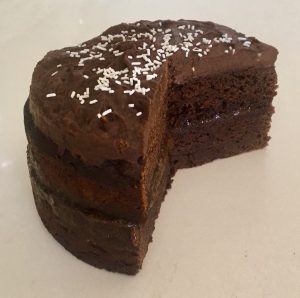
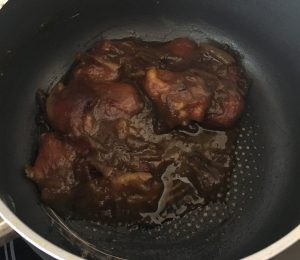
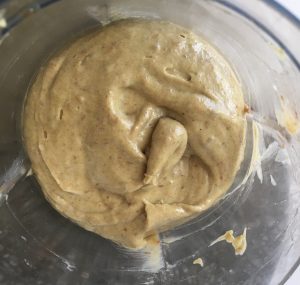
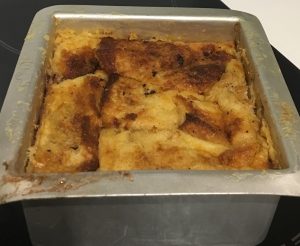
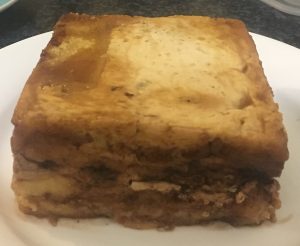
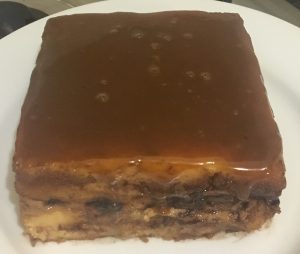
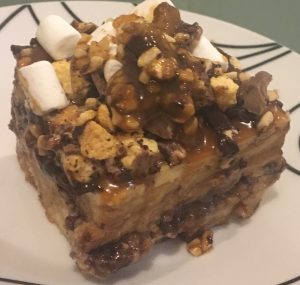
Sweet Tooth Experiments

  • About Me
  • Recipe Index
  • Baking Metrics
  • Tips & Tricks
  • Common Baking Questions
  • Contact

Tag Archives: chocolate

Chocolate Banana Split Sundae Pie

Posted on March 9, 2019 Posted in Pies .

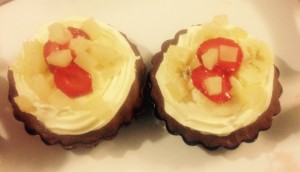
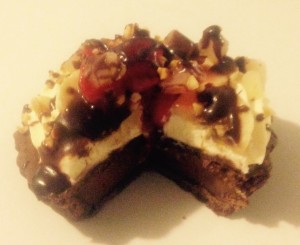
Chocolate Banana Split Sundae Pie

Chocolate Banana Split Pie recipe

I have always been a fan of chocolate banana split sundae. Vanilla ice-cream, banana, chocolate, cherries, nuts and strawberry, how could this not taste absolutely amazing?

The only thing is that ice-cream is not a great ‘comfort food’ in the colder months, so to mitigate this I decided to turn the banana split sundae into a pie.

I have kept the core flavors and added a few secondary complementing flavors into the mix to make the pies even tastier.

Chocolate Banana Split Pie recipe

Ingredients:

Pastry:

  • 180g plain flour
  • 20g cocoa powder
  • 100g butter
  • 50g sugar
  • 45ml water

Filling:

  • 180g dark chocolate
  • ¾ cup sugar
  • 750ml milk
  • ¼ cup corn flour
  • 5 egg yolks
  • 2 tsn vanilla extract
  • 20g butter

Topping:

  • 150g thickened cream
  • 20g icing sugar

Extra:

  • 2 chopped bananas
  • 200g strawberries chopped
  • 200g chopped pineapple
  • 20g peanuts
  • 4 glace cherries

Chocolate Sauce:

  • 30g cream
  • 50g dark chocolate


Method:

  1. Pre-heat the oven to 220c degrees.
  2. Place all the pastry ingredients except the water into a food processor and blitz until the mix resembles fine breadcrumbs.
  3. Add 45g of water and process until the mix resembles dough and comes away at the sides of the bowl.
  4. Knead the dough for a minute then divide into 4 balls of 60g each.
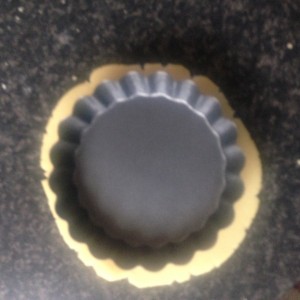
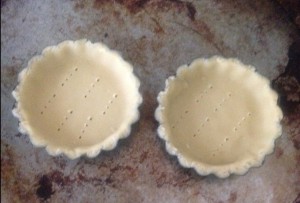
  5. With a rolling pin roll the balls to disks and place into 4 medium sized tart cases, trim edges. Place the remaining pastry aside back in the fridge.
  6. Prick the pastry with a fork a few times in the center and place the tarts in the fridge for 30 minutes.
  7. Meanwhile make the filling by placing the chocolate, sugar, milk and corn flour in a saucepan on a medium heat and whisk with a hand whisk until the mix is thick.
  8. Lightly beat the 5 egg yolks and vanilla in a bowl and add in 1 cup of the chocolate custard mix, beat.
  9. Add the yolk mix into the chocolate custard mix and beat with a hand whisk for 2 minutes while the mix boils.
  10. Take off the heat and beat in the 20g butter.
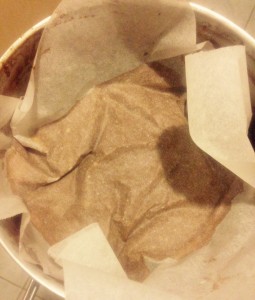
  11. Place some baking paper on the top of the custard mix to stop a skin from forming and leave for 10 minutes to cool.
  12. Take the tart cases out of the fridge and place on a baking tray covering the tarts with foil, baking for 10 minutes.
  13. Remove the foil and bake for a further 5 minutes.
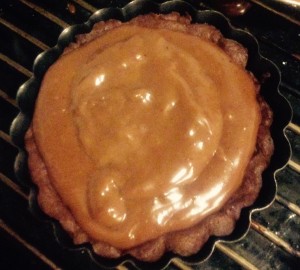
  14. Once the tart cases have cooled place the chocolate custard mix in each tart base.
  15. Turn the oven down to 160c degrees.
  16. Roll the remaining pastry into 3 equal balls then roll out into a disk shape.
  17. Top the remaining disks on top of the custard and trim excess.
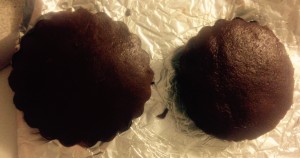
  18. Poke the top a few times with a fork and place in the oven for 25 minutes.
  19. Remove tarts from the oven and leave to completely cool, then place in the fridge for 30 minutes.
  20. Meanwhile, with electric beats whisk the cream and icing sugar until peaks form.
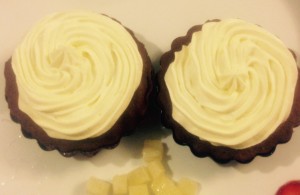
  21. Place the cream into a piping bag with a star nozzle and pipe on top of each chilled pie evenly.
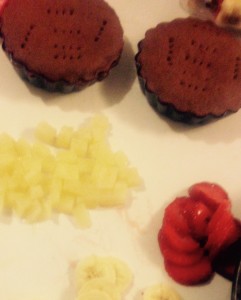
  22. Cut up the strawberries, banana and pineapple and place on top of the cream.
  23. Chop up the peanuts and sprinkle on top.
  24. To make the sauce place the chocolate and cream in the microwave for 1 minute, stirring every 20 seconds until a sauce is formed.
  25. Allow sauce to cool slightly and drizzle on top of the pies.
  26. Place a cherry in the center and into the fridge to fully set for 1 hour.


Coconut Cream Pie recipe
Step 2
Coconut Cream Pie recipe
Step 4
Coconut Cream Pie recipe
Step 6
Chocolate Banana Split Pie recipe
Step 11
Chocolate Banana Split Pie recipe
Step 14
Chocolate Banana Split Pie recipe
Step 17
Chocolate Banana Split Pie recipe
Step 18
Chocolate Banana Split Pie recipe
Step 21
Chocolate Banana Split Pie recipe
Step 22

Like this recipe? Subscribe via RSS or email to get my new entries and more scrumptious recipes with reviews.
Email, RSS Follow
Print
Leave a comment .
Tags: banana, cherries, chocolate, Chocolate Banana Split Pie, Chocolate Banana Split Sundae Pie, cream, peanuts, pineapple, strawberry .

Chickpea Chocolate Coconut and Almond Cookies

Posted on February 16, 2019 Posted in Biscuits .

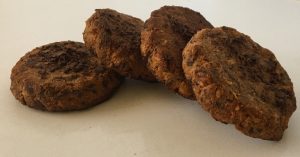
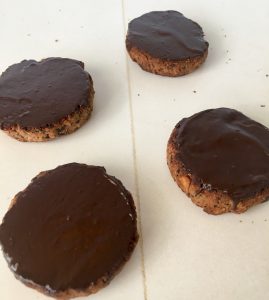
Chickpea Chocolate Coconut and Almond Cookies

Chickpea Chocolate Coconut and Almond Cookies


I’ve made chickpea chocolate cake in the past, chocolate coconut slice, almond and chocolate cake, coconut and almond cupcakes….however I have never mixed these 4 flavors together. As they all taste like a dream with chocolate I thought there could be a combo potential.

So I decided to do some experimenting with these 4 flavors with biscuit variations. I looked at using butter vs. coconut oil, coconut flour vs. almond meal vs. rice flour, cocoa powder vs. chocolate, nil-chocolate biscuit dough, double chocolate biscuit varieties and the list goes on….

Suffice to say I made a few different batches that were slightly altered from the last.

This recipe I’m posting is the hands down winner. All flavors come out spectacularly. Even with the ‘gluten free’ component and legume inclusion they don’t taste ‘cardboard’ as some healthier versions of baking sometimes do.

So simple to make, literally throwing ingredients into a food processor and bake for 15 minutes and boom delicious biscuits at once!

Ingredients:

  • 230g chickpeas (1 x 400g can, drained)
  • 100g almond meal
  • 100g brown sugar
  • 40g coconut oil
  • 1 tsn almond extract
  • 1 egg
  • ½ tsn baking powder
  • 1/8th tsn salt
  • 40g desiccated coconut
  • 80g roasted almonds
  • 80g 70% dark chocolate, 80g extra


Method:

  1. Pre-heat the oven to 180c degrees and line 2 large baking trays with baking paper.
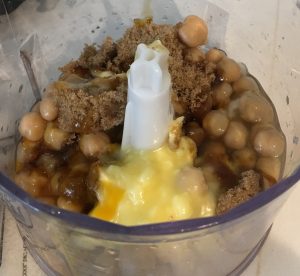
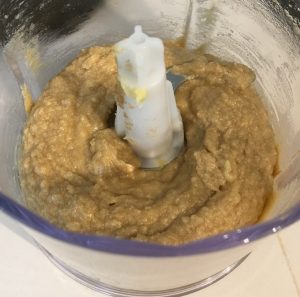
  2. Place the drained chickpeas, sugar, oil, extract and egg into a food processor and blitz until smooth.
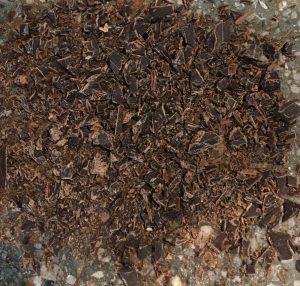
  3. Dice the 80g chocolate and 80g almonds into small pieces.
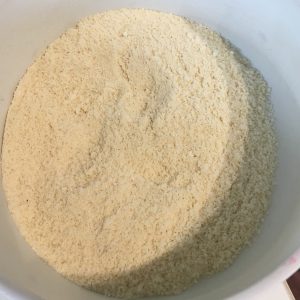
  4. Place the almond meal, baking powder, salt, coconut, diced chocolate and diced almonds into a bowl and stir until well combine.
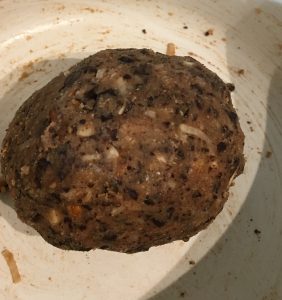
  5. Add the chickpea mix to the dry mix and stir until well combine.
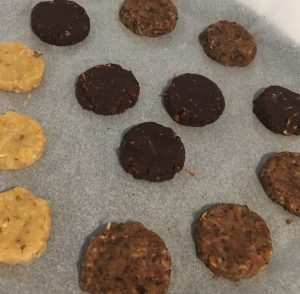
  6. Roll the dough mix into 20g sized balls and flatten well with the back of a fork onto the trays. Note they will not rise so you will want to flatten well.
  7. Place the trays into the oven for 15 minutes to cook.
  8. Allow the biscuits to set on the trays then move to a cooling rack until cooled.
  9. Meanwhile place the remaining extra 80g chocolate into a shallow microwave proof bowl and heat in the microwave on medium, stirring every 30 seconds until the chocolate is melted and smooth.
  10. Using a butter knife or spatula spread the melted smooth chocolate onto the bottom of the biscuit in a thin even layer.
  11. Place biscuits chocolate side up onto the cooling tray until chocolate has set.
  12. Enjoy!


Chickpea Chocolate Coconut and Almond Cookies


Step 2

Chickpea Chocolate Coconut and Almond Cookies

Step 2

Chickpea Chocolate Coconut and Almond Cookies

Step 3

Chickpea Chocolate Coconut and Almond Cookies

Step 4

Chickpea Chocolate Coconut and Almond Cookies

Step 5

Chickpea Chocolate Coconut and Almond Cookies

Step 7

Chickpea Chocolate Coconut and Almond Cookies

Step 10

Chickpea Chocolate Coconut and Almond Cookies


Like this recipe? Subscribe via RSS or email to get my new entries and more scrumptious recipes with reviews.

Email, RSS Follow
Print
Leave a comment .
Tags: Almond, chickpea, Chickpea Chocolate Coconut and Almond Cookies, chocolate, coconut, dark chocolate .

Chocolate and Orange Marmalade Sponge

Posted on December 1, 2018 Posted in Cakes .

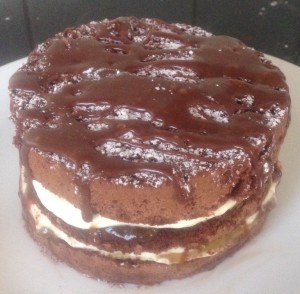
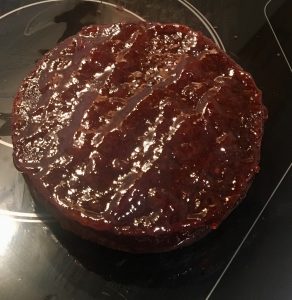
Chocolate and Orange Marmalade Sponge

Chocolate and Orange Marmalade Sponge recipe

For a long time now (around 18 months) I have been attempting to make the ultimate amazing ‘Jaffa inspired’ treat.

I have gone through choc-orange flavoured mousse , focaccia, truffle balls, biscuits, mud-cake, pastries, flan…and the list goes on…Though some of these experimental sessions produced bakes that were not actually bad they were not absolutely amazing either, thus not good enough to post.

This sponge cake recipe was not part of the choc-orange original baking experimental sessions, I actually came up with this recipe a few months later as I wanted to turn my favorite (never fail) sponge recipe into a chocolate sponge to see if it would work (you don’t come across a good chocolate sponge very often so I thought I would challenge this).

When I made the sponge and was happy with the outcome I started thinking about some jam fillings that are a bit unusual (not the normal raspberry or strawberry jam options we typically see). As I had some marmalade left over from the choc-orange experiments I ended up opting for this. Once I spread the layers of jam with cream and sandwiched the cake layers together I was left with either a massive fail or new sponge recipe.

Next step was to drizzle with chocolate sauce, cut and devour. I must say the devouring part was not a difficult task at all.

Finally chocolate orange flavor combo success!

Ingredients:

Sponge:

  • 2 tsn plain flour
  • ½ tsn bi carbonate of soda
  • 1 tsn cream of tartar
  • 100g corn flour
  • 30g cocoa powder
  • 4 eggs
  • 165g sugar
  • ½ tsn vanilla essence

Filling:

  • 300g thickened cream
  • 2 tsn icing sugar
  • ½ tsn vanilla essence
  • 270g orange marmalade

Ganache:

  • 100g dark chocolate, broken up
  • 40g thickened cream


Method:

  1. Preheat the oven to 190c degrees and line 3 x 20cm cake tins with baking paper.
  2. Place the plain flour, bi carbonate or soda, cream of tartar, corn flour and cocoa powder into a bowl and sift 3 times.
  3. Place the eggs and sugar in a bowl and using electric beaters whisk for 10 minutes on high speed.
  4. Add the vanilla essence to the egg mix and beat for 1 more minute
  5. Turn the beaters on low speed and add the flour mix, beating for 1 minute.
  6. Spoon the mix evenly into the 3 cake tins and bake each cake for 20-25 minutes or until the sponges spring back when touched on the top.
  7. Remove the tins from the oven and leave to cool for 10 minutes, cakes still in the tin.
  8. Turn the cakes onto a cooling rack and leave until cold.
  9. To make the filling whisk the cream, icing sugar and vanilla essence with electric beaters until peaks form.
  10. To assemble place one cake layer on a plate and spoon the jam evenly onto this cake as well as a second cake.
  11. Spoon the cream evenly on the top of the jam of both cakes.
  12. Place the second filled cake onto the plated cake (cream side up) and top the cake off with the third/remaining (non-filled) cake layer.
  13. To make the ganache, place the cream in a bowl and microwave until boiling.
  14. Add the chocolate to the cream and leave for 1 minute.
  15. Stir the chocolate and cream until glossy and thick.
  16. Drizzle the chocolate ganache over the top of the cake.


Notes:

  • I dusted the top cake layer with icing sugar and cocoa powder before I drizzled the ganache for extra decoration.


Chocolate and Orange Marmalade Sponge recipe

Step 4

Chocolate and Orange Marmalade Sponge recipe

Step 5

Chocolate and Orange Marmalade Sponge recipe

Step 10

Chocolate and Orange Marmalade Sponge recipe

Step 12

Chocolate and Orange Marmalade Sponge recipe

Step 15

Chocolate and Orange Marmalade Sponge recipe

Step 16

Like this recipe? Subscribe via RSS or email to get my new entries and more scrumptious recipes with reviews.
 

Email, RSS Follow
Print
Leave a comment .
Tags: chocolate, Chocolate and Orange Marmalade Sponge, Chocolate Sponge, Marmalade, orange, sponge .

Date Strawberry and Chocolate Avocado Cake

Posted on November 17, 2018 Posted in Cakes .

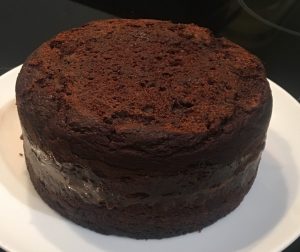
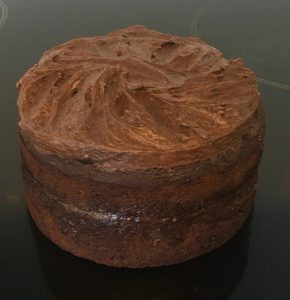
Date Strawberry and Chocolate Avocado Cake

Date Strawberry and Chocolate Avocado Cake recipe

Many many times I have used avocado as the base to a healthier alternative frosting for cakes. Additionally, I have made mousse, tarts and pies with avocado as the core filling ingredient. But, what I haven’t really experimented with is using avocado as a key ingredient within the cake itself.

Sour cream, mayonnaise, yoghurt, varieties of cheeses, even cordial have featured as a wet ingredient in my past baking experiments but avocado surprisingly was a new one for me.

To come up with an avo based recipe I played around with a ridiculous number of cake flavor combos. And by a number I mean 14 different variations from sourcream & onion chips with chocolate to rosemary chocolate & orange blossom, even vegemite & chocolate.

The outcome of chocolate was def a winner. The experiment of flavor profiles of strawberry and dates resulted in the standout cake, delivering a rich chocolate strawberry treat.

As avocado is full of good fats, omitting the amount of bad fat I thought it would be an interesting direction for the recipe to completely replace sugar via dates and jam (yes I know jam has sugar but majority of the sweetness is through the strawberries) and chocolate replaced by means of raw Dutch cocoa powder.

The end result is a satisfying and suprisingly addictive sweet treat.

Date Strawberry and Chocolate Avocado Cake recipe

Cake:

  • 150g pitted dates
  • 1 tsn bi-carb of soda
  • 45g butter
  • 100g avocado flesh (2/3 of 1 avocado)
  • 2 eggs
  • 1 tsn vanilla essence
  • ¼ tsn salt
  • 65ml milk
  • 180g strawberry jam
  • 225g self-raising flour
  • 60g cocoa powder

Frosting:

  • 130g avocado flesh (1 avocado)
  • 20g cocoa powder
  • Pinch salt
  • 1/2 tsn vanilla essence
  • 70g strawberry jam
  • 100g butter, softened

Extra:

  • 130g strawberry jam


Method:

  1. Pre-heat the oven to 180c degrees and line a 25cm cake tin with baking paper.
  2. Place the dates and 190ml water into a saucepan on a medium/high heat.
  3. Once mix boils stir through the bi-carb of soda, set aside to cool completely.
  4. Place the dates, butter, avocado, eggs, vanilla, salt, milk and strawberry jam into a food processor and blitz until well combine and smooth.
  5. Transfer avocado mix into a bowl, sieve the flour and cocoa into the mix.
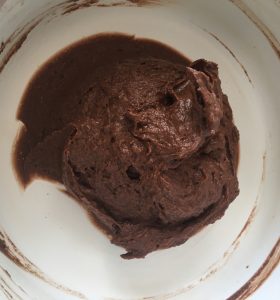
  6. Fold all ingredients together until just combine.
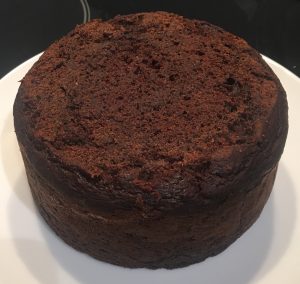
  7. Spoon the mix into the cake tin and place in the oven for 40 minutes or until a skewer inserted into the center comes out clean.
  8. Place the cake on a cooling rack until cool.
  9. Meanwhile make the frosting by placing all of the frosting ingredients into a food processor and blitzing until combine and fluffy.
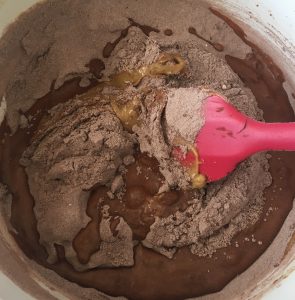
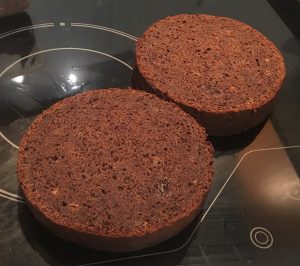
  10. Once the cake is cooled cut in half horizontally, place a cake layer on a plate cut side up, and spread with half the extra jam. Use the back of a spoon to push the jam into the cake. Repeat for the 2nd cake layer, leaving the layer on the bench, jam/sut side up.
  11.  Top the jam on layer 1 with 1/3rd of the frosting and repeat with the second layer. Sandwich the 1st cake layer with the 2nd cake layer, jam side down to have an unfrosted cake top with all frosting and jam in the center of the cake.
  12. Top with the remaining 1/3rd frosting and enjoy!


Date Strawberry and Chocolate Avocado Cake recipe

Step 2


Date Strawberry and Chocolate Avocado Cake recipe

Step 4


Date Strawberry and Chocolate Avocado Cake recipe

Step 6


Date Strawberry and Chocolate Avocado Cake recipe

Step 9


Date Strawberry and Chocolate Avocado Cake recipe

Step 10


Date Strawberry and Chocolate Avocado Cake recipe

Step 10


Date Strawberry and Chocolate Avocado Cake recipe

Step 10


Date Strawberry and Chocolate Avocado Cake recipe

Step 11


Date Strawberry and Chocolate Avocado Cake recipe

Step 12


Like this recipe? Subscribe via RSS or email to get my new entries and more scrumptious recipes with reviews.
 

Email, RSS Follow
Print
Leave a comment .
Tags: avocado, chocolate, Date Strawberry and Chocolate Avocado Cake, dates, jam, strawberry, strawberry jam, Strawberry Jam Chocolate Avocado Cake .

Aniseed and Chocolate Biscuit Cake

Posted on November 3, 2018 Posted in Cakes .

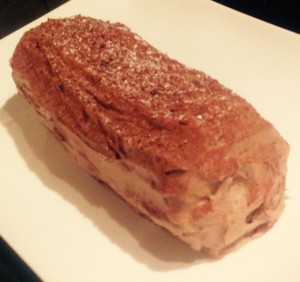
Aniseed and Chocolate Biscuit Cake

Aniseed and Chocolate Biscuit Cake recipe
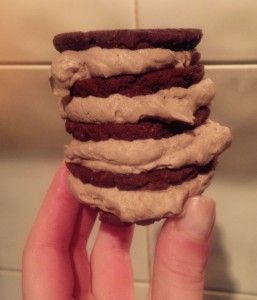
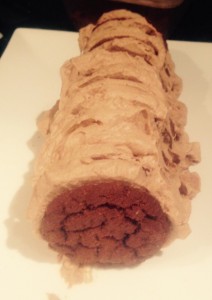
This recipe is an interesting one, while being so super easy and oh so delicious. The inspiration came from none other than chocolate bullets (chocolate covered licorice).
I was looking for new flavours to pair with chocolate that were a bit unusual but complemented each other and though I could steal the flavour profile of chocolate bullets.
For the cake style and format I took influence from my Ginger and Date Biscuit Cake.
Outcome, a really delightful cake that took a whole of 15 minutes to make and contained only a few ingredients that are supermarket stables.
Cakes don’t get much easier than this!

Ingredients

  • 300ml thickened cream
  • 2 + ½ tbsn icing sugar
  • 1 tsn vanilla essence
  • 10g cocoa powder
  • 1 + 1/3 tbsn white Sambuca
  • 125g chocolate ripple biscuits


Method:

  1. Beat the cream with electric beaters until soft peaks form.
  2. Add the icing sugar, vanilla, cocoa and Sambuca to the cream until combine and firm peaks form.
  3. Spoon a line of the cream mix onto a plate in a line.
  4. Spoon ½ tbsn of cream mix onto a biscuit and sandwich together with another.
  5. Place the biscuits long side up onto the cream.
  6. Continue to spread ½ tbsn cream onto a biscuit and push into the biscuit on the plate, cream side first.
  7. Continue until all the biscuits are used up.
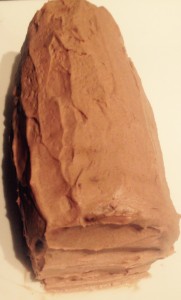
  8. Spread the remaining cream over the outside of the cream biscuit log.
  9. Place cake in the fridge for 6 hours to set.
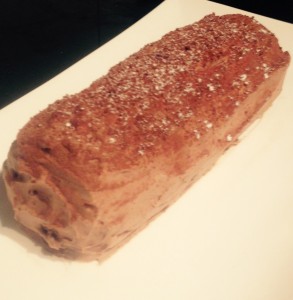
  10. Dust with cocoa powder and serve.


NOTE: If you dont have Sambuba you can replace with Ouzo instead or any aniseed flavoured liquor.


Aniseed and Chocolate Biscuit Cake recipe re

Step 4

Aniseed and Chocolate Biscuit Cake recipe

Step 7

Aniseed and Chocolate Biscuit Cake recipe

Step 8

Aniseed and Chocolate Biscuit Cake recipe

Step 10


Like this recipe? Subscribe via RSS or email to get my new entries and more scrumptious recipes with reviews.
Email, RSS Follow
Print
Leave a comment .
Tags: aniseed, Aniseed and Chocolate Biscuit Cake, biscuits, chocolate, sambuca .

Marsala and Coffee Ice-Cream Ricotta Cheese Cake

Posted on September 29, 2018 Posted in Ice-cream cake .

Marsala and Coffee Ice-Cream Ricotta Cheese Cake

Masala and Coffee Ice-Cream Cheese Cake recipe

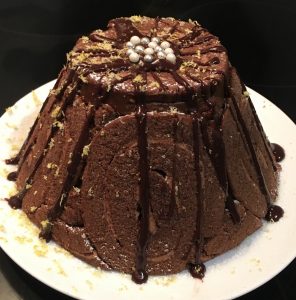
Inspired by the outer layer of trifle varieties and flavour combo of delicious Tiramisu, this experiment is one that resulted in a cake that I could just not stop eating.

My all-time favorite sweet treat (as I have mentioned multiple times) is Tiramisu. I wanted to make a version of this dessert that would keep over a generous period of time so I could enjoy the treat multiple times, oppose to the traditional dessert that really does need to be eaten within a few days of creation.

Thus, making an ice-cream cake made sense. It would keep for weeks (in the freezer), not days. Lastly, as the traditional Tiramisu is not exactly light on the hips I did opt for low fat ricotta and down-weighted the cream volume.

This cake is easy, tasty, quick, with no baking required, and as I mentioned above addictive!

Masala and Coffee Ice-Cream Cheese Cake


Ingredients:

  • 400g chocolate swizz roll
  • 100ml Marsala
  • 300g ricotta cheese
  • 200ml sweetened condensed milk
  • 300ml thickened cream
  • 2 tsn vanilla extract
  • 2 tbsn coffee granules
  • 2 tsn cocoa powder
  • 35g chocolate covered coffee beans


Method:

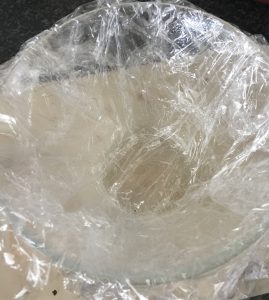
  1. Spray a 1.5-liter pudding tin or bowl with oil spray, following line the sprayed tin with 2 layers of overlapping plastic wrap.
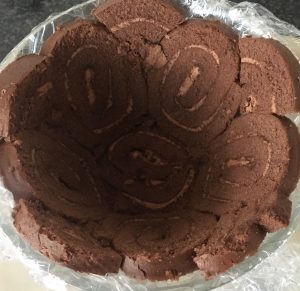
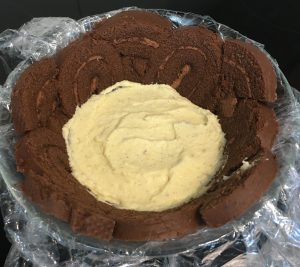
  2. Cut the swizz roll into 1cm thick slices and place on the bottom and slides of the tin, squashing slightly with fingertips to ensure no gaps.
  3. Using a spoon drizzle 40ml of the Marsala over the swizz roll on the bottom and the sides, evenly covering each piece.
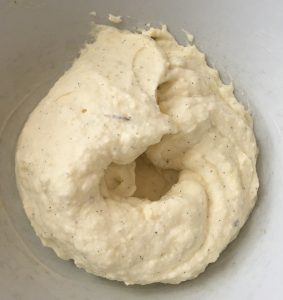
  4. In a food processor blitz the cheese and condensed milk until smooth.
  5. Whisk the cheese mix and 300ml cream with electric beaters in a bowl until peaks start to form (do not over beat or the cream will split).
  6. Spoon half the mix into another bowl and leave aside for later use to make the coffee chocolate layer.
  7. With your original bowl of mix add the vanilla, and remaining 60ml of Marsala, fold until well combined.
  8. Spoon the vanilla & Marsala mix into the bowl on top of the swizz roll and level with the back of a spoon.
  9. Place the tin in the freezer for 30 minutes to firm.
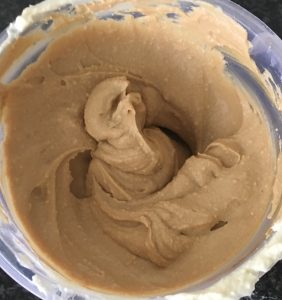
  10. Meanwhile make the coffee mix by placing 15ml of boiling water into a small bowl with the coffee granules, stir until combined, set aside to cool completely before pouring into the remaining bowl of mix.
  11. Add the cocoa powder to the coffee mix and beat on low with electric beaters until just combined.
  12. Chop up the coffee beans until finely diced and fold into the mix until combined.
  13. Spoon the coffee mix over the top of the vanilla and Marsala mix and level with the back of a spoon.
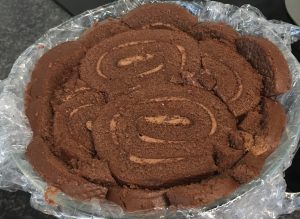
  14. Using the remaining swizz roll slices place on the top of the mix to completely cover the top with no gaps.
  15. Pull the plastic wrap tightly and fold to cover the top of the cake completely, then push down the top of the cake with the bottom of a plate.
  16. Freeze for 4 hours until firm (with the plate as a height on top).
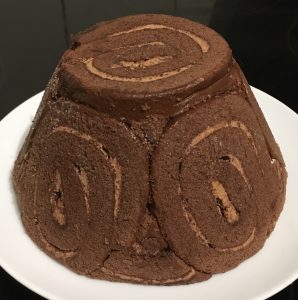
  17. When ready to serve the cake you will need to take the cake out of the freezer 30 mins before. Uncover the plastic wrap on the top and invert (flip) the cake onto a plate.
  18. Remove the plastic wrap completely and top with a drizzle of chocolate ganache (if you desire).
  19. Cut into slices and enjoy!


Masala and Coffee Ice-Cream Cheese Cake recipe
Step 1
Masala and Coffee Ice-Cream Cheese Cake recipe
Step 2
Masala and Coffee Ice-Cream Cheese Cake recipe
Step 7
Masala and Coffee Ice-Cream Cheese Cake recipe
Step 8
Masala and Coffee Ice-Cream Cheese Cake recipe
Step 11
Masala and Coffee Ice-Cream Cheese Cake recipe
Step 14
Masala and Coffee Ice-Cream Cheese Cake recipe
Step 18


Like this recipe? Subscribe via RSS or email to get my new entries and more scrumptious recipes with reviews

Email, RSS Follow
Print
Leave a comment .
Tags: chocolate, coffee, marsala, Marsala and Coffee Ice-Cream Ricotta Cheese Cake, ricotta cheese .

Marshmallow Peanut Caramel and Chocolate Bread Pudding

Posted on August 18, 2018 Posted in Cakes .

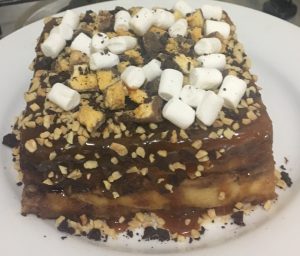
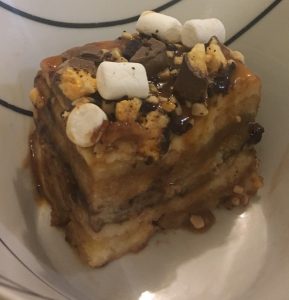
Marshmallow Peanut Caramel and Chocolate Bread Pudding

Marshmallow Peanut Caramel and Chocolate Bread Pudding recipe

What do you do when you are tasked to make the most delectable bread and butter pudding?

I don’t know about you but I took this as a challenge to do some experimenting with scrumptious, over-the-top but still delightfully tasty flavour pairings (any excuse to experiment and I’m there with bells on)!

After ideating on a few flavour ideas I landed on 3 varying flavour profiles all as rich as each other, being; a rocky-road influence combo, black forest inspired and a Jaffa guided taste.

I must say all combo’s were tasty, I’d happily eat any of them for dessert, however, the rocky-road influenced combo (Marshmallow Peanut Caramel and Chocolate Bread Pudding) was the stand out winner….A far cry from the traditional cinnamon and sultana recipe!

Marshmallow Peanut Caramel and Chocolate Bread Pudding recipe


Ingredients:

  • 3 eggs
  • 400ml milk
  • 140ml cream
  • 20g sugar
  • 1 tsn vanilla essence
  • 9 slices stale white bread (I used sourdough)
  • 45g butter
  • 30g dark (70%) chocolate chips
  • 230g caramel top n’ fill
  • 80g peanuts, finely chopped
  • 40g mini marshmallows

Extra:

  • Vanilla ice-cream to serve


Method:

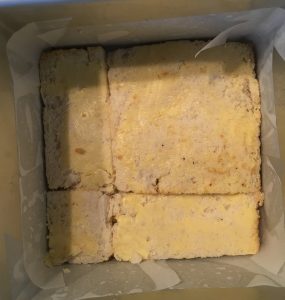
  1. Pre-heat the oven to 180c degrees and spray a 20cm x 20cm square cake tin with oil spray.
  2. Place 3 pieces of plastic wrap into the tin allowing for overlap, with pieces crossed each over to ensure full tin coverage.
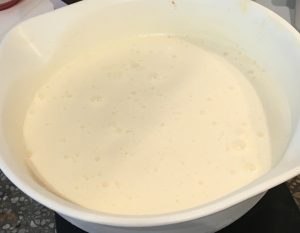
  3. Whisk eggs, milk, sugar and essence in a bowl until combine.
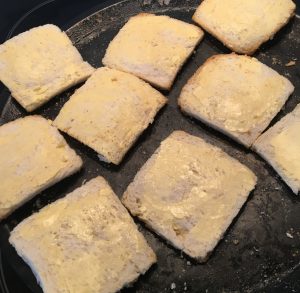
  4. Spread the butter on both sides of all 9 bread slices.
  5. Decrust (if you wish I did but this is optional) the bread and trim 3 pieces to fit a layer snug in the base of the tin.
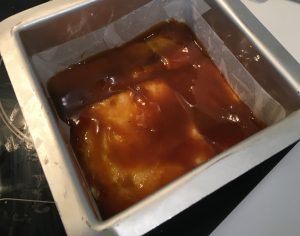
  6. Top with 10g of chocolate chips, 30g peanuts and 150g caramel.
  7. Use the back of a spoon to spread out the mix if it’s not evenly distributed.
  8. Trim a further 3 pieces of buttered bread to fit another layer snug on top of the caramel mix.
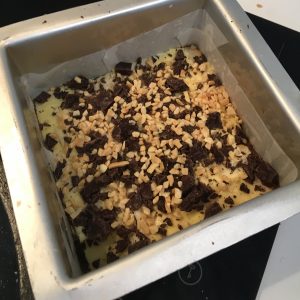
  9. Top with 10g of chocolate chips, 30g peanuts and 30g marshmallows.
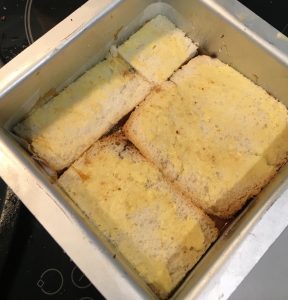
  10. Trim the last 3 pieces of buttered bread to fit the last (3rd) layer snug on top of the marshmallow mix.
  11. Pour the milk mix evenly over the pudding and allow to sit and absorb for 1 hour.
  12. Place the pudding into the oven for 35 minutes or until all liquid has fully been absorbed and the top is golden and crispy.
  13. Allow the pudding to cool slightly until just warm.
  14. Cut the pudding into 6 even pieces, 1horizontal cut through the middle and 2 vertical cuts.
  15. Pull the plastic wrap to remove the pudding from the tin, being careful not to loose the puddings shape.
  16. Use a spatula to spoon the pudding slices into bowls.
  17. Top each piece evenly with remaining 10g chocolate chips, 80g caramel, 20g peanuts and 10g marshmallow’s.
  18. Serve with a generous scoop of vanilla ice-cream and enjoy.

NOTE: If the pudding starts to drop/slide in shape after step 13 place back in the oven for a further 5-10 minutes.


Marshmallow Peanut Caramel and Chocolate Bread Pudding recipe

Step 3


Marshmallow Peanut Caramel and Chocolate Bread Pudding recipe

Step 4

Marshmallow Peanut Caramel and Chocolate Bread Pudding recipe

Step 5


Marshmallow Peanut Caramel and Chocolate Bread Pudding recipe

Step 7


Marshmallow Peanut Caramel and Chocolate Bread Pudding recipe

Step 9


Marshmallow Peanut Caramel and Chocolate Bread Pudding recipe

Step 10


Marshmallow Peanut Caramel and Chocolate Bread Pudding recipe

Step 13


Marshmallow Peanut Caramel and Chocolate Bread Pudding recipe

Step 15


Marshmallow Peanut Caramel and Chocolate Bread Pudding recipe

Step 17


Marshmallow Peanut Caramel and Chocolate Bread Pudding

Step 17


Like this recipe? Subscribe via RSS or email to get my new entries and more scrumptious recipes with reviews.
Email, RSS Follow
Print
Leave a comment .
Tags: bread and butter pudding, caramel, chocolate, Marshmallow Peanut Caramel and Chocolate Bread Pudding, marshmallows, peanuts, pudding .

Date Bourbon and Chocolate Cakes

Posted on July 21, 2018 Posted in Cakes .

Date Bourbon and Chocolate Cakes

Date Bourbon and Chocolate Cakes recipe

Believe it or not dates and bourbon actually have a similar flavour profile. However, they do have a big difference that is quite notable.

One ingredient is sweet as well as holding an earthy profile, while the other is strong in earthy sour smokiness. Put them together and the sweetness balances out the sourness and you are left with an interesting earthy flavour.

Add a hint of satisfying rich chocolate and you have chocolate cake with a satisfying unique tasty flavour twist.


Ingredients:

Cake:

  • 350g dried dates
  • 375ml water
  • 35ml Bourbon
  • 60g butter
  • 160g brown sugar
  • 3 eggs
  • 180g flour
  • 1 tsn baking powder
  • ½ tsn bi carbonate of soda
  • 30g cocoa powder

Icing:

  • 100g date sauce powder (or replace with 80g icing sugar if you cannot find this)
  • 130g icing sugar
  • 160g butter
  • 10ml bourbon


Method:

  1. Pre-heat the oven to 160c degrees and line a 12 capacity cupcake tin with cupcake patties. Spray with oil spray.
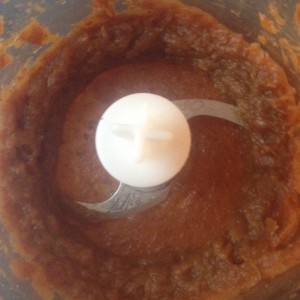
  2. Place the dates and water into a saucepan on a low heat. Stir until the dates are plump and have soaked up all the water.
  3. Remove the dates from the pan, add the bouron and place into a food processor, blitz until well combine.
  4. Set the date mix aside to cool.
  5. Using electric beaters beat the cake butter and sugar until light and creamy.
  6. Add the eggs one at a time, beating in each addition until well combined.
  7. Sift into the egg mix the flour, powder, soda, and cocoa powder, stir until combine.
  8. Add the date mix to the egg mix and stir until just combine.
  9. Spoon the mix evenly into each patty case.
  10. Bake in the oven for 20 minutes or until a skewer inserted in the center comes out clean.
  11. Meanwhile make the icing by placing all the icing ingredients into a bowl and using electric beats whisk until light and fluffy.
  12. Once the cakes are cooked place on a cooling tray.
  13. Remove the cakes from the patty cases (optional) and using a piping bag with a star nozzle pipe little circles of icing onto each cake.


Date Bourbon and Chocolate Cakes recipe

Step 3

Date Bourbon and Chocolate Cakes recipe

Step 7

Date Bourbon and Chocolate Cakes recipe

Step 8

Date Bourbon and Chocolate Cakes recipe

Step 9

Date Bourbon and Chocolate Cakes recipe

Step 12

Date Bourbon and Chocolate Cakes recipe


Like this recipe? Subscribe via RSS or email to get my new entries and more scrumptious recipes with reviews.
Email, RSS Follow
Print
Leave a comment .
Tags: bourbon, chocolate, Date Bourbon and Chocolate Cakes, dates .

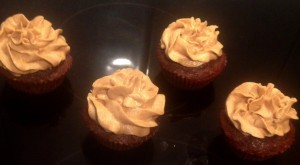
Chocolate Top-Deck Tiramisu Cupcakes

Posted on June 23, 2018 Posted in Cupcakes .

Chocolate Top-Deck Tiramisu Cupcakes  

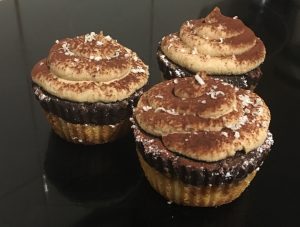
Chocolate Top-Deck Tiramisu Cupcakes recipe

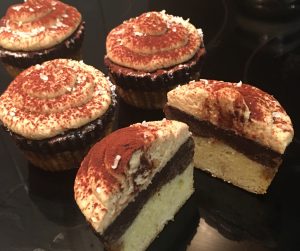
Tiramisu is my ultimate all-time favorite dessert ever. The only thing with traditional Tiramisu is that its not the easiest thing to eat – a bowl/plate as well as a spoon is a must. Unlike a slice or cupcake Tiramisu can really only be eaten sitting at a table.

So I decided that I would come up with a recipe that tastes like the traditional treat but as a cupcake.

For the cupcake recipe, I modified my never fail white chocolate and dark chocolate wedding cake recipes with the coffee and marsala flavor combo, as well as staying true to the traditional mascarpone cheese for my ‘icing’.

Though I have included the mix of white and dark chocolate in this recipe, in which is not traditional for this dessert, the chocolate batter works flawlessly with the traditional flavors.

Chocolate Top-Deck Tiramisu Cupcakes recipe

Ingredients:

White chocolate layer:

  • 85g butter
  • 85g white chocolate
  • 130g sugar
  • 150ml water
  • 105g self-raising flour
  • 65ml milk
  • 1 egg

Dark chocolate layer:

  • 85g butter
  • 85g dark chocolate
  • 130g sugar
  • 150ml water
  • 20g cocoa powder
  • 85g self-raising flour
  • 10ml marsala
  • 55ml expresso coffee
  • 1 egg

Syrup:

  • 30ml marsala
  • 30ml expresso coffee
  • 15g sugar

Icing:

  • 200g mascarpone cheese
  • 35g icing sugar
  • 25ml marsala
  • 2 tsn expresso coffee


Method:

  1. Pre-heat the oven to 160c degrees and line an 8-capacity cupcake tray with patty cases.
  2. Spray the patty cases with oil spray.
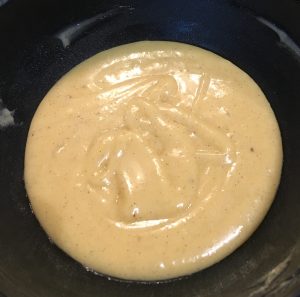
  3. In a saucepan on the stove melt the butter, chocolate, sugar and water on medium heat until smooth and glossy.
  4. Pour the room temperature chocolate mix, milk and egg into a bowl.
  5. Sift the flour to the chocolate mix and whisk with a hand whisk until smooth.
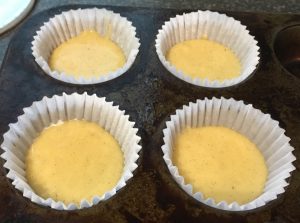
  6. Spoon the mix into the prepared patty cases until 1/3 full.
  7. Place the tin in the freezer for 10 minutes to slightly firm.
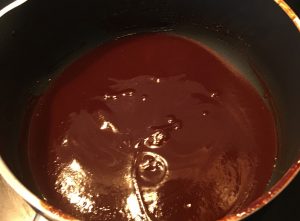
  8. Meanwhile make the dark chocolate batter by placing the butter, chocolate, sugar and water into a saucepan on medium heat until smooth and glossy.
  9. Pour the room temperature chocolate mix, expresso and egg into a bowl.
  10. Sift in the flour and cocoa powder into the chocolate mix and whisk with a hand whisk until smooth.
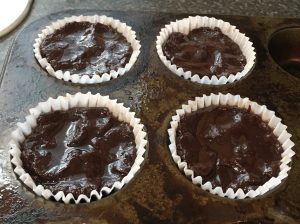
  11. Take the tin out of the freezer and spoon the dark chocolate mix into the prepared patty cases until they are 2/3rds full.
  12. Place the cupcake tin in the oven and bake for 20 minutes or until a skewer inserted in the center comes out clean.
  13. Leave the cupcakes in the tin for 5 minutes before placing onto a cooling rack to cool completely.
  14. Meanwhile make the syrup by placing the ingredient into a bowl and heating in the microwave until bubbling, leave aside.
  15. Brush the syrup on top of the cupcakes with a pastry brush and remove the patty cases.
  16. Make the icing by placing all the icing ingredients into a bowl and using electric beats whisk until the mix thickens.
  17. Spoon the icing into a piping bag with a circle nozzle and pipe on top of the cupcakes.
  18. Finish the cakes with a dust of cocoa powder and some grated white chocolate.


Chocolate Top-Deck Tiramisu Cupcakes recipe

Step 3

Chocolate Top-Deck Tiramisu Cupcakes recipe

Step 5

Chocolate Top-Deck Tiramisu Cupcakes recipe

Step 6

Chocolate Top-Deck Tiramisu Cupcakes recipe

Step 9

Chocolate Top-Deck Tiramisu Cupcakes recipe

Step 11

Chocolate Top-Deck Tiramisu Cupcakes recipe

Step 15

Chocolate Top-Deck Tiramisu Cupcakes recipe

Step 16

Chocolate Top-Deck Tiramisu Cupcakes recipe

Step 18

Like this recipe? Subscribe via RSS or email to get my new entries and more scrumptious recipes with reviews.
 

Email, RSS Follow
Print
Leave a comment .
Tags: chocolate, Chocolate Top-Deck Tiramisu Cupcakes, coffee, dark chocolate, marsala, mascapone, white chocolate .

Caramel and Chocolate Flan Brulee Brownie

Posted on June 9, 2018 Posted in Brownies .

Caramel and Chocolate Flan Brulee Brownie

Caramel and Chocolate Flan Brulee Brownie recipe

There is not much to say on this little sweat treat.

I decided I wanted to make a slice that had layers of amazing tastes and textures, really taking the taste buds on a journey.

How I planned to do this was combining various scrumptious desserts into one delicious multi treat.

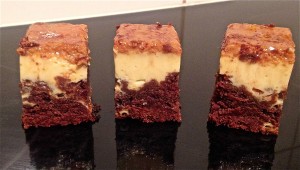
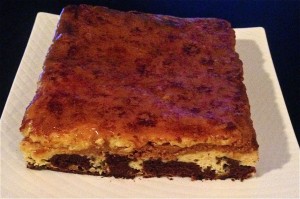
This recipe is executed by a rich chocolate brownie base, a light and fluffy vanilla flan centre and smooth melt in-your-mouth caramel with a crisp brulee top.

If I haven’t got your attending by now nothing will!

Outcome = exactly what I hoped, Caramel, Chocolate Vanilla Flan Brulee Brownie bliss.

Ingredients:

  • 300g caramel (I used Nestlé Caramel top n’ fill)
  • 1 tbsn extra sugar

Brownie:

  • 100g dark chocolate
  • 50g butter
  • 70g sugar
  • 70g plain flour
  • 1 egg

Flan:

  • 310g sweetened condensed milk
  • 260ml milk
  • 3 eggs
  • 2 teaspoons vanilla essence

Method:

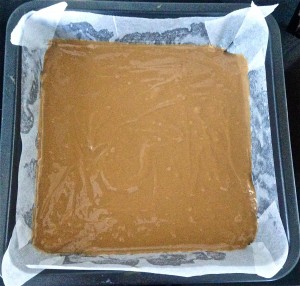
  1. Preheat the oven to 190c and line a 21cm square cake tin with baking paper.
  2. Spread the caramel evenly in the bottom of the cake tin and place in the freezer for at least 15 minutes.
  3. Combine the chocolate and butter into a microwave safe container and microwave on medium for 1 minute. Stir. Microwave and stir every 30 seconds until the mix is silky and smooth.
  4. Add the sugar, eggs and flour to the chocolate mix and whisk thoroughly with a hand whisk until well combined.
  5. Using a spoon carefully place the mix on top the caramel without moving it. Spread to ensure even layering.
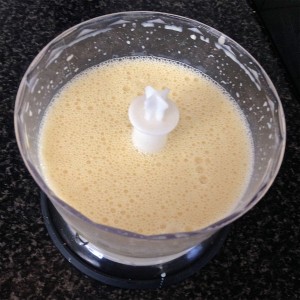
  6. In a food processor add in the condensed milk, milk, eggs and vanilla essence. Cover and blend ingredients until the mix is thoroughly combined together.
  7. Spoon milk mix over the brownie layer.
  8. Place the tin in the oven for 50 minutes or until a skewer inserted in the middle comes out clean.
  9. Let the brownie cool completely in the tin.
  10. Once the brownie has cooled flip the tin on a plate, removing the tin and baking paper. Sprinkle the extra sugar on the top of the caramel layer.
  11. Using a blow torch scorch the top of the slice until browned and bubbling.
  12. Cut and serve.


Caramel and Chocolate Flan Brulee Brownie

Ingredients

Caramel and Chocolate Flan Brulee Brownie recipe

Step 2

Caramel and Chocolate Flan Brulee Brownie recipe

Step 6

Caramel and Chocolate Flan Brulee Brownie recipe

Step 11


Like this recipe? Subscribe via RSS or email to get my new entries and more scrumptious recipes with reviews.
Email, RSS Follow
Print
Leave a comment .
Tags: brownie, brulee, caramel, Caramel and Chocolate Flan Brulee Brownie, chocolate, flan .
« Previous Page
Next Page »

Pages

  • About Me
  • Baking Metrics
  • Blogroll
  • Common Baking Questions
  • Recipe Index
  • Tips & Tricks
  • Contact

Archives

  • February 2022
  • October 2021
  • September 2021
  • August 2021
  • April 2021
  • February 2021
  • January 2021
  • December 2020
  • November 2020
  • October 2020
  • September 2020
  • August 2020
  • July 2020
  • June 2020
  • May 2020
  • September 2019
  • June 2019
  • May 2019
  • April 2019
  • March 2019
  • February 2019
  • January 2019
  • December 2018
  • November 2018
  • October 2018
  • September 2018
  • August 2018
  • July 2018
  • June 2018
  • May 2018
  • April 2018
  • March 2018
  • February 2018
  • January 2018
  • December 2017
  • November 2017
  • October 2017
  • September 2017
  • August 2017
  • July 2017
  • June 2017
  • May 2017
  • April 2017
  • March 2017
  • February 2017
  • January 2017
  • December 2016
  • November 2016
  • October 2016
  • September 2016
  • August 2016
  • July 2016
  • June 2016
  • May 2016
  • April 2016
  • March 2016
  • February 2016
  • January 2016
  • December 2015
  • November 2015
  • October 2015
  • September 2015
  • August 2015
  • July 2015
  • June 2015
  • May 2015
  • April 2015
  • March 2015
  • February 2015
  • January 2015
  • December 2014
  • November 2014
  • October 2014
  • September 2014
  • August 2014
  • July 2014
  • June 2014
  • May 2014
  • April 2014
  • March 2014
  • February 2014
  • January 2014
  • December 2013

Categories

  • America (5)
  • Arabic (1)
  • Australian (2)
  • Biscuits (24)
  • Brazil (1)
  • Bread (12)
  • Brownies (5)
  • Cakes (141)
  • Croatian (1)
  • Cupcakes (20)
  • Custard (1)
  • Doughnuts (6)
  • Flan (1)
  • France (5)
  • Fudge (3)
  • German (1)
  • Greece (2)
  • Hungary (1)
  • Ice-cream & Sorbet (15)
  • Ice-cream cake (6)
  • Icing (18)
  • Italy (4)
  • Jam (1)
  • Jamaican (1)
  • Lebanese (1)
  • Marshmallows (2)
  • Mexican (1)
  • Morocco (1)
  • Mousse (2)
  • Muffins (1)
  • Panna Cotta (1)
  • Pastries (2)
  • Pies (7)
  • Portugal (1)
  • Pudding (12)
  • Roulade (1)
  • Russia (1)
  • Slice (27)
  • Souffle (1)
  • Sweden (1)
  • Swedish (1)
  • Syrup (1)
  • Tarts (13)
  • Traditional (17)
  • Trifile (1)
  • Truffles (5)
  • Turkey (1)
  • Uncategorized (1)
  • Unique (10)

WordPress

  • Register
  • Log in
  • WordPress

Subscribe

  • Entries (RSS)
  • Comments (RSS)

CyberChimps WordPress Themes

© Sweet Tooth Experiments