Sweet Tooth Experiments

  • About Me
  • Recipe Index
  • Baking Metrics
  • Tips & Tricks
  • Common Baking Questions
  • Contact

Monthly Archives: July 2017

Chocolate and Hazelnut Sweet Lasagna

Posted on July 29, 2017 Posted in Unique .

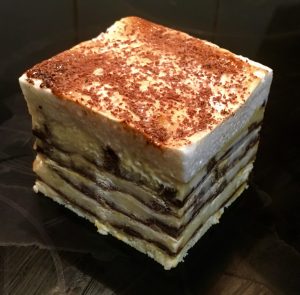
Chocolate and Hazelnut Sweet Lasagna

Chocolate and Hazelnut Sweet Lasagna recipe

Inspired by the latest craze of turning the sweet onto the savory and the savory into the sweet. I have dabbled with this a little with sweet dumplings, ravioli and tacos as well as posted my Apple Crumble Pizza and my Chocolate Nut Springroll. However I still have many many more ideas on things to create.

One item I have been meaning to turn from savory to sweet is lasagna. I have tried many savory versions of this dish, from a Mexican fest to vegan based-meals, however never a sweet one.

I figured using a cheese and crème patisserie fusion filling could replicate the cheese. Using actual lasagna sheets covered in layers of chocolate and hazelnut spread would imitate the pasta and meat layers. And of course, not forgetting the white sauce top layer I made a delicious meringue to complete treat.

I’m surprised at how good this turned out to the point that it for sure amazingly delicious.


Custard Cream filling:

  • 6 eggs
  • 100g sugar
  • 2 tsn vanilla essence
  • 65g cornflour
  • 750ml milk
  • 300g ricotta cheese
  • 60g icing sugar
  • 120ml thickened cream

Extra:

  • 4 lasagna sheets
  • 80g Nutella
  • 100g dark chocolate

Sugar syrup:

  • 150g sugar
  • 80ml water


Method:

  1. Line a 15cm x 30cm cake tin or deep oven dish with baking paper.
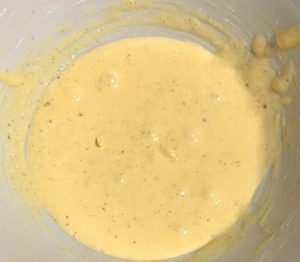
  2. Make the filling by whisking with electric beaters the egg yolks, sugar, vanilla and cornflour until well combined.
  3. Leave the egg white aside for later use.
  4. Place the milk into a saucepan on high heat until the milk starts to boil.
  5. Add the milk to the yolk mix is a steady stream until well combined.
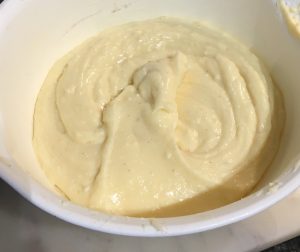
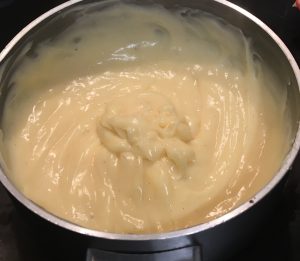
  6. Transfer the mix back into the pan on a medium heat and using a hand whisk beat until the mix thickens up into a custard.
  7. Pour the mix into a bowl with plastic wrap on top and leave aside to cool completely.
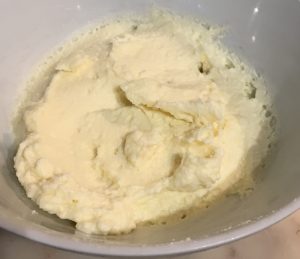
  8. Meanwhile with electric beaters whisk the ricotta and icing sugar until well combined.
  9. Add the cream to the ricotta mix and whisk until well combine and smooth and place in the fridge for later use.
  10. Preheat the oven to 180c degrees.
  11. Cut the lasagna sheets to fit I the tin perfectly.
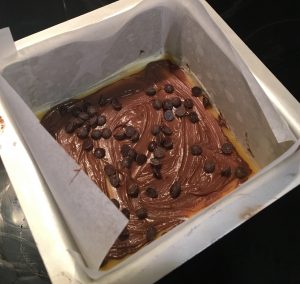
  12. Spoon 20g of Nutella onto each lasagna sheet and spread with the back of a spoon to evenly cover to sheet.
  13. Dice the chocolate into small pieces and sprinkle the chocolate evenly over the Nutella, leave the sheets aside for later use.
  14. Remove the plastic wrap from the custard mix and add the ricotta mix, beat until smooth and combine.
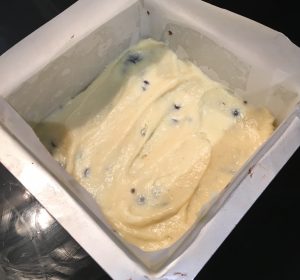
  15. To put the cake together, spoon 1/5th of the filling into the prepared cake tin. Spread with the back of a spoon for even coverage.
  16. Add a lasagna sheet and top with another 1/5th of the filling.
  17. Continue with the lasagna and cream layering until all 4 sheets have been placed and the last 1/5th of filling is placed on the top of the last sheet. You should have done 5 filling layers and 4 sheet layers.
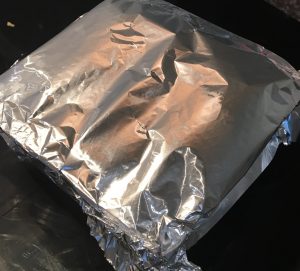
  18. Cover the top of the tin with aluminum foil and bake in the oven for 25 minutes.
  19. Meanwhile make a meringue by placing the egg whites into a bowl and whisking with electric beaters.
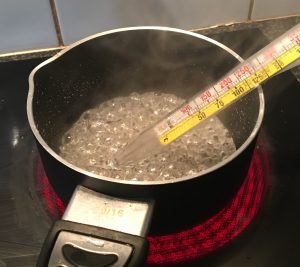
  20. Place the sugar and water into a pan on high heat stirring until the sugar dissolves then leave the mix until a candy thermometer hits 125c degrees.
  21. Slowly take the sugar syrup off the heat and in a slow and steady stream pour the syrup into the egg whites.
  22. Continue beating the egg white mix for 5-10 more minutes or until glossy and silky.
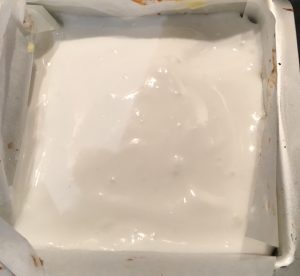
  23. Remove the lasagna from the oven, remove the foil and spread the meringue over the top of the cake.
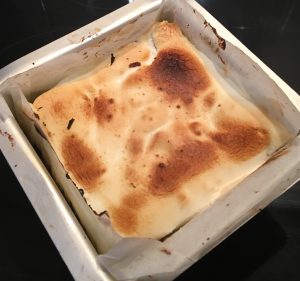
  24. Place the cake back in the oven for 10 more minutes to cook the pasta through and bake the meringue until golden brown.
  25. Leave the cake aside to cool in the tin then cut into squares, place slice of lasagna onto a plate with a side of vanilla ice-cream.


Chocolate and Hazelnut Sweet Lasagna recipe

Step 2

Chocolate and Hazelnut Sweet Lasagna recipe

Step 6

Chocolate and Hazelnut Sweet Lasagna recipe

Step 8

Chocolate and Hazelnut Sweet Lasagna recipe

Step 9

Chocolate and Hazelnut Sweet Lasagna recipe

Step 12

Chocolate and Hazelnut Sweet Lasagna recipe

Step 16

Chocolate and Hazelnut Sweet Lasagna recipe

Step 18

Chocolate and Hazelnut Sweet Lasagna recipe

Step 20

Chocolate and Hazelnut Sweet Lasagna recipe

Step 23

Chocolate and Hazelnut Sweet Lasagna recipe

Step 24


Like this recipe? Subscribe via RSS or email to get my new entries and more scrumptious recipes with reviews
 

Email, RSS Follow
Print
Leave a comment .
Tags: chocolate, Chocolate and Hazelnut Sweet Lasagna, hazelnut spread, lasagna, Nutella .

Baklava Cake

Posted on July 22, 2017 Posted in Cakes .

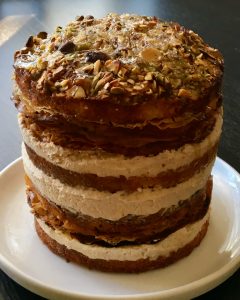
Baklava Cake

Baklava Cake Recipe

I’m quite the fan of baklava so it’s no surprise that one day I decided to ‘steal’ the flavors and some of the baking techniques to reproduce the treat into a cake version. The crunch of the filo works in perfect harmony with the velvet mascarpone cheese texture, while the syrup connects and amplifies the cake layers to a new level. When combined, the crunch, smoothness, sticky and fluffiness of textures all complement each other for a seriously satisfying dessert.

Thus here is my Baklava Cake recipe.


Ingredients:

Cake:

  • 250g butter
  • ½ tsn almond essence
  • 220g sugar
  • 4 eggs
  • 80ml cup milk
  • 225g self-raising flour
  • 60g ground almonds
  • 120g slivered almonds
  • 200g shelled pistachios

Syrup:

  • 290g sugar
  • 340ml water
  • 4 tsn honey
  • Lemon rind strip
  • 3 tbsn lemon juice
  • 3/4 tsn rosewater essence

Filling:

  • 450g mascarpone cheese
  • 1 tbsn honey
  • 1 tsn ground cinnamon
  • ½ ground cardomom

Filo Layers:

  • 70g pistachios
  • 2 tbsn sugar
  • 1 tsn cinnamon
  • ½ ground cardomom
  • 7 sheets filo
  • 80g butter


Method:

  1. Pre-heat the oven to 180c degrees and line 2 x 25cm cake tins with baking paper.
  2. With electric beaters beat the butter and sugar for 5 minutes or until light and fluffy.
  3. Add the eggs, one at a time beating in between each addition until well combined.
  4. Add the milk, sift in the flour and ground almonds. Fold together until combine.
  5. Spread the batter into the 2 prepared cake tins. 1 with 1/3rd of the mix and the 2nd tin with the remaining mix, flatten the tops with the back of a spoon.
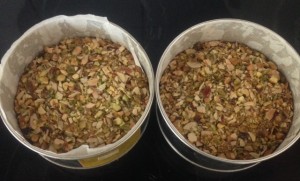
  6. Roughly chop up the nuts together and then sprinkle ontop of the cakes. Push the nuts softly with your hand to ensure they stick into the cake.
  7. Bake cakes for 35 minutes or until a skewer inserted in the center comes out clean. The larger cake will take longer (around 50 minutes).
  8. Leave the cooked cakes in the tins and reduce the oven temperature down to 160c degrees.
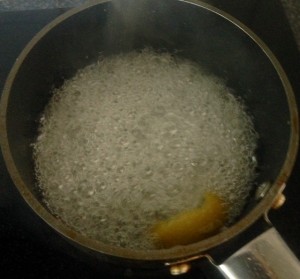
  9. To make the syrup place the sugar, water, honey and lemon strip into a saucepan and stir on medium heat until the mix boils.
  10. Continue boiling until the mix becomes thicker and syrupy.
  11. Take the syrup off the heat, remove the rind and add in the rosewater and lemon juice, stir to combine. Place 4 tbsn aside in a small bowl for the filling.
  12. With the cakes still in their tins use a skewer to poke holes in the top of the cakes.
  13. Pour the syrup over the cakes evenly, leaving them in the tins to cool completely.
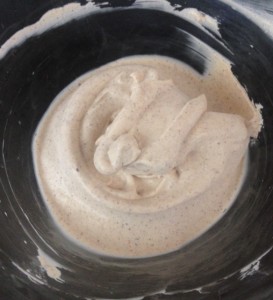
  14. Meanwhile make the filling by beating the cheese, honey, cinnamon and cardamom with the 4 tbsn of the left-over syrup with electric beaters until combine. Set aside.
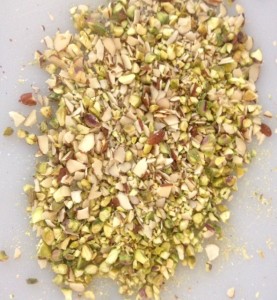
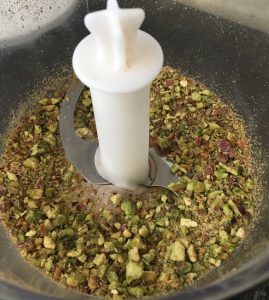
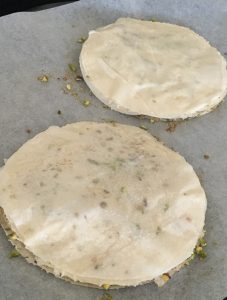
  15. To make the filo layer place the pistachios, sugar and spices into a food processor and blitz until finely chopped.
  16. Line a large baking tray with baking paper.
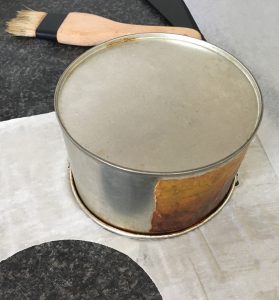
  17. Melt the butter and using a pastry brush brush some of the butter to cover 1 filo sheet.
  18. Using the cake tin as a guide place the tin on the buttered filo and cut around the tin, repeat with the leftover filo from your buttered sheets so you now have 2 circles from the 1 piece of filo.
  19. Place the 2 filo pieces onto the lined baking tray.
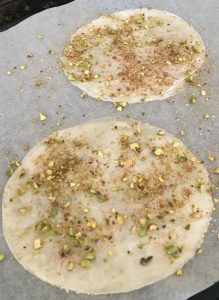
  20. Sprinkle 1 tsn of the nut mix over the buttered filo circles.
  21. Brush the butter onto a 2nd piece of filo and repeat the cutting of 2 circles.
  22. Add the 2 newly cut circle layers ontop of the filo circles on the tray and top with 1 tsn of nut mix.
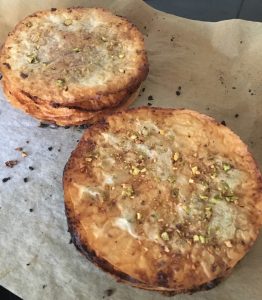
  23. Repeat the butter, nut, filo process until 7 sheets have been used and you have 2 filo stacks of 7 layers each.
  24. Bake the stacks in the oven for 15 minutes or until golden in colour, leave the tray aside to cool the stacks completely.
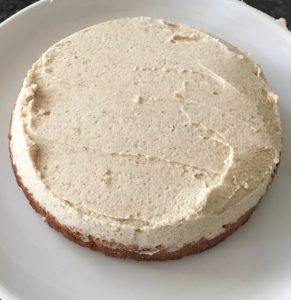
  25. Once the cakes have cooled place the smaller cake onto a plate (nut side up).
  26. Spread with ½ the cheese filling then place a filo stack on top.
  27. Cut the larger cake in half horizontally.
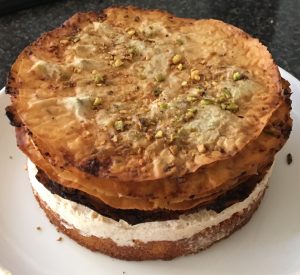
  28. Add a 2nd cake layer (the layer with no nuts) ontop of the filo, spread with the remaining filling and the remaining filo stack.
  29. Add the last (3rd) cake layer nut side up and enjoy.


Baklava Cake recipe

Step 6

Baklava Cake recipe

Step 7

Baklava Cake recipe

Step 10

Baklava Cake recipe

Step 14

Baklava Cake Recipe

Step 15

Baklava Cake Recipe

Step 18

Baklava Cake Recipe
Step 20
Baklava Cake Recipe

Step 23

Baklava Cake Recipe

Step 24

Baklava Cake Recipe

Step 26

Baklava Cake Recipe

Step 26


Like this recipe? Subscribe via RSS or email to get my new entries and more scrumptious recipes with reviews
Email, RSS Follow
Print
Leave a comment .
Tags: almonds, Baklava, Baklava Cake, cinnamon, cloves, nuts, pistachios .

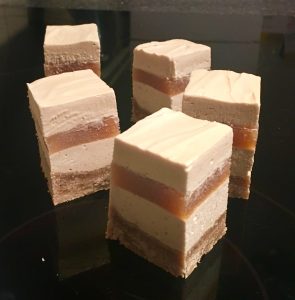
Apple Jelly and Peanut Oat Cheesecake Slice

Posted on July 15, 2017 Posted in Slice .

Apple Jelly and Peanut Oat Cheesecake Slice

Apple Jelly and Peanut Oat Cheesecake Slice recipe

Apple is a really interesting ingredient to bake with, it is actually quite a difficult ingredient to hero as a key flavor in desserts.

However, as I still have not accomplished a killed apple unusual treat I was determine to succeed in a bake thus hit the kitchen for some experimenting.

In my experimenting one combo I came up with that I thought would be the winner was the pecan lavender lemon and apple cake, however it was the flavor combo of cinnamon apple peanut oats and caramel that exceeded expectations.

After playing around with this flavor combo with different textures I ended up featuring the nuts oats and spice in a base for a crunch, created a peanut cheesecake for the filling, an apple jelly for an addition textural layer and caramel cream for indulgence.


Oat base:

  • 105g flour
  • 30g peanuts
  • 105g butter
  • 90g brown sugar
  • 60 oatbran
  • 1 + 1/2 tsn ground cinnamon

Peanut cheesecake:

  • 1 + 1/2 tsn gelatin
  • 2 tbsn water
  • 280g cream cheese
  • 75g brown sugar
  • 1 + 1/2 tsn vanilla
  • 210g peanut butter
  • 50ml cream

Apple jelly:

  • 350ml freshly squeezed apple juice
  • 75g brown sugar
  • 1 + 1/2 tsn lemon juice
  • 2 tsn gelatin

Cream:

  • 190ml thickened cream
  • 1 tsn ground cinnamon
  • 45g brown sugar


Method:

  1. Pre-heat the oven to 180c degrees and line a 30cm x 30cm slice tin with baking paper.
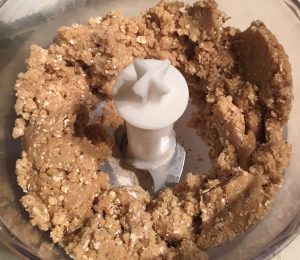
  2. Place all the base ingredients into a food processor and blitz until the mix is combine and balls up on the side of the mixer.
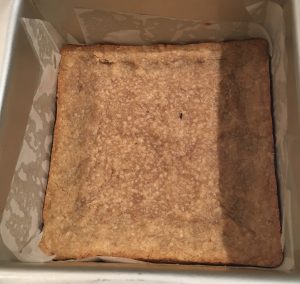
  3. Spoon the mix into the cake tin and using the back of a spoon flatten out for even coverage.
  4. Bake in the oven for 20 minutes or until the top is slightly golden, leave aside to cool completely.
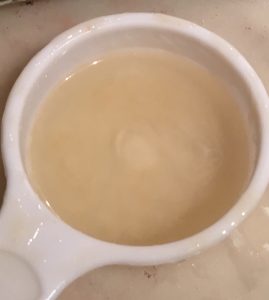
  5. Meanwhile make the cheesecake layer by placing the boiling water with the gelatin and whisking with a fork until dissolved.
  6. Place the gelatin mix, cream cheese, sugar, vanilla and peanut butter into a bowl and beat with electric beaters until fluffy and well combine.
  7. Add the cream to the mix and beat until just combine.
  8. Remove the cooled oat base layer and baking paper from the tin and spray the tin with oil spray.
  9. Cut 2mm off the base from 2 opposite sides.
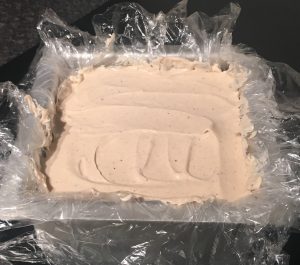
  10. Place 2 sheets of cling wrap over each other with the oat base layer in the center and lift the base back in the tin with the clingwrap overflowing the sides of the tin.
  11. Pour the cheesecake mix on top of the oat base layer and even the mix out with a spoon.
  12. Place the slice in the fridge for 1 hour to set.
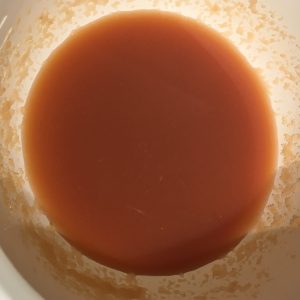
  13. To make the jelly add the freshly squeezed apple juice, sugar and lemon into a bowl and heat in the microwave until hot to touch.
  14. Add the gelatin to the apple mix and stir until the gelatin is dissolved, leave aside until cooled completely.
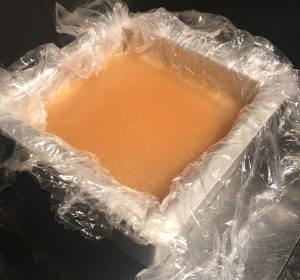
  15. Pour the apple mix over the cheesecake layer and leave in the fridge for 4 hours to set.
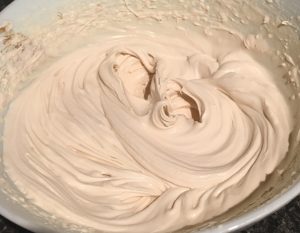
  16. Lastly, beat the cream, cinnamon and sugar until peaks form.
  17. Spread the cream over the set jelly layer and leave in the fridge for 1 hour.
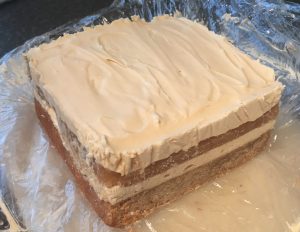
  18. To serve, pull the cling wrap up to lift the slice from the tin, remove the cling wrap and place the slice on a plate.
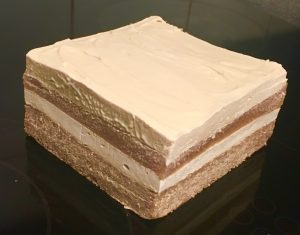
  19. Cut the slice into squares.


Apple Jelly and Peanut Oat Cheesecake Slice recipe
Step 2
Apple Jelly and Peanut Oat Cheesecake Slice recipe
Step 4
Apple Jelly and Peanut Oat Cheesecake Slice recipe
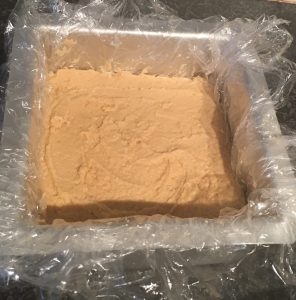
Step 5
Apple Jelly and Peanut Oat Cheesecake Slice recipe
Step 11
Apple Jelly and Peanut Oat Cheesecake Slice recipe
Step 14
Apple Jelly and Peanut Oat Cheesecake Slice recipe
Step 15
Apple Jelly and Peanut Oat Cheesecake Slice recipe
Step 16
Apple Jelly and Peanut Oat Cheesecake Slice recipe
Step 17
Apple Jelly and Peanut Oat Cheesecake Slice recipe
Step 18
Apple Jelly and Peanut Oat Cheesecake Slice recipe
Step 18

Like this recipe? Subscribe via RSS or email to get my new entries and more scrumptious recipes with reviews.

Email, RSS Follow
Print
Leave a comment .
Tags: apple, Apple Jelly and Peanut Oat Cheesecake Slice, cheesecake, jelly, oates, peanut, Peanutbutter .

Rainbow Paddle Pop Truffles

Posted on July 8, 2017 Posted in Truffles .

Rainbow Paddle Pop Truffles

4


This recipe is actually one that took quite a bit of research and took many attempts to get it tasting perfect. The challenge I set myself was to replicate the taste of a Rainbow flavored Paddle Pop ice-cream.

My first attempt was a cake, followed by a slice and then somehow I came up with the idea of making truffles.

The idea of replicating a Rainbow flavored Paddle Pop cake came recently realising that many people I know name the Rainbow Paddle Pop as their childhood favorite ice-cream treat. In particular the flavour, which being ‘rainbow’ is actually a research piece in itself.

In my research I came to understand that the flavour is actually a mix of caramel + a small touch of vanilla and a slight treacle hit…which is not an easy flavour to reproduce (hence all my failed attempts)!

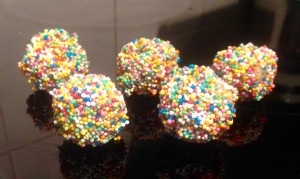
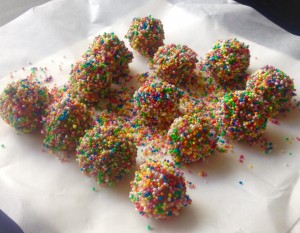
As the rainbow colour was hard to produce in a truffle (completely easy in the cake version), I decided to give the truffles their famous colours through the use of 100’s & 1000’s.

I encourage you to eat a rainbow paddle pop, then one of these truffles and you be the judge!


Ingredients:

  • 100g brown sugar
  • 60g butter
  • 200g sweetened condensed milk
  • 30g liquid glucose
  • 20g golden syrup
  • 100g white chocolate
  • 100g plain sweet biscuits (I used Marie)
  • 1 egg
  • 150g 100’s & 1000’s


Method:

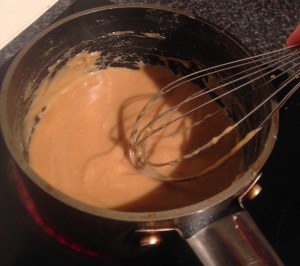
  1. Place the sugar, butter, milk, glucose, golden syrup and chocolate in saucepan on medium heat on the stove.
  2. Using a hand whisk mix the ingredients until well combine and boiling.
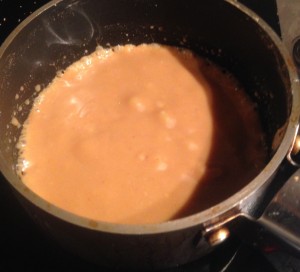
  3. Reduce the temperature to low/medium until the mix thickens, then remove the saucepan off the heat.
  4. Place the biscuits in a food processor and blitz until the mix resembles fine breadcrumbs.
  5. Add the biscuit mix into the caramel mix and stir until well combine, place the mix into a clean bowl and into the fridge 20 minutes or until cold.
  6. Pour half the 100’s & 1000’s into a bowl.
  7. Place the egg whites in another bowl and beat with a hand whisk for 30 seconds.
  8. Using your hands roll the caramel mix into 20g sized balls.
  9. One at a time place the truffles into the eggwhites until completely coated, then followed by placing into the 100’s & 1000’s bowl.
  10. Shake the bowl to cover the truffle completely in the 100’s & 1000’s, and then place on a plate. Continue with half the truffles.
  11. Disregarded the 100’s & 1000’s in the bowl and pour in the fresh remaining (the old 100’s & 1000’s will be much less effective if you continue with not renewing them).
  12. Continue with remaining truffles of egg and 100’s & 1000’s.
  13. Place the plate in the fridge to set for 1 hour, enjoy.


Notes:

  • Don’t worry if you caramelize some of the mix slightly too much on the bottom of the saucepan. The biscuits and 100’s & 1000’s will cover this up for you.


Rainbow Paddle Pop Truffles recipe.

Step 2

Rainbow Paddle Pop Truffles recipe

Step 3

Rainbow Paddle Pop Truffles recipe

Step 12


Like this recipe? Subscribe via RSS or email to get my new entries and more scrumptious recipes with reviews.

Email, RSS Follow
Print
Leave a comment .
Tags: Paddle Pop, Rainbow Paddle Pop, Rainbow Paddle Pop Truffles, Truffles .

Watermelon Daiquiri Cake with Ermine Frosting

Posted on July 1, 2017 Posted in Cakes .

Watermelon Daiquiri Cake with Ermine Frosting

Watermelon Daiquiri Cake with Ermine Frosting

Ermine frosting has recently peaked my interest. Also known as Butter Roux frosting, this old fashion icing was commonly used in the 19th century as a staple icing (these days we would opt for cream cheese frosting over ermine).

Therefore I started experimenting with cakes that I thought would be a great basis for this frosting to be featured in.

Being a Sunday morning and having cocktails the night before I took inspiration from a few of my favs.

Out of this my days experimenting the watermelon daiquiri cake was born. To really connect the icing with the cake I replaced some of the milk with rum to make the daiquiri shine.

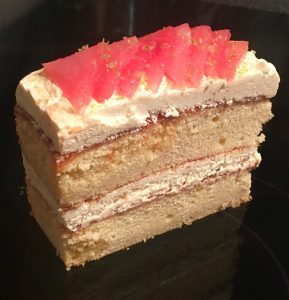
The outcome, a lovely luscious lime cake with a beautifully moreish watermelon syrup topped with rum inspired ermine.


Ingredients:

Cake:

  • 90g butter, room temperature
  • 1/2 tsn vanilla essence
  • 2 tsn lime zest
  • 1 tsn orange zest
  • 110g caster sugar
  • 2 eggs
  • 150g self-raising flour
  • 20ml milk
  • 30ml lime juice

Watermelon syrup:

  • 900g watermelon flesh
  • 80g sugar

Frosting:

  • 15g flour
  • 70ml milk
  • 30ml rum
  • 90g butter
  • 100g sugar


Method:

  1. Pre-heat the oven to 175c degrees and line 2 15cmx30cm cake tins with baking paper.
  2. Place the butter, vanilla, zest and sugar in a bowl and beat with electric beaters for 2 minutes or until this mix is light and fluffy.
  3. Add the eggs one at a time, beating in between each addition until well combine.
  4. Add the flour, milk and juice and beat on low until just combine.
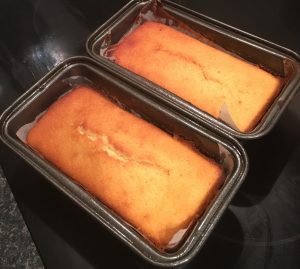
  5. Pour the mix into the cake tins evenly and bake for 45 minutes or until a skewer inserted into the cakes comes out clean, leave aside in the tin.
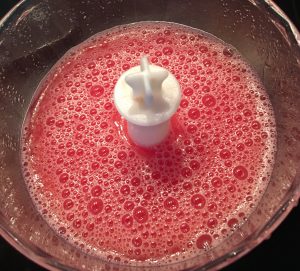
  6. Meanwhile, to make the syrup blitz 900g of watermelon flesh in a food processor.
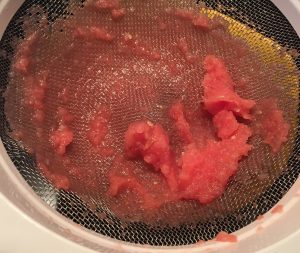
  7. Pass the watermelon juice through a sieve and place into a saucepan.
  8. Place the saucepan on a medium heat and simmer until it reduces to 220ml.
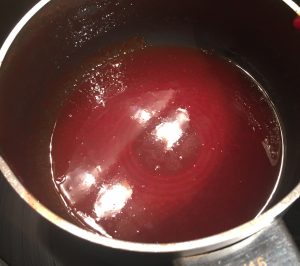
  9. Add the 80g of sugar to the watermelon syrup and cook on a high heat until the mix resembles a syrupy consistency (180ml in total).
  10. Poke holes in the cooled cakes with a skewer then pour the syrup over the top of the cakes evenly, leave aside for 1 hour for the syrup to soak through the cakes.
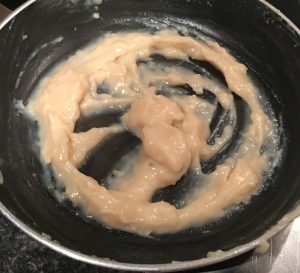
  11. Meanwhile make the icing by placing the flour, milk and rum in a saucepan and whisk with a hand whisk on a medium heat until a thick paste forms, take off the heat and leave aside until cooled.
  12. Place the butter and sugar into a bowl and beat with electric beaters until the mix is fluffy and smooth.
  13. Add the rum flour mix to the butter mix and beat until creamy and well combine.
  14. To assemble the cake, place one layer of cake onto a plate, syrup side up.
  15. Top with half of the icing, top with the second cake layer syrup side up.
  16. Finish with the remaining icing and some pieces of fresh watermelon.
  17. Enjoy.


Watermelon Daiquiri Cake with Ermine Frosting
Step 6
Watermelon Daiquiri Cake with Ermine Frosting

Step 7

Watermelon Daiquiri Cake with Ermine Frosting
Step 9

Watermelon Daiquiri Cake with Ermine Frosting

Step 10
Watermelon Daiquiri Cake with Ermine Frosting
Step 11


Like this recipe? Subscribe via RSS or email to get my new entries and more scrumptious recipes with reviews.

Email, RSS Follow
Print
Leave a comment .
Tags: cocktail, daiquiri, ermine, ermine frosting, lime, orange, rum, watermelon, Watermelon Daiquiri Cake with Ermine Frosting .

Pages

  • About Me
  • Baking Metrics
  • Blogroll
  • Common Baking Questions
  • Recipe Index
  • Tips & Tricks
  • Contact

Archives

  • February 2022
  • October 2021
  • September 2021
  • August 2021
  • April 2021
  • February 2021
  • January 2021
  • December 2020
  • November 2020
  • October 2020
  • September 2020
  • August 2020
  • July 2020
  • June 2020
  • May 2020
  • September 2019
  • June 2019
  • May 2019
  • April 2019
  • March 2019
  • February 2019
  • January 2019
  • December 2018
  • November 2018
  • October 2018
  • September 2018
  • August 2018
  • July 2018
  • June 2018
  • May 2018
  • April 2018
  • March 2018
  • February 2018
  • January 2018
  • December 2017
  • November 2017
  • October 2017
  • September 2017
  • August 2017
  • July 2017
  • June 2017
  • May 2017
  • April 2017
  • March 2017
  • February 2017
  • January 2017
  • December 2016
  • November 2016
  • October 2016
  • September 2016
  • August 2016
  • July 2016
  • June 2016
  • May 2016
  • April 2016
  • March 2016
  • February 2016
  • January 2016
  • December 2015
  • November 2015
  • October 2015
  • September 2015
  • August 2015
  • July 2015
  • June 2015
  • May 2015
  • April 2015
  • March 2015
  • February 2015
  • January 2015
  • December 2014
  • November 2014
  • October 2014
  • September 2014
  • August 2014
  • July 2014
  • June 2014
  • May 2014
  • April 2014
  • March 2014
  • February 2014
  • January 2014
  • December 2013

Categories

  • America (5)
  • Arabic (1)
  • Australian (2)
  • Biscuits (24)
  • Brazil (1)
  • Bread (12)
  • Brownies (5)
  • Cakes (141)
  • Croatian (1)
  • Cupcakes (20)
  • Custard (1)
  • Doughnuts (6)
  • Flan (1)
  • France (5)
  • Fudge (3)
  • German (1)
  • Greece (2)
  • Hungary (1)
  • Ice-cream & Sorbet (15)
  • Ice-cream cake (6)
  • Icing (18)
  • Italy (4)
  • Jam (1)
  • Jamaican (1)
  • Lebanese (1)
  • Marshmallows (2)
  • Mexican (1)
  • Morocco (1)
  • Mousse (2)
  • Muffins (1)
  • Panna Cotta (1)
  • Pastries (2)
  • Pies (7)
  • Portugal (1)
  • Pudding (12)
  • Roulade (1)
  • Russia (1)
  • Slice (27)
  • Souffle (1)
  • Sweden (1)
  • Swedish (1)
  • Syrup (1)
  • Tarts (13)
  • Traditional (17)
  • Trifile (1)
  • Truffles (5)
  • Turkey (1)
  • Uncategorized (1)
  • Unique (10)

WordPress

  • Register
  • Log in
  • WordPress

Subscribe

  • Entries (RSS)
  • Comments (RSS)

CyberChimps WordPress Themes

© Sweet Tooth Experiments