Sweet Tooth Experiments

  • About Me
  • Recipe Index
  • Baking Metrics
  • Tips & Tricks
  • Common Baking Questions
  • Contact

Monthly Archives: September 2020

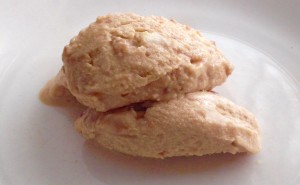
Boozy Butterscotch Caramel and Peanut Ice-Cream
Posted on September 26, 2020 Posted in Ice-cream & Sorbet .

Boozy Butterscotch Caramel and Peanut Ice-Cream

4

This is such an interesting recipe to me as it was one of my more colorful experiment sessions. So this recipe came from me creating a butterscotch and caramel layer cake with a peanut ice-cream filling. I should have known that adding the ice-cream layer to a cake would mean I would need to freeze the cake in its entirety and that cutting the cake would mean the ice-cream filling would flow out the sides!

The solution to this is to make a sponge cake, but of course by the time I realized this I had already baked the cake!

So what to do? I really liked the ice-cream filling I created so I added some caramel and a few other little layers to turn it from nice to “pow exciting”!

Next a bit of a controversial move, based on recent recipe requests I wanted to make the recipe quick and super easy, so…replaced homemade ice-cream with store brought.

Ingredients:

  • 650g vanilla ice-cream
  • 160g brown sugar
  • 70g peanuts, chopped
  • 120g peanut butter
  • 170ml butterscotch schnapps
  • 20g butter
  • 35ml thickened cream


Method:

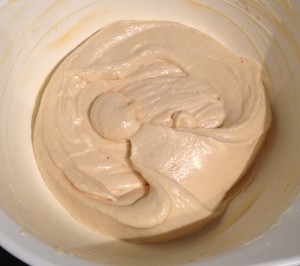
  1. Put the ice-cream in a bowl and place onto the microwave for 30 seconds or until the mix just softens slightly.
  2. Place the peanut butter in the microwave for 30 seconds or until liquid consistency is achieved.
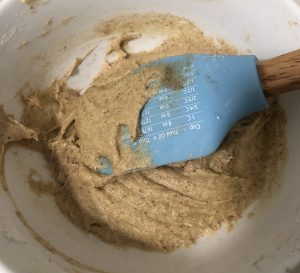
  3. Add 30g of brown sugar, 50g of the chopped peanuts, peanut butter and butterscotch schnapps to the ice-cream and using a hand whisk beat until combine.
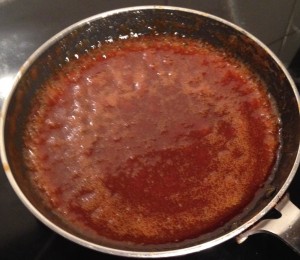
  4. Place the remaining 130g brown sugar into a saucepan on high until the sugar has melted and bubbling.
  5. Take off the heat and add the butter, stirring with a whisk until combine.
  6. Add the cream and whisk with a hand whisk until the mix is smooth and glossy.
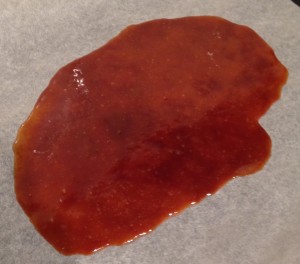
  7. Pour the mix onto baking paper until cooled then in the freezer for 10 minutes to harden completely.
  8. Break up the hardened caramel into small pieces and place into the mix, leaving 1/5th aside.
  9. Whisk the caramel pieces into the ice-cream mix until combine.
  10. Pour the ice-cream into a bowl and place into the freezer for 4 hours or until completely set.
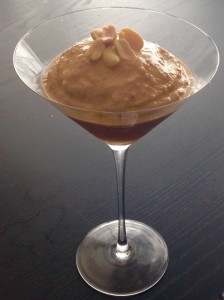
  11. To serve scoop the ice-cream out into 4 cocktail glasses and top with the remaining 20g of chopped peanuts and caramel pieces.


Notes:

  • You can also serve with a caramel or peanut flavored sweet thin biscuit or wafer.
1

Step 1

3

Step 4

2

Step 7

5

Step 11


Like this recipe? Subscribe via RSS or email to get my new entries and more scrumptious recipes with reviews

Email, RSS Follow
Print
Leave a comment .
Tags: butterscotch, Butterscotch Caramel and Peanut Ice-Cream, Butterscotch Schnapps, caramel, ice-cream, peanut, peanut butter .

Spiced Golden Syrup Orange Upside-down Cake

Posted on September 12, 2020 Posted in Cakes .

Spiced Golden Syrup Orange Upside-down Cake

Spiced Golden Syrup Orange Upside-down Cake recipe

I’m told this Cake taste like ‘Christmas’, though I think it’s just the cardamom, cinnamon and orange combo that gives off this flavour experience.

So I made golden syrup dumplings the other day in which got me thinking that I should make something with the golden syrup otherwise I knew I would end up in the habit of adding it to my porridge just because I knew it was there….

I played around with varying spices and fruits until I landed on cinnamon and orange with the syrup. A pinch of cardamom, in which is super tasty with oranges and brown sugar to complement the golden syrup and a new upside-down cake batter was formed. To really hero the golden syrup and orange I decided on an upside down cake as the golden syrup would then provide a decedent sauce texture, almost pudding like when combined with the orange segments.

An easy, tasty cake that is a dream served warm with cream or ice-cream.

Ingredients:

Oranges:

  • 2 oranges
  • 250g golden Syrup
  • 20g butter


Batter:

  • 125g butter, softened
  • 50g brown sugar
  • 3 eggs
  • 30g golden syrup
  • 1 tsn ground cinnamon
  • 1/6th tsn ground cardamom
  • 2 tbsn milk
  • 1 cup self raising flour

Extra:

  • 40g golden syrup
  • Cream or ice cream to serve


Method:

  1. Pre-heat the oven to 180c degrees and line a 30cm cake tin with baking paper.
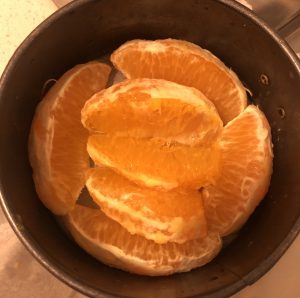
  2. Melt the butter in the microwave, once melted add the golden syrup and the orange peeled and cut into segments, stir and leave aside.
  3. To make the cake batter place the butter and sugar in a bowl and beat with electric beaters for 5 minutes or until light and creamy.
  4. Add the eggs, one at a time, beating in between each addition.
  5. Add the golden syrup and spices and beat until combined.
  6. Add the milk and flour and beat on low for 1 minute until the mix is combined.
  7. Fan the orange pieces in the base of the cake tin to make an even covered layer.
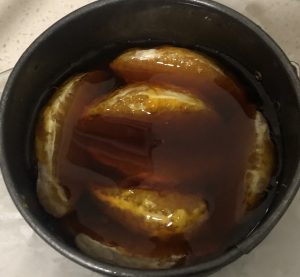
  8. Pour the syrup mix over the orange segments until each are covered and the mix is used up.
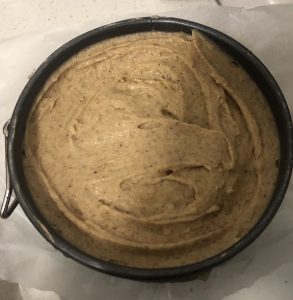
  9. Spoon the cake batter over the oranges and syrup until the batter completely covers the orange and smooth the top with the back of a spoon.
  10. Bake in the oven for 30 minutes or until a skewer inserted in the middle comes out clean.
  11. Leave the tin for 5 minutes.
  12. Turn the tin upside-down onto a plate, pouring extra syrup over the top of the cake.
  13. Serve warm with cream or ice-cream on the side and enjoy.


Spiced Golden Syrup Orange Upside-down Cake recipe

Step 6


Spiced Golden Syrup Orange Upside-down Cake recipe

Step 7


Spiced Golden Syrup Orange Upside-down Cake recipe

Step 8


Spiced Golden Syrup Orange Upside-down Cake recipe

Step 9

Email, RSS Follow
Print
Leave a comment .
Tags: cardamon, cinnamon, golden syrup, oranges, Spiced Golden Syrup Orange Upside-down Cake .

Peanut Brittle and Chocolate Ice-Cream Sandwich

Posted on September 5, 2020 Posted in Ice-cream & Sorbet, Ice-cream cake .

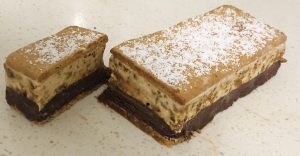
I recently was experimenting with peanut brittle and ended up with a LOT of brittle and not much to do with the excess. Usually I would take it to work but with my working from home scenario all the brittle was not leaving the house. So, I decided to make up a recipe that featured the brittle. With my recent ice-cream experimenting trend, ice-cream was on my mind, but I didn’t want to have too many steps to the recipe, I wanted to make it simple easy, scrumptious and quick prep time.

I did make a biscuit base for this recipe but to be honest a store brough base is completely fine as this recipe is all about the brittle.

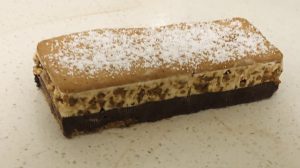
I wanted to make somewhat of a “Maxibon vs. Eskimo Pie” that had complementary layers and textures.

As my favorited flavour in the world is chocolate of course I had to build this layer into the mix and presto a new recipe was born.

Ingredience:

  • 1 cup caster sugar
  • ¼ cup water
  • 1 cup peanuts, chopped salted and toasted
  • 40g butter
  • 1 tsn baking soda
  • 500g vanilla ice-cream, softened
  • ¼ cup cocoa powder
  • Sponge cake, plain store brought

Extra

  • Chocolate ganache
  • Icing sugar


Method:

  1. Line a tray with baking paper.
  2. Place the sugar and water in a saucepan, stirring on a low heat until the sugar has dissolved.
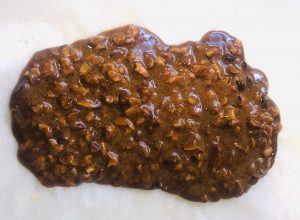
  3. Turn the heat to high, add the nuts and allow the mix to boil until it reaches 110c degrees on a candy thermometer or begins to turn golden.
  4. Take the nut toffee off the heat and stir in the butter and soda.
  5. Pour the mix into the prepared baking paper and allow to completely cool.
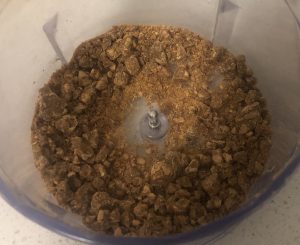
  6. Break the brittle into pieces and place in a food processor, pulsing until they resemble small pieces.
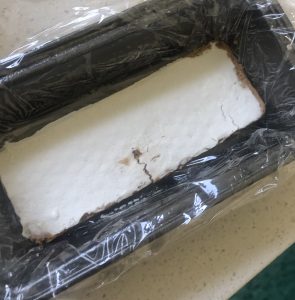
  7. Spray a 10cm x 15cm cake tin with oil spray and then line the tin with 2 layers of clingwrap.
  8. Cut a 2 x 1cm layers of sponge cake the same size as the cake tin’s base.
  9. Place one sponge layer in the bottom of the tin.
  10. Stir the peanut mix into 250ml of the ice-cream until well combined.
  11. Spoon the peanut ice-cream mix on top of the sponge and even with the back of a spoon.
  12. Place the tin in the freezer to firm.
  13. Meanwhile stir the cocoa powder with the remaining 250ml ice-cream.
  14. Spoon the chocolate ice-cream over the top of the peanut ice-cream and even with the back of a spoon in the tin.
  15. Top the chocolate ice-cream with the 2nd layer of sponge, gently pushing down with your fingertips.
  16. Place the cake in the freezer to completely set (4+ hours, overnight ideal).
  17. To serve, pull the plastic wrap to release the cake from the tin and place onto a cutting board.
  18. Trim the cake slightly on all 4 sides if needed to ensure a clean straight cake.
  19. Place the cake onto a plate, dust with icing sugar and a drizzle of chocolate ganache if desired.
  20. Cut into sliced and serve.

Note: Sponge cake OR as I have used a tin sized biscuit can be used as the top and bottom of the ice-cream sandwich.


Peanut Brittle and chocolate ice-cream sandwich recipe

Step 3


Peanut Brittle and chocolate ice-cream sandwich recipe

Step 5


Peanut Brittle and chocolate ice-cream sandwich recipe

Step 6


Peanut Brittle and chocolate ice-cream sandwich recipe

Step 7


Peanut Brittle and chocolate ice-cream sandwich recipe

Step 8


Peanut Brittle and chocolate ice-cream sandwich recipe

Step 13

Peanut Brittle and chocolate ice-cream sandwich recipe

Step 14


Step 15

Email, RSS Follow
Print
Leave a comment .
Tags: biscuit, chocolate, peanut brittle, Peanut Brittle and Chocolate Ice-Cream Sandwich, sponge .

Pages

  • About Me
  • Baking Metrics
  • Blogroll
  • Common Baking Questions
  • Recipe Index
  • Tips & Tricks
  • Contact

Archives

  • February 2022
  • October 2021
  • September 2021
  • August 2021
  • April 2021
  • February 2021
  • January 2021
  • December 2020
  • November 2020
  • October 2020
  • September 2020
  • August 2020
  • July 2020
  • June 2020
  • May 2020
  • September 2019
  • June 2019
  • May 2019
  • April 2019
  • March 2019
  • February 2019
  • January 2019
  • December 2018
  • November 2018
  • October 2018
  • September 2018
  • August 2018
  • July 2018
  • June 2018
  • May 2018
  • April 2018
  • March 2018
  • February 2018
  • January 2018
  • December 2017
  • November 2017
  • October 2017
  • September 2017
  • August 2017
  • July 2017
  • June 2017
  • May 2017
  • April 2017
  • March 2017
  • February 2017
  • January 2017
  • December 2016
  • November 2016
  • October 2016
  • September 2016
  • August 2016
  • July 2016
  • June 2016
  • May 2016
  • April 2016
  • March 2016
  • February 2016
  • January 2016
  • December 2015
  • November 2015
  • October 2015
  • September 2015
  • August 2015
  • July 2015
  • June 2015
  • May 2015
  • April 2015
  • March 2015
  • February 2015
  • January 2015
  • December 2014
  • November 2014
  • October 2014
  • September 2014
  • August 2014
  • July 2014
  • June 2014
  • May 2014
  • April 2014
  • March 2014
  • February 2014
  • January 2014
  • December 2013

Categories

  • America (5)
  • Arabic (1)
  • Australian (2)
  • Biscuits (24)
  • Brazil (1)
  • Bread (12)
  • Brownies (5)
  • Cakes (141)
  • Croatian (1)
  • Cupcakes (20)
  • Custard (1)
  • Doughnuts (6)
  • Flan (1)
  • France (5)
  • Fudge (3)
  • German (1)
  • Greece (2)
  • Hungary (1)
  • Ice-cream & Sorbet (15)
  • Ice-cream cake (6)
  • Icing (18)
  • Italy (4)
  • Jam (1)
  • Jamaican (1)
  • Lebanese (1)
  • Marshmallows (2)
  • Mexican (1)
  • Morocco (1)
  • Mousse (2)
  • Muffins (1)
  • Panna Cotta (1)
  • Pastries (2)
  • Pies (7)
  • Portugal (1)
  • Pudding (12)
  • Roulade (1)
  • Russia (1)
  • Slice (27)
  • Souffle (1)
  • Sweden (1)
  • Swedish (1)
  • Syrup (1)
  • Tarts (13)
  • Traditional (17)
  • Trifile (1)
  • Truffles (5)
  • Turkey (1)
  • Uncategorized (1)
  • Unique (10)

WordPress

  • Register
  • Log in
  • WordPress

Subscribe

  • Entries (RSS)
  • Comments (RSS)

CyberChimps WordPress Themes

© Sweet Tooth Experiments