Sweet Tooth Experiments

  • About Me
  • Recipe Index
  • Baking Metrics
  • Tips & Tricks
  • Common Baking Questions
  • Contact

Tag Archives: peanut butter

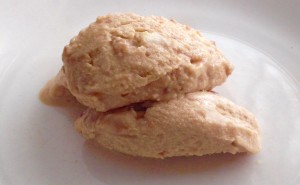
Boozy Butterscotch Caramel and Peanut Ice-Cream
Posted on September 26, 2020 Posted in Ice-cream & Sorbet .

Boozy Butterscotch Caramel and Peanut Ice-Cream

4

This is such an interesting recipe to me as it was one of my more colorful experiment sessions. So this recipe came from me creating a butterscotch and caramel layer cake with a peanut ice-cream filling. I should have known that adding the ice-cream layer to a cake would mean I would need to freeze the cake in its entirety and that cutting the cake would mean the ice-cream filling would flow out the sides!

The solution to this is to make a sponge cake, but of course by the time I realized this I had already baked the cake!

So what to do? I really liked the ice-cream filling I created so I added some caramel and a few other little layers to turn it from nice to “pow exciting”!

Next a bit of a controversial move, based on recent recipe requests I wanted to make the recipe quick and super easy, so…replaced homemade ice-cream with store brought.

Ingredients:

  • 650g vanilla ice-cream
  • 160g brown sugar
  • 70g peanuts, chopped
  • 120g peanut butter
  • 170ml butterscotch schnapps
  • 20g butter
  • 35ml thickened cream


Method:

  1. Put the ice-cream in a bowl and place onto the microwave for 30 seconds or until the mix just softens slightly.
  2. Place the peanut butter in the microwave for 30 seconds or until liquid consistency is achieved.
  3. Add 30g of brown sugar, 50g of the chopped peanuts, peanut butter and butterscotch schnapps to the ice-cream and using a hand whisk beat until combine.
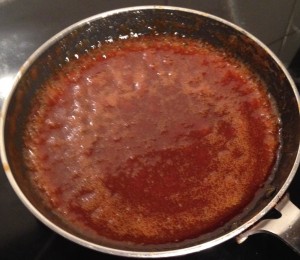
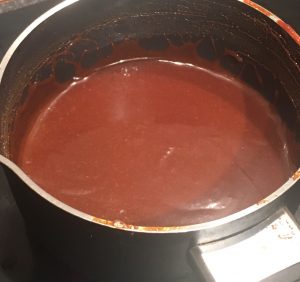
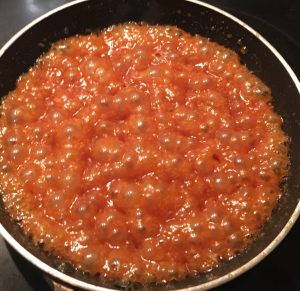
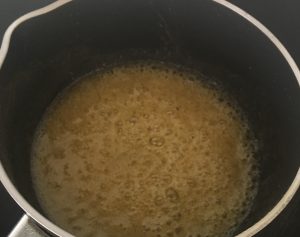
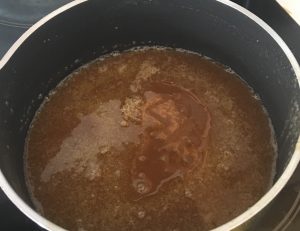
  4. Place the remaining 130g brown sugar into a saucepan on high until the sugar has melted and bubbling.
  5. Take off the heat and add the butter, stirring with a whisk until combine.
  6. Add the cream and whisk with a hand whisk until the mix is smooth and glossy.
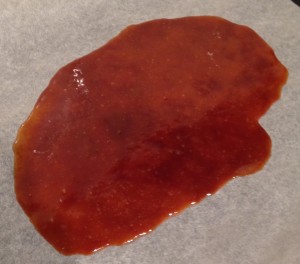
  7. Pour the mix onto baking paper until cooled then in the freezer for 10 minutes to harden completely.
  8. Break up the hardened caramel into small pieces and place into the mix, leaving 1/5th aside.
  9. Whisk the caramel pieces into the ice-cream mix until combine.
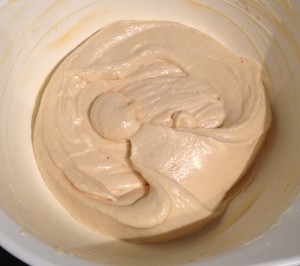
  10. Pour the ice-cream into a bowl and place into the freezer for 4 hours or until completely set.
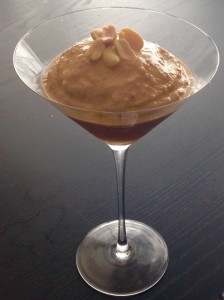
  11. To serve scoop the ice-cream out into 4 cocktail glasses and top with the remaining 20g of chopped peanuts and caramel pieces.


Notes:

  • You can also serve with a caramel or peanut flavored sweet thin biscuit or wafer.
1

Step 1

3

Step 4

2

Step 7

5

Step 11


Like this recipe? Subscribe via RSS or email to get my new entries and more scrumptious recipes with reviews

Email, RSS Follow
Print
Leave a comment .
Tags: butterscotch, Butterscotch Caramel and Peanut Ice-Cream, Butterscotch Schnapps, caramel, ice-cream, peanut, peanut butter .

Knickerbocker Glory Cake

Posted on August 1, 2020 Posted in Cakes .

Knickerbocker Glory Cake

Knickerbocker Glory Cake recipe

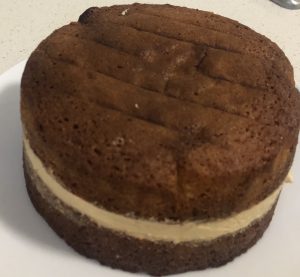
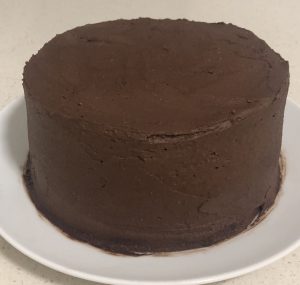
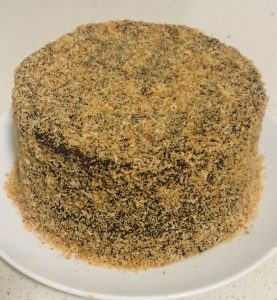
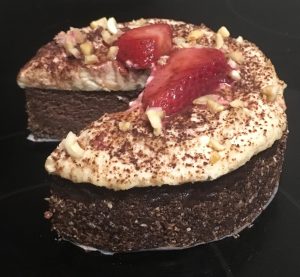
Inspired by trying my first knickerbocker glory I loved the element of the variations of textures and flavour layers, therefore decided to turn the layered ice cream sundae dessert into a cake. This dessert if you’re not familiar with it is served in a large tall glass like you would see of milkshakes in the 1970’s. However unlike a milkshake this dessert traditionally contain ice cream, cream, fruit, and meringue.

Since its conception on 1920 there have been multiple adaptations and varying flavour inclusions, however this cake recipe I have invented is made off my favourite knickerbocker glory ingredient adaptions, being; Peanuts, strawberry, chocolate, coconut and vanilla.

Strawberry and vanilla as the base allows the mix of amazing flavours to bounce off and complement each other, producing a delectable taste.


Ingredients:

Cake:

  • 215g butter, softened
  • 180g caster sugar
  • 1 tsn vanilla essence
  • 1/2 tsn strawberry essence
  • 3 eggs
  • 320g strawberry jam
  • 320g self-rising flour

Peanut Icing:

  • 30g butter, softened
  • ¼ cup peanut butter
  • 1 cup icing sugar
  • 10ml milk

Chocolate Icing:

  • 150g butter, softened
  • 1 cup icing sugar
  • 30g cocoa powder
  • 10ml milk

Extras:

  • 30g desiccated coconut, roasted
  • 40g chopped peanuts, roasted


Method:

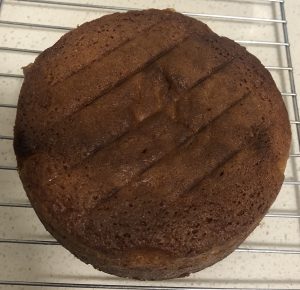
  1. Preheat oven to 180c degrees and line a 30cm cake tin with baking paper.
  2. Beat butter, vanilla essence, strawberry essence and sugar for 5 minutes or until creamy and pale with electric beaters.
  3. Add the eggs one at a time, beating in between each addition.
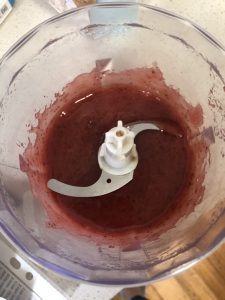
  4. Puree the jam in a food processor until smooth, leave aside.
  5. Sieve the flour into the butter mix along with the strawberry jam puree. Beat with electric beats until just combine.
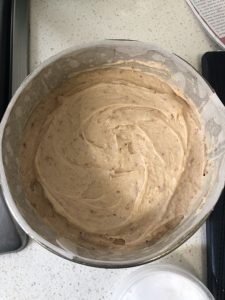
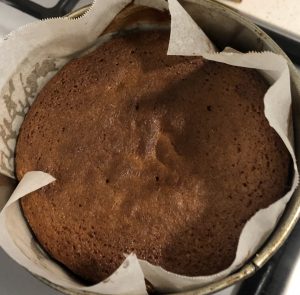
  6. Pour the mix into the prepared cake tin and bake in the oven for 45 minutes or until a skewer inserted into the centre comes out clean.
  7. Wait 5 minutes, then invert the cake onto a cake tray to cool completely.
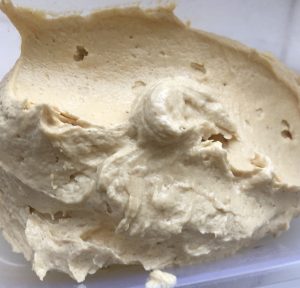
  8. Meanwhile make the peanut icing but placing all the ingredients on a bowl and beat with electric beaters until pale, set aside.
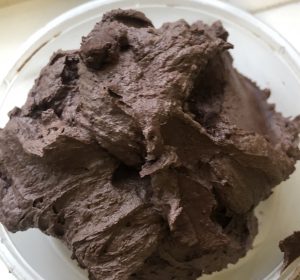
  9. In another bowl beat the chocolate icing ingredients until pale, light and fluffy.
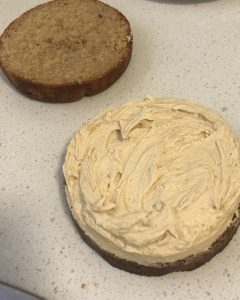
  10. Cut the cake in half horizontally.
  11. Spread the peanut icing on the bottom cake layer and place the 2nd layer on top.
  12.  Spread the chocolate icing on the top cake layer and sides.
  13. Sprinkle with roasted coconut on the sides of the cake as well as roasted peanuts – serve and enjoy.


Pink Strawberry Almond Cake with Rosé Frosting

Step 3


Pink Strawberry Almond Cake with Rosé Frosting

Step 4


Pink Strawberry Almond Cake with Rosé Frosting

Step 6


Knickerbocker Glory Cake recipe

Step 6


Knickerbocker Glory Cake recipe

Step 7


Knickerbocker Glory Cake recipe

Step 8


Knickerbocker Glory Cake recipe

Step 9


Knickerbocker Glory Cake recipe

Step 10


Knickerbocker Glory Cake recipe

Step 11


Knickerbocker Glory Cake recipe

Step 12


Knickerbocker Glory Cake recipe

Step 13


Email, RSS Follow
Print
Leave a comment .
Tags: chocolate, coconut, Knickerbocker Glory, Knickerbocker Glory Cake, peanut, peanut butter, strawberries, strawberry, vanilla .

Quinoa Honey and Peanut Butter Biscuits

Posted on January 5, 2019 Posted in Biscuits .

Quinoa Honey and Peanut Butter Biscuits

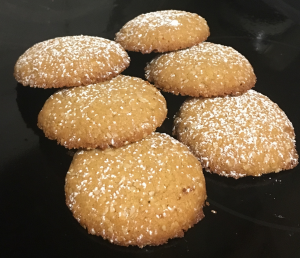
Quinoa Honey and Peanut Butter Cookies

In an attempt to eat gluten free, I brought a packet of quinoa flakes to use as a rolled oat substitute for my porridge. As much as the substitute seemed consistent with rolled oats I didn’t fall in love with the texture.

So, after opting back to oats I had a half full packet of quinoa flakes that I didn’t want to waste.

The solution? Get experimenting. I figured if the flakes were mostly used as an oat substitute I could bake with them just like I do with other cereal ingredients.

Knowing this ingredient pairs well with common breakfast flavors I played around with a few flavour combos before I landed on honey and peanut butter.

These 2 ingredients go so well together and using the quinoa flakes as a base biscuit ingredient went just as well as oat bran, flour or oats do.

To keep with the gluten free theme, I used rice flour instead of the usual wheat flour for gluten free friendly biscuit-y goodness.

I had low expectations for this treat and to be honest was blown away by how tasty it is.


Ingredients:

  • 55g brown sugar
  • 80g butter
  • 110g honey
  • 90g peanut butter
  • 1 tsn vanilla essence
  • 200g rice flour
  • 1 tsn baking power
  • ¼ tsn salt
  • 110g quinoa flakes


Method:

  1. Preheat the oven to 180c degrees and line 2 large baking trays with baking paper.
  2. Place the sugar, butter, honey, peanut butter and vanilla into a saucepan on a medium heat.
  3. Stir until the mix is well combined, silky and bubbling on the sides of the pan. Set aside to cool slightly.
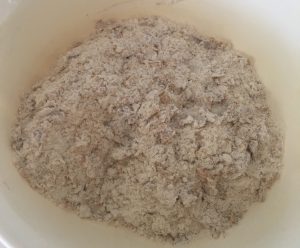
  4. Sieve the flour, powder and salt into a bowl and add the quinoa flakes, stir.
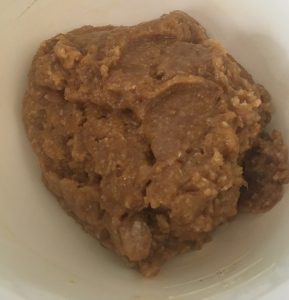
  5. Pour the butter mix over the dry mix and stir until well combined.
  6. Put the bowl of the biscuit mix into the fridge for 30 minutes to cool and slightly harden.
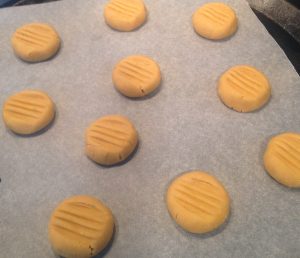
  7. Next roll the cooled dough into balls 30g in size and place onto the trays.
  8. Using a fork push the balls in the center to flatten.
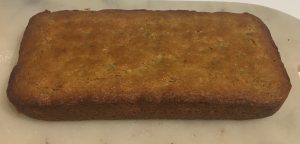
  9. Place the trays in the oven to bake for 15 minutes or until the biscuits are golden brown in colour – leave the biscuits on the tray to completely cool.
  10. Enjoy!


Golden Syrup Pecan and Caramel Mini Cheese Cakes recipe

Step 2


Grape Jelly Melting Moments recipe

Step 8


Like this recipe? Subscribe via RSS or email to get my new entries and more scrumptious recipes with reviews

Email, RSS Follow
Print
Leave a comment .
Tags: gluten free, honey, peanut butter, quinoa, Quinoa Honey and Peanut Butter Biscuits, Rice, rice flour .

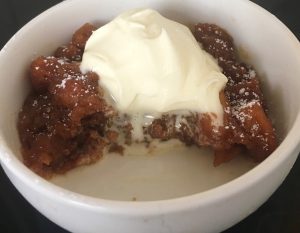
Caramel Butterscotch Schnapps and Peanut Butter Bread Pudding

Posted on February 24, 2018 Posted in Pudding .

Caramel Butterscotch Schnapps and Peanut Butter Bread Pudding

Caramel Butterscotch Schnapps and Peanut Butter Bread Pudding recipe

I recently made an ice-cream that featured the flavor combo of caramel sauce, butterscotch and peanuts in which was a tasty explosion success.

To give this flavor combo a spin and an uncommon depth I opted to experiment with the combo via making a slice, tart, flan and pudding. The winner, by far the pudding in which I used cubed bread as the base.

Drying out the bread meant that the caramel sauce could be soaked up to really take on the flavor profile.

This recipe is simple, easy and delightfully unique as a scrumptious alternative to the traditional cinnamon and sultana bread and butter pudding.

Caramel Butterscotch Schnapps and Peanut Butter Bread Pudding recipe


Ingredients:

  • 120g of crust removed and cubed bread
  • 235g brown sugar
  • 40g butter
  • 40ml cream
  • ¼ tsn salt
  • 140ml butterscotch Schnapps
  • 110g crunchy peanut butter
  • 2 eggs


Method:

  1. Preheat the oven to 170c degrees.
  2. Place the cubed bread into the oven and bake until golden brown, set aside to cool.
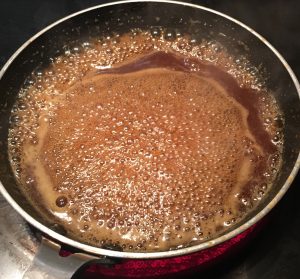
  3. To make the caramel place 160g of the sugar in a saucepan on a high heat until the sugar has melted and is bubbly and golden in colour.
  4. Add the butter and cream and stir until combine (be careful of any splash).
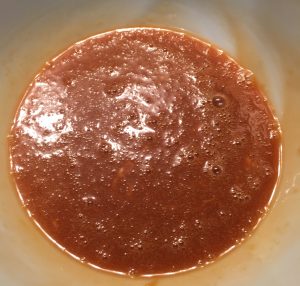
  5. Take the caramel off the heat, add the salt and butterscotch schnapps then use a hand whisk to combine until silky.
  6. Add the peanut butter and whisk again until well combined, leave aside to cool to room temperature.
  7. Beat the eggs and the remaining 75g of sugar with the hand whisk.
  8. Add the egg mix to the caramel mix and beat until combine.
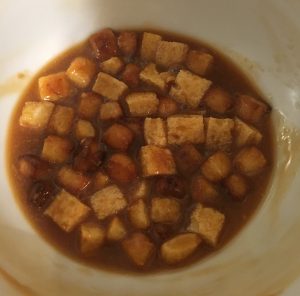
  9. Add the bread cubes and stir to the caramel mix, leave the mix aside to soak up the liquid for 1 hour, lightly folding the mix every 15 mins.
  10. Lightly spray 4 x 1 large cup ramekins with oil spray then spoon the mix evenly into the moulds.
  11. Place the ramekins into a large slice tin and fill the slice tin with enough water to reach half way up the sides of the ramekins.
  12. Bake for 10 minutes, remove the slice tin from the oven, giving the puddings a light stir to ensure the bread is throughout the mix evenly.
  13. Following, continue baking for a further 25 minutes or until the pudding is puffed and set when you touch the top.
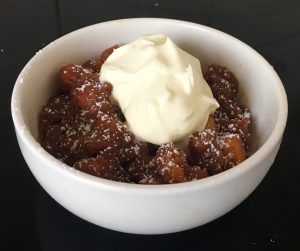
  14. Top with vanilla ice-cream or double cream and enjoy!


Caramel Butterscotch Schnapps and Peanut Butter Bread Pudding recipe

Step 3

Caramel Butterscotch Schnapps and Peanut Butter Bread Pudding recipe

Step 5

Caramel Butterscotch Schnapps and Peanut Butter Bread Pudding recipe

Step 8

Caramel Butterscotch Schnapps and Peanut Butter Bread Pudding recipe

Step 9

Caramel Butterscotch Schnapps and Peanut Butter Bread Pudding recipe


Like this recipe? Subscribe via RSS or email to get my new entries and more scrumptious recipes with reviews


Email, RSS Follow
Print
Leave a comment .
Tags: bread, bread pudding, Butterscotch Schnapps, caramel, Caramel Butterscotch Schnapps and Peanut Butter Bread Pudding, peanut butter, pudding .

Weet-Bix Anzac Slice with Peanut Banana Frosting

Posted on February 10, 2018 Posted in Slice .

Weet-Bix Anzac Slice with Peanut Banana Frosting

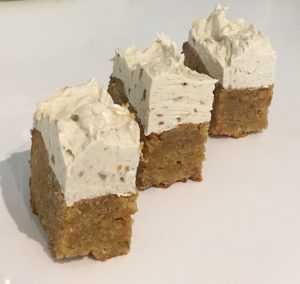
Weet-Bix Anzac Slice with Peanut Banana Frosting

You may have noticed that baking with cereal tends to feature on my blog every few months, where oats, rice bubbles even quinoa flakes tend to be my favourite grains/ingredients.

I decided that I wanted to branch out and challenge myself in this space by baking with cereals that I very rarely (if at all) eat myself.

Not only would I incorporate the cereal in the recipe, I would feature it as the core ingredient in the bakes foundation.

Sooo…I went shopping, pursuing the cereal isle and landed on milo cereal, nutri-grain and weet-bix. 3 very Aussie themed products.

To stay in the ‘Aussie’ territory I decided that using an Aussie flavour combo would be fitting for the experiments, so I mimicked the based flavour combo of Anzac biscuits and created 3 cereal slices.

After making the 3 slice unsurprisingly it was the weet-bix one that was best not just because the texture of crumbled weet-bix worked well in the bake but also as the flavour worked great with the golden syrup, brown sugar and coconut (let’s just say the other 2 weren’t great in either of these areas).

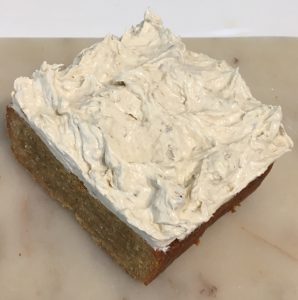
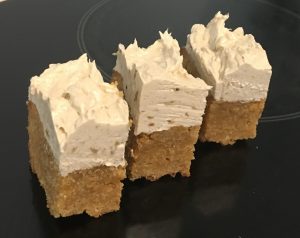
The slice did desperately need an icing though, as it was quite dense and although tasty was missing that wow factor, thus a delicious icing would offset and complement the slice perfectly. A few experimental icings later and I had the perfect icing that perked up the slice and gave it a bit more bunch.

What I decided on? Initially I experimented with peanut butter and then banana as they worked well with the slice flavours so I made up an icing for each, in which I like both and felt they both worked so I combine them together and walla the Weet-Bix Anzac Slice with Peanut and Banana Frosting was born.

Ingredients:

Cake:

  • 250g butter
  • 300g brown sugar
  • 100ml golden syrup
  • 140g plain flour
  • 160g self raising flour
  • 70g desiccated coconut, toasted
  • 8 Weet-Bix (140g)
  • 2 eggs

Icing:

  • 150g butter
  • 35g icing sugar
  • 40g peanut butter
  • 45g banana flesh


Method:

  1. Pre heat the oven to 180c degrees and line a 20cm x 20cm cake tin with baking paper.
  2. Place the butter, sugar and golden syrup into a saucepan and stir on a medium heat until the mix is well combine and boils. Leave aside for 5 minutes to cool.
  3. Add the coconut into a bowl as well as the sifted flours.
  4. Using your hands crush the Weet-Bix into small pieces and stir into the flour mix.
  5. Pour the cooled butter mix into the flour mix and stir until combine.
  6. Beat the eggs in a small bowl with a fork and pour egg mix into the flour mix.
  7. Stir the mix until the egg is well combine then pour the batter into the prepared cake tin.
  8. Flatten the top of the slice with the back of a spoon and place the cake tin in the oven for 20 minutes or until a skewer inserted into the center just comes out only just clean.
  9. Place the slice on a cooling rack until cold.
  10. Meanwhile make the icing by whisking the butter and icing sugar for 5 minutes or until fluffy and pale.
  11. Place the banana in a food processor and blitz until pureed.
  12. Add the pureed banana and peanut butter to the butter mix and whisk with electric beaters until well combine.
  13. Top the slice with the icing and cut into pieces. Enjoy!


Weet-Bix Anzac Slice with Peanut Banana Frosting
Step 2
Weet-Bix Anzac Slice recipe
Step 2
Weet-Bix Anzac Slice with Peanut Banana Frosting
Step 3
Weet-Bix Anzac Slice with Peanut Banana Frosting
Step 5
Weet-Bix Anzac Slice with Peanut Banana Frosting
Step 9
Weet-Bix Anzac Slice with Peanut Banana Frosting
Step 12
Weet-Bix Anzac Slice with Peanut Banana Frosting
Step 13
Weet-Bix Anzac Slice with Peanut Banana Frosting

Like this recipe? Subscribe via RSS or email to get my new entries and more scrumptious recipes with reviews.

Email, RSS Follow
Print
Leave a comment .
Tags: anzac, banana, coconut, golden syrup, peanut butter, weet-bix, Weet-Bix Anzac Slice with Peanut Banana Frosting .

Coconut Peanut and Chocolate Tofu Cheesecake

Posted on December 22, 2017 Posted in Cakes .

Coconut Peanut and Chocolate Tofu Cheesecake

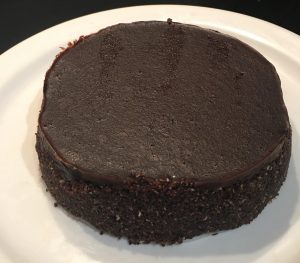
Coconut Peanut and Chocolate Tofu Cheesecake recipe
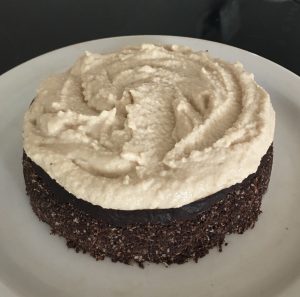
Thought cheesecake is always a devilish high bad fat treat? Think again, this recipe I have created only has healthy fats from nuts and coconut. Yes, a healthy high protein cheesecake can exist and most importantly, it tastes delicious (what’s the point otherwise)!The tofu provides a high protein low carb and low fat stable base, while low fat ricotta cheese significantly cuts the fat that a normal cream cheese cheesecake has.
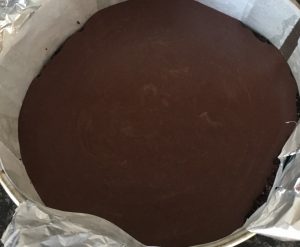
And as apparently raw is healthy and hot right now I wanted to make sure this cake was on theme and trend with people’s desires.

Using the nuts and dried fruit makes this cake completely gluten free, while the peanut puree icing is fulfilling and satisfying.

To be honest if I added veggies this cake would be a meal in itself with plenty of healthy fats, protein, calcium, even fruit!

Coconut Peanut and Chocolate Tofu Cheesecake recipe

Ingredients:

Icing:

  • 125g peanuts
  • 100ml coconut cream
  • 60ml honey

Base:

  • 2 tsn coconut oil
  • ¼ tsn salt
  • 90g desiccated coconut
  • 20g dried dates
  • 15g cocoa powder
  • 30ml honey

Filling:

  • 250g firm tofu
  • 220g ricotta cheese
  • 220g brown sugar
  • 70g cocoa powder
  • 2 egg whites
  • 1 tsn vanilla essence
  • 5 tsn coconut oil
  • 100g peanut butter
  • 1 tsn coffee graduals
  • ½ tsn ground cinnamon


Method:

  1. Place the peanuts into a bowl and cover with boiling water. Soak nuts for 5 hours.
  2. Meanwhile, preheat the oven to 175c degrees and line a 25cm spring form cake tin with baking paper.
  3. Toast the coconut by placing in a fry pan on the cooktop on high heat.
  4. Using a spoon move the coconut around to ensure even toasting of the coconut until golden brown in colour. Place aside to cool.
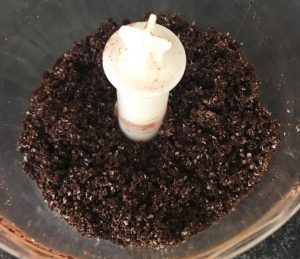
  5. Place the cooled coconut and remaining base ingredients onto a food processor and blitz until well combine and the mix resembles fine breadcrumb texture.
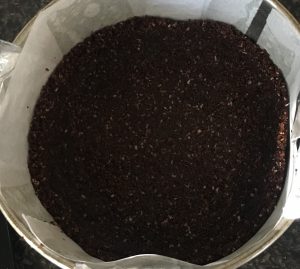
  6. Pour the base mix into the prepared cake tin and using the bottom and sides of a cup flatten the base and sides of the mix in the tin. Place the tin in the fridge to harden.
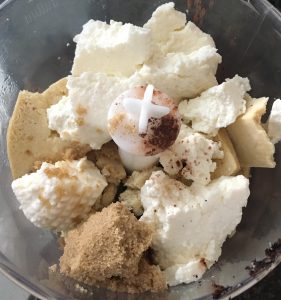
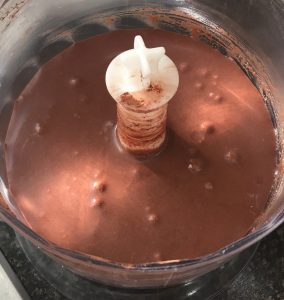
  7. To make the filling place all the filling ingredients into a food processor and blitz until smooth and silky in texture.
  8. Pour the filling mix into the cake tin over the base.
  9. Place the cake in the oven to bake for 1 hour or until a skewer inserted in the center comes out almost clean (if inserted in the sides it should come out clean).
  10. Move the cake to a cooling rack until cold to touch.
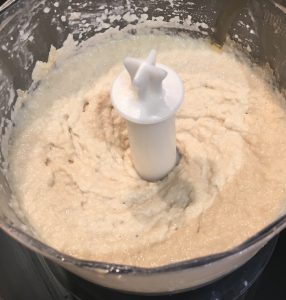
  11. Meanwhile make the icing by draining the peanuts and placing into a food processor along with the coconut cream and honey.
  12. Blitz the icing mix for 5 minutes, scraping down the sides every minute.
  13. To assemble the cake, remove the cooled cake from the tin and place on a serving plate.
  14. Spread the icing over the top of the cake and place the cake in the fridge for 2 hours to full set.


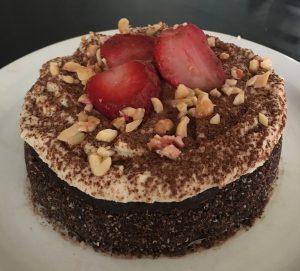
Note: I have decorated with extra chopped peanuts, extra toasted desiccated coconut and grated chocolate.


Coconut Peanut and Chocolate Tofu Cheesecake recipe

Step 1

Coconut Peanut and Chocolate Tofu Cheesecake recipe

Step 5

Coconut Peanut and Chocolate Tofu Cheesecake recipe

Step 6

Coconut Peanut and Chocolate Tofu Cheesecake recipe

Step 7

Coconut Peanut and Chocolate Tofu Cheesecake recipe

Step 7

Coconut Peanut and Chocolate Tofu Cheesecake recipe

Step 8

Coconut Peanut and Chocolate Tofu Cheesecake recipe

Step 12

Coconut Peanut and Chocolate Tofu Cheesecake recipe

Step 13

Coconut Peanut and Chocolate Tofu Cheesecake recipe

Step 14


Like this recipe? Subscribe via RSS or email to get my new entries and more scrumptious recipes with reviews.

Email, RSS Follow
Print
Leave a comment .
Tags: chocolate, cinnamon, coconut, coffee, firm tofu, peanut butter, peanuts, ricotta cheese, tofu .

Spiked Oat Peanut and Chocolate Cookies

Posted on September 25, 2016 Posted in Biscuits .

Spiked Oat Peanut and Chocolate Cookies

Spiked Oat Peanut and Chocolate Cookies recipe

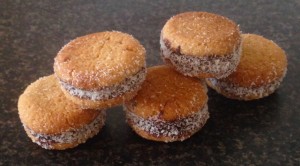
These cookies came from me experimenting with cookie ‘sandwich’ biscuit recipes. I made a few patches of a range of varying flavor combinations where to list a few includes;  peanut butter, almond, coconut, lime, butterscotch, caramel, Kahlua, chocolate…and the list goes on. The aim of making all the variations was to (a) have fun playing around with flavor pairings, but ultimately (b) I wanted to make up an epic recipe for a friends birthday to take to her gathering.

The best mix was peanut butter, chocolate and coconut with the addition of Kahlua to enhance and amplify the chocolate flavor, in which that it did!

This recipe you can say is not as out there as others I have made, BUT these cookies are pretty darn amazingly tasty.


Ingredients:

Biscuit:

  • 160g butter
  • 160g sugar
  • 90g peanut butter
  • 45ml Kahlua
  • 150g plain flour
  • 65g desiccated coconut
  • 1/8 tsn salt
  • 105g Oat bran

Filling:

  • 300g dark chocolate
  • 30ml cream
  • 90g peanut butter

Extra:

  • 60g desiccated coconut


Method:

  1. Preheat the oven to 160c degrees and line a 30 x 30cm baking tray with baking paper.
  2. Using electric beaters whisk the soft butter and sugar until creamy.
  3. Add the peanut butter and Kahlua and beat until well combined.
  4. Sift in the flour and add in the coconut, oats and salt. Stir to combine.
  5. Wet hands and roll mix into 15g balls, placing on the tray with 5cm between each ball.
  6. Once all balls are done use the back of a spoon to slightly flatten.
  7. Bake in the oven for 12-14 minutes then place on a cooling rack until cooled.
  8. Meanwhile, to make the filling place the chocolate with the cream in a bowl and microwave in 30 second intervals stirring in between until melted and smooth.
  9. Set the chocolate aside in the fridge for 30 mins of until the chocolate is at a spreadable consistency (similar to peanut butter)
  10. Spread each cooled biscuit on the baked side down with the chocolate mix.
  11. On half the biscuits drop a small amount of peanut butter into the center of the biscuit on top of the ganache.
  12. Sandwich the biscuits together.
  13. Roll each of the biscuits on their side into the extra desiccated coconut and roll to cover all the chocolate filling until all biscuits are done.


Pumpkin Vanilla and Cinnamon Scrolls recipe

Step 2

Spiked Oat Peanut and Chocolate Cookies recipe

Step 4

Spiked Oat Peanut and Chocolate Cookies recipe

Step 6

Spiked Oat Peanut and Chocolate Cookies recipe

Step 7

Spiked Oat Peanut and Chocolate Cookies recipe

Step 8

Spiked Oat Peanut and Chocolate Cookies recipe

Step 13


Like this recipe? Subscribe via RSS or email to get my new entries and more scrumptious recipes with reviews.

Email, RSS Follow
Print
Leave a comment .
Tags: biscuits, chocolate, coconut, cookies, dark chocolate, dessicated coconut, kahlua, oat bran, peanut butter, Spiked Oat Peanut and Chocolate Cookies .

Peanut Butter and Jelly Slice Sandwiches

Posted on November 17, 2014 Posted in Slice, Unique .


Peanut Butter and Jelly Slice Sandwiches


Peanut Butter and Jelly Slice Sandwich recipe


You may have noticed by now that I do love to play with American style flavor favorites, (see my Devils Food Cake, Chocolate Bacon Cake with Maple Frosting, Spiced Pumpkin Pie, Hummingbird Cake to name a few). The whole savory and sweet combo they commonly serve is so interesting, something we don’t see much in Australia.

One thing I have yet to experiment with is their famous peanut and jelly (jam in AUS) sandwich, I don’t even think I have ever tasted one in my life.

So true Ella style instead of first tasting I threw myself into experimenting with this concept to incorporate these 2 key ingredients in a sweet baking tread.

I must say I attempted 3 versions of this…Originally I made a 3 layered slice with a peanut butter, a jelly and a white chocolate crumble topping slice. I wasn’t happy with this so I attempted it again with just the 2 layers and omitted the crumble layer – as suspected the jam turned into a toffee texture without the crumble layer to protect it.

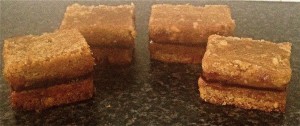
As the peanut layer was absolutely delectable and satisfying I decided to slice pieces in half like 2 pieces of bread and with thick jelly (jam) placed in the center to sandwich the peanut slice together.

Outcome…better that expected – absolutely scrumptious! Best part (bar the taste) this is sooo easy to make! Below is the recipe to me easy Peanut Butter and Jelly Slice Sandwiches.


Ingredients:

  • ½ cup butter
  • ½ brown sugar
  • ¼ cup white sugar
  • 300g peanut butter
  • 1 egg
  • 1 tsn vanilla extract
  • 1 + 1/2cup plain flour
  • ½ tsn baking powder
  • ½ tsn salt
  • ½ tsn cinnamon
  • 1/2 cup thick raspberry jam


Method:

  1. Preheat the oven to 175c and line a 20cm square baking tray with baking paper.
  2. In a bowl using electric beaters beat butter and sugar for 5 minutes until thick and creamy.
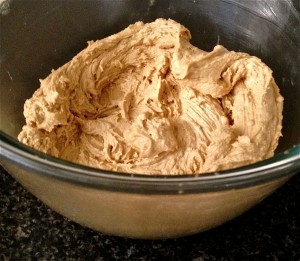
  3. Add the peanut butter, egg and vanilla essence, beat.
  4. In another bowl mix together the flour, powder, salt and cinnamon.
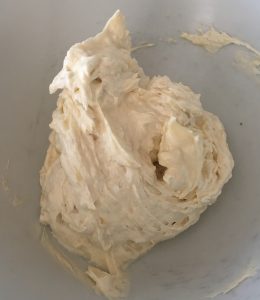
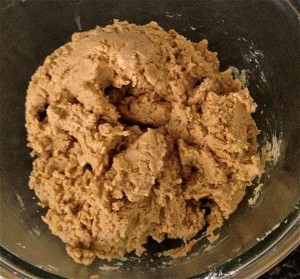
  5. Using a spoon carefully fold the dry ingredients into the wet mix until just combined.
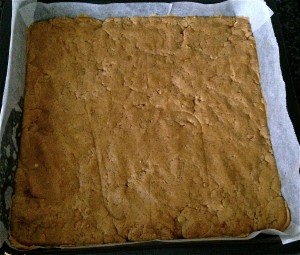
  6. Spoon the mix into the tray and smooth out.
  7. Cook for 35 minutes or until golden.
  8. Allow the slice to fully cool then cut the slice horizontally through the middle.
  9. Place the bottom layer back into the tray and spoon the thick jam to cover the bottom layer.
  10. Place the second layer on the top of the jam to create a peanut slice sandwich with jam in the centre.
  11. Allow to set in the fridge for 2 hours before removing from the tray and cutting the slice into bars.

Notes:

  • You can use whatever flavor jam you prefer, though raspberry is the most traditional.
  • The jam does need to be quite thick. If its not heat it in the microwave or on the stove until bubbling hot then whisk in 1 tsn of gelatine powder. Allow to cool, then follow on from step 9.


Peanut Butter and Jelly Slice Sandwich recipe

Step 3

Peanut Butter and Jelly Slice Sandwich recipe

Step 5

Peanut Butter and Jelly Slice Sandwich recipe.

Step 6


Like this recipe? Subscribe via RSS or email to get my new entries and more scrumptious recipes with reviews.

Email, RSS Follow
Print
Leave a comment .
Tags: jam, jelly, peanut butter, Peanutbutter, rasberry, slice .

Peanut Butter Icing

Posted on January 8, 2014 Posted in Icing .

Peanut Butter Icing

Ingredients:

  • 1 cup icing sugar
  • 1 cup smooth peanut butter
  • 80g butter
  • 1 tsn vanilla essence
  • 80ml thickened cream


Method:

  • Beat the sugar, peanut butter, butter and vanilla for 5-10 minutes until pale and fluffy.
  • Add the cream and beat for a further 1 minute.


Like this recipe? Subscribe via RSS or email to get my new entries and more scrumptious recipes with reviews.


Email, RSS Follow
Print
Leave a comment .
Tags: icing, peanut butter, peanut butter icing .

Pages

  • About Me
  • Baking Metrics
  • Blogroll
  • Common Baking Questions
  • Recipe Index
  • Tips & Tricks
  • Contact

Archives

  • February 2022
  • October 2021
  • September 2021
  • August 2021
  • April 2021
  • February 2021
  • January 2021
  • December 2020
  • November 2020
  • October 2020
  • September 2020
  • August 2020
  • July 2020
  • June 2020
  • May 2020
  • September 2019
  • June 2019
  • May 2019
  • April 2019
  • March 2019
  • February 2019
  • January 2019
  • December 2018
  • November 2018
  • October 2018
  • September 2018
  • August 2018
  • July 2018
  • June 2018
  • May 2018
  • April 2018
  • March 2018
  • February 2018
  • January 2018
  • December 2017
  • November 2017
  • October 2017
  • September 2017
  • August 2017
  • July 2017
  • June 2017
  • May 2017
  • April 2017
  • March 2017
  • February 2017
  • January 2017
  • December 2016
  • November 2016
  • October 2016
  • September 2016
  • August 2016
  • July 2016
  • June 2016
  • May 2016
  • April 2016
  • March 2016
  • February 2016
  • January 2016
  • December 2015
  • November 2015
  • October 2015
  • September 2015
  • August 2015
  • July 2015
  • June 2015
  • May 2015
  • April 2015
  • March 2015
  • February 2015
  • January 2015
  • December 2014
  • November 2014
  • October 2014
  • September 2014
  • August 2014
  • July 2014
  • June 2014
  • May 2014
  • April 2014
  • March 2014
  • February 2014
  • January 2014
  • December 2013

Categories

  • America (5)
  • Arabic (1)
  • Australian (2)
  • Biscuits (24)
  • Brazil (1)
  • Bread (12)
  • Brownies (5)
  • Cakes (141)
  • Croatian (1)
  • Cupcakes (20)
  • Custard (1)
  • Doughnuts (6)
  • Flan (1)
  • France (5)
  • Fudge (3)
  • German (1)
  • Greece (2)
  • Hungary (1)
  • Ice-cream & Sorbet (15)
  • Ice-cream cake (6)
  • Icing (18)
  • Italy (4)
  • Jam (1)
  • Jamaican (1)
  • Lebanese (1)
  • Marshmallows (2)
  • Mexican (1)
  • Morocco (1)
  • Mousse (2)
  • Muffins (1)
  • Panna Cotta (1)
  • Pastries (2)
  • Pies (7)
  • Portugal (1)
  • Pudding (12)
  • Roulade (1)
  • Russia (1)
  • Slice (27)
  • Souffle (1)
  • Sweden (1)
  • Swedish (1)
  • Syrup (1)
  • Tarts (13)
  • Traditional (17)
  • Trifile (1)
  • Truffles (5)
  • Turkey (1)
  • Uncategorized (1)
  • Unique (10)

WordPress

  • Register
  • Log in
  • WordPress

Subscribe

  • Entries (RSS)
  • Comments (RSS)

CyberChimps WordPress Themes

© Sweet Tooth Experiments