Sweet Tooth Experiments

  • About Me
  • Recipe Index
  • Baking Metrics
  • Tips & Tricks
  • Common Baking Questions
  • Contact

Tag Archives: dark chocolate

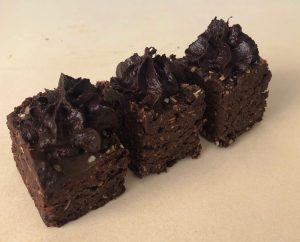
Chocolate Coconut Rough Eggplant Slice with Avocado Icing
Posted on September 29, 2019 Posted in Slice .

Chocolate Coconut Rough Eggplant Slice with Avocado Icing

Chocolate Coconut Rough Eggplant Slice with Avocado Icing

After recently going on a gut loving and IBS focused diet I have been consuming a lot more raw, natural, seeds, nuts, good fats and vegetables.

If you follow this blog you will know I have baked gluten free many many times as well as used dried fruit instead of sugar and vegetables as the base for my sweet recipes (with taste testers never realising).

This recipe incorporates the above as well as uses coconut oil, almonds and avocado to replace butter, cream and the need for flour.

This recipe is super easy, literally all ingredients thrown into a blender and spooned into a cake tin in the oven, then boom – a delicious slice.

To take this slice to the next level I have made a simple avocado based icing, that just like the cake is made by simply bending the ingredients together.

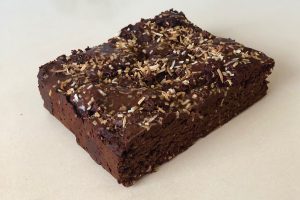
This slice is rich, decadent and satisfying, without any sign that it’s full of vegetables and fruit.
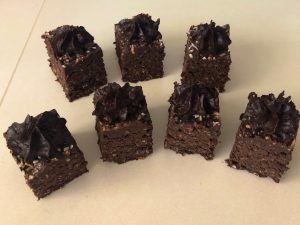
Chocolate Coconut Rough Eggplant Slice with Avocado Icing

Ingredients:

Slice:

  • 200g eggplant, diced
  • 130g 70% dark chocolate
  • 60g coconut oil
  • 80g almond meal (ground almonds)
  • 70g dates, chopped
  • 30g cocoa powder
  • ¼ tsn salt
  • 1 tsn vanilla essence
  • 60g toasted desiccated coconut
  • 3 eggs
  • 1 tsn baking powder
  • ½ tsn bi-carbonate of soda

Icing:

  • 1 Avocado (seeded and peeled)
  • 20g cocoa powder
  • 20g 70% dark chocolate
  • 20g coconut oil
  • 20g rice malt syrup


Method:

  1. Pre heat the oven to 170c and line a 20cm x 20cm cake tin with baking paper.
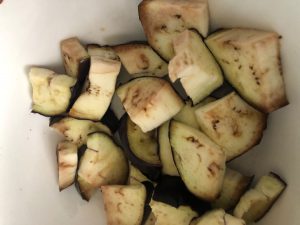
  2. Place the eggplant in a bowl and microwave for 4 minutes or until the eggplant is steaming and soft.
  3. Place the chocolate and oil in another bowl and microwave for 1 minute or until the oil is melted.
  4. Remove the bowl from the microwave and stir until the mix is silky smooth and combine.
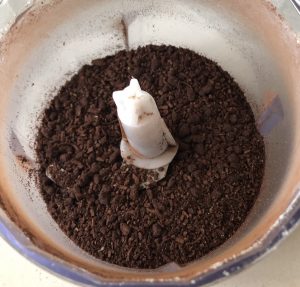
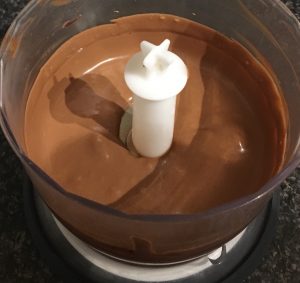
  5. Place the almond meal, dates, cocoa powder and salt into a food processor and blitz until mix resembles fine breadcrumb texture.
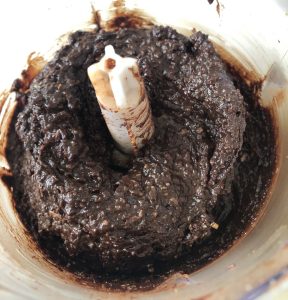
  6. Add the eggplant, chocolate mix, vanilla, coconut, baking powder, bi-carbonate of soda and eggs to the mix and blitz until well combine.
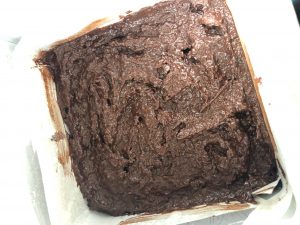
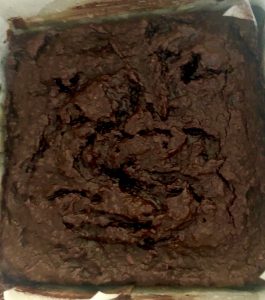
  7. Spoon the mix into the prepared cake tin, flattening the top with the back of a spoon.
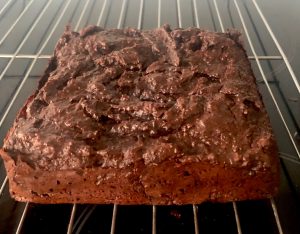
  8. Bake in the oven for 25 minutes or until a skewer inserted into the center comes out clean.
  9. Allow the slice to cool in the tin then place onto a cooling tray until cold.
  10. Meanwhile place the icing ingredients into a food processor and blitz until smooth.
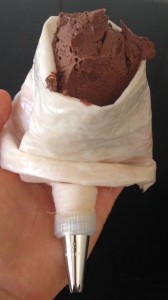
  11. Spoon the icing mix into a piping bag fit with a star nozzle.
  12. Cut the slice into pieces and pipe the icing onto each piece.
  13. Enjoy!


Chocolate Coconut Rough Eggplant Slice with Avocado Icing

Step 2


Chocolate Coconut Rough Eggplant Slice with Avocado Icing

Step 5


Chocolate Coconut Rough Eggplant Slice with Avocado Icing

Step 6


Chocolate Coconut Rough Eggplant Slice with Avocado Icing

Step 7


Chocolate Coconut Rough Eggplant Slice with Avocado Icing

Step 8


Chocolate Coconut Rough Eggplant Slice with Avocado Icing

Step 9


Chocolate Coconut Rough Eggplant Slice with Avocado Icing

Step 9

Millet Chocolate Chili and Cinnamon Cupcakes recipes

Step 11


Like this recipe? Subscribe via RSS or email to get my new entries and more scrumptious recipes with reviews.

Email, RSS Follow
Print
Leave a comment .
Tags: avocado, avocado icing, Chocolate Coconut Rough Eggplant Slice with Avocado Icing, cocoa, coconut, dark chocolate, dates, Eggplant, rice malt syrup .

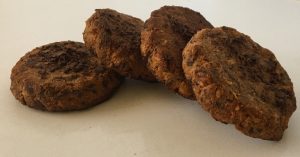
Chickpea Chocolate Coconut and Almond Cookies

Posted on February 16, 2019 Posted in Biscuits .

Chickpea Chocolate Coconut and Almond Cookies

Chickpea Chocolate Coconut and Almond Cookies


I’ve made chickpea chocolate cake in the past, chocolate coconut slice, almond and chocolate cake, coconut and almond cupcakes….however I have never mixed these 4 flavors together. As they all taste like a dream with chocolate I thought there could be a combo potential.

So I decided to do some experimenting with these 4 flavors with biscuit variations. I looked at using butter vs. coconut oil, coconut flour vs. almond meal vs. rice flour, cocoa powder vs. chocolate, nil-chocolate biscuit dough, double chocolate biscuit varieties and the list goes on….

Suffice to say I made a few different batches that were slightly altered from the last.

This recipe I’m posting is the hands down winner. All flavors come out spectacularly. Even with the ‘gluten free’ component and legume inclusion they don’t taste ‘cardboard’ as some healthier versions of baking sometimes do.

So simple to make, literally throwing ingredients into a food processor and bake for 15 minutes and boom delicious biscuits at once!

Ingredients:

  • 230g chickpeas (1 x 400g can, drained)
  • 100g almond meal
  • 100g brown sugar
  • 40g coconut oil
  • 1 tsn almond extract
  • 1 egg
  • ½ tsn baking powder
  • 1/8th tsn salt
  • 40g desiccated coconut
  • 80g roasted almonds
  • 80g 70% dark chocolate, 80g extra


Method:

  1. Pre-heat the oven to 180c degrees and line 2 large baking trays with baking paper.
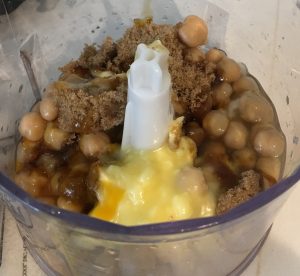
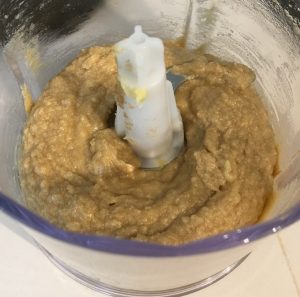
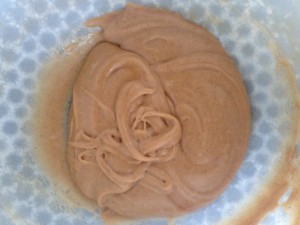
  2. Place the drained chickpeas, sugar, oil, extract and egg into a food processor and blitz until smooth.
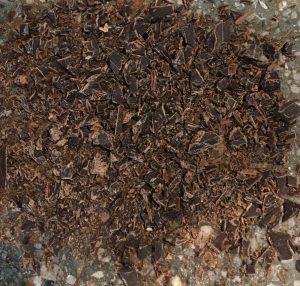
  3. Dice the 80g chocolate and 80g almonds into small pieces.
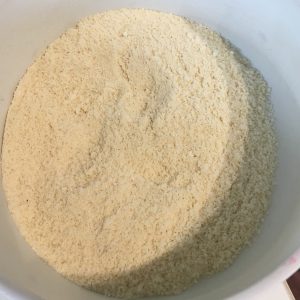
  4. Place the almond meal, baking powder, salt, coconut, diced chocolate and diced almonds into a bowl and stir until well combine.
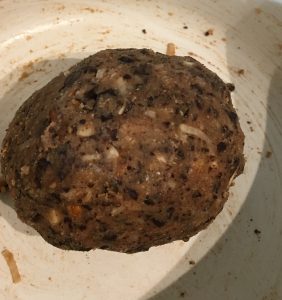
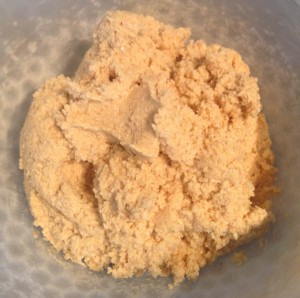
  5. Add the chickpea mix to the dry mix and stir until well combine.
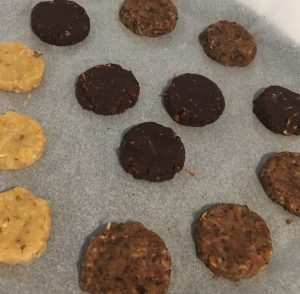
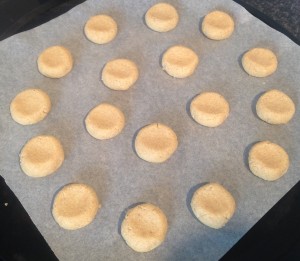
  6. Roll the dough mix into 20g sized balls and flatten well with the back of a fork onto the trays. Note they will not rise so you will want to flatten well.
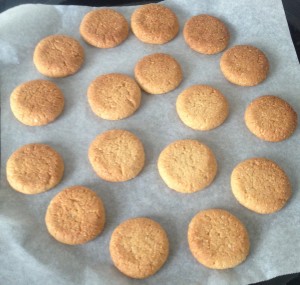
  7. Place the trays into the oven for 15 minutes to cook.
  8. Allow the biscuits to set on the trays then move to a cooling rack until cooled.
  9. Meanwhile place the remaining extra 80g chocolate into a shallow microwave proof bowl and heat in the microwave on medium, stirring every 30 seconds until the chocolate is melted and smooth.
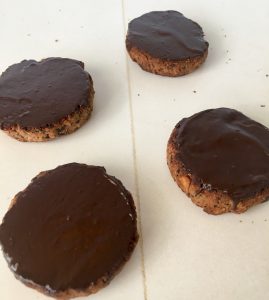
  10. Using a butter knife or spatula spread the melted smooth chocolate onto the bottom of the biscuit in a thin even layer.
  11. Place biscuits chocolate side up onto the cooling tray until chocolate has set.
  12. Enjoy!


Chickpea Chocolate Coconut and Almond Cookies


Step 2

Chickpea Chocolate Coconut and Almond Cookies

Step 2

Chickpea Chocolate Coconut and Almond Cookies

Step 3

Chickpea Chocolate Coconut and Almond Cookies

Step 4

Chickpea Chocolate Coconut and Almond Cookies

Step 5

Chickpea Chocolate Coconut and Almond Cookies

Step 7

Chickpea Chocolate Coconut and Almond Cookies

Step 10

Chickpea Chocolate Coconut and Almond Cookies


Like this recipe? Subscribe via RSS or email to get my new entries and more scrumptious recipes with reviews.

Email, RSS Follow
Print
Leave a comment .
Tags: Almond, chickpea, Chickpea Chocolate Coconut and Almond Cookies, chocolate, coconut, dark chocolate .

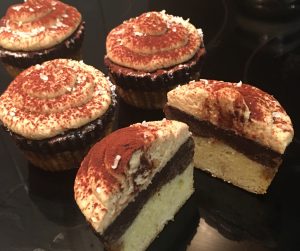
Chocolate Top-Deck Tiramisu Cupcakes

Posted on June 23, 2018 Posted in Cupcakes .

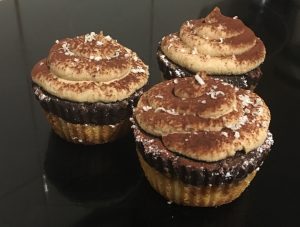
Chocolate Top-Deck Tiramisu Cupcakes  

Chocolate Top-Deck Tiramisu Cupcakes recipe

Tiramisu is my ultimate all-time favorite dessert ever. The only thing with traditional Tiramisu is that its not the easiest thing to eat – a bowl/plate as well as a spoon is a must. Unlike a slice or cupcake Tiramisu can really only be eaten sitting at a table.

So I decided that I would come up with a recipe that tastes like the traditional treat but as a cupcake.

For the cupcake recipe, I modified my never fail white chocolate and dark chocolate wedding cake recipes with the coffee and marsala flavor combo, as well as staying true to the traditional mascarpone cheese for my ‘icing’.

Though I have included the mix of white and dark chocolate in this recipe, in which is not traditional for this dessert, the chocolate batter works flawlessly with the traditional flavors.

Chocolate Top-Deck Tiramisu Cupcakes recipe

Ingredients:

White chocolate layer:

  • 85g butter
  • 85g white chocolate
  • 130g sugar
  • 150ml water
  • 105g self-raising flour
  • 65ml milk
  • 1 egg

Dark chocolate layer:

  • 85g butter
  • 85g dark chocolate
  • 130g sugar
  • 150ml water
  • 20g cocoa powder
  • 85g self-raising flour
  • 10ml marsala
  • 55ml expresso coffee
  • 1 egg

Syrup:

  • 30ml marsala
  • 30ml expresso coffee
  • 15g sugar

Icing:

  • 200g mascarpone cheese
  • 35g icing sugar
  • 25ml marsala
  • 2 tsn expresso coffee


Method:

  1. Pre-heat the oven to 160c degrees and line an 8-capacity cupcake tray with patty cases.
  2. Spray the patty cases with oil spray.
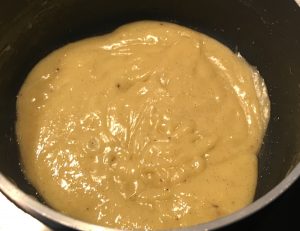
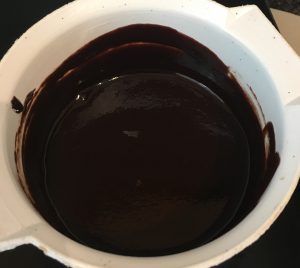
  3. In a saucepan on the stove melt the butter, chocolate, sugar and water on medium heat until smooth and glossy.
  4. Pour the room temperature chocolate mix, milk and egg into a bowl.
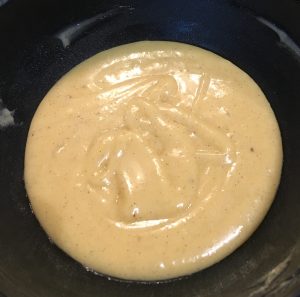
  5. Sift the flour to the chocolate mix and whisk with a hand whisk until smooth.
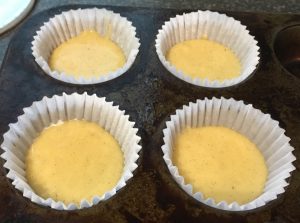
  6. Spoon the mix into the prepared patty cases until 1/3 full.
  7. Place the tin in the freezer for 10 minutes to slightly firm.
  8. Meanwhile make the dark chocolate batter by placing the butter, chocolate, sugar and water into a saucepan on medium heat until smooth and glossy.
  9. Pour the room temperature chocolate mix, expresso and egg into a bowl.
  10. Sift in the flour and cocoa powder into the chocolate mix and whisk with a hand whisk until smooth.
  11. Take the tin out of the freezer and spoon the dark chocolate mix into the prepared patty cases until they are 2/3rds full.
  12. Place the cupcake tin in the oven and bake for 20 minutes or until a skewer inserted in the center comes out clean.
  13. Leave the cupcakes in the tin for 5 minutes before placing onto a cooling rack to cool completely.
  14. Meanwhile make the syrup by placing the ingredient into a bowl and heating in the microwave until bubbling, leave aside.
  15. Brush the syrup on top of the cupcakes with a pastry brush and remove the patty cases.
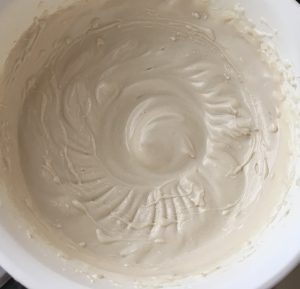
  16. Make the icing by placing all the icing ingredients into a bowl and using electric beats whisk until the mix thickens.
  17. Spoon the icing into a piping bag with a circle nozzle and pipe on top of the cupcakes.
  18. Finish the cakes with a dust of cocoa powder and some grated white chocolate.


Chocolate Top-Deck Tiramisu Cupcakes recipe

Step 3

Chocolate Top-Deck Tiramisu Cupcakes recipe

Step 5

Chocolate Top-Deck Tiramisu Cupcakes recipe

Step 6

Chocolate Top-Deck Tiramisu Cupcakes recipe

Step 9

Chocolate Top-Deck Tiramisu Cupcakes recipe

Step 11

Chocolate Top-Deck Tiramisu Cupcakes recipe

Step 15

Chocolate Top-Deck Tiramisu Cupcakes recipe

Step 16

Chocolate Top-Deck Tiramisu Cupcakes recipe

Step 18

Like this recipe? Subscribe via RSS or email to get my new entries and more scrumptious recipes with reviews.


Email, RSS Follow
Print
Leave a comment .
Tags: chocolate, Chocolate Top-Deck Tiramisu Cupcakes, coffee, dark chocolate, marsala, mascapone, white chocolate .

Mocha Ginger and Caramel Layer Cake

Posted on November 4, 2017 Posted in Cakes .

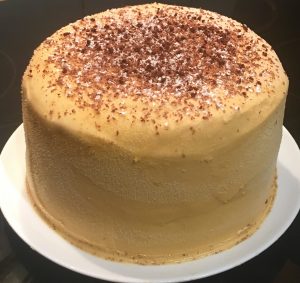
Mocha Ginger and Caramel Layer Cake

Mocha Ginger and Caramel Layer Cake

My attempt number 3 of making a treat featuring chocolate, coffee, ginger and caramel and I finally have a luscious and delectable treat on my hands!

Attempt 1 was the mousse cake that featured a dark chocolate mocha layer, a white chocolate ginger layer and a caramel layer. Though this attempt was a structural disaster (the layers didn’t play well as mousse  – the caramel layer melted fairly quickly), I did as least identify the flavour combo was divine.

Attempt 2 was the slice, similar to a caramel slice but with a ginger biscuit base, caramel center and mocha layer on the top. This was ok but reminded me too much of the traditional caramel slice and not unusual enough.

Attempt 3 takes my crowd-pleasing Devils Food Cake recipe as the mocha layer, my Churros Chocolate Caramel Cake’s caramel as the caramel layer and my never fail Vanilla Cake recipe as the ginger cake layers base.

Outcome – Aaaaamamzing!

A bit of work as 2 cakes need to me made but sooooo worth it!

Ingredients:

Mocha layer:

  • 120g butter
  • 90g caster sugar
  • 1 tsn vanilla essence
  • 2 eggs
  • 115g self-raising flour
  • 40g cake flour
  • 55g cocoa powder
  • 1/2 tsn salt
  • 1/4 tsn bicarbonate of soda
  • 6 tsn instant espresso coffee granules
  • 120ml buttermilk

Ginger layer:

  • 125g butter
  • 150g sugar
  • 1 tsn vanilla essence
  • 2 eggs
  • 160g self-raising flour
  • 1 tsn ground ginger
  • 2 tsn grated ginger
  • 1 + ½ tsn ground cinnamon
  • ¼ tsn all spice
  • ½ tsn salt
  • 1/4 tsn bicarbonate of soda
  • 125ml buttermilk

Buttercream:

  • 60g butter
  • 20g icing sugar

Caramel frosting:

  • 130g white sugar
  • 20ml water
  • 50g brown sugar
  • 180ml thickened cream


Method:

  1. Preheat the oven to 180c and line 2 x 25cm round cake tins with baking paper.
  2. Firstly, make the Mocha cake layer by using electric beaters to beat the butter, sugar and essence for 5 mins or until light and fluffy.
  3. Add in the eggs one at a time and ensure you beat thoroughly between each addition.
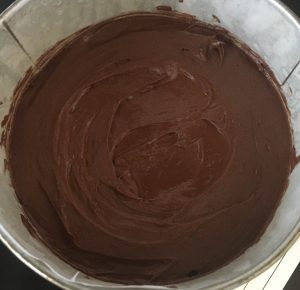
  4. Sift in the flours, cocoa powder, salt and bicarbonate of soda into the butter mix.
  5. In a separate small bowl add the coffee granules to the buttermilk, stir until well combined and pour into the butter mix.
  6. Beat the mix with electric beaters until just combined.
  7. Pour mixture into 1 of the prepared pans and bake for 1 hour or until a skewer inserted in the center comes out clean.
  8. Meanwhile, make the Ginger cake layer by whisking with electric beaters the butter, sugar and essence for 5 mins or until light and fluffy.
  9. Add in the eggs one at a time and ensure you beat thoroughly between each addition.
  10. Sift in the flour, spices, salt and bicarbonate of soda into the butter mix.
  11. Pour the buttermilk into the butter mix.
  12. Beat the mix with electric beaters until just combined.
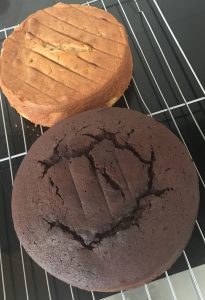
  13. Once the mocha cake that is baking in the background is cooked leave the cake in the tin for 5 mins, then place onto a cooling rack to cool.
  14. Pour the ginger cake layer mixture into the 2nd prepared pan and bake for 45 minutes or until a skewer inserted in the center comes out clean.
  15. Once the ginger cake is cooked leave the cake in the tin for 5 mins, then place onto a cooling rack to cool.
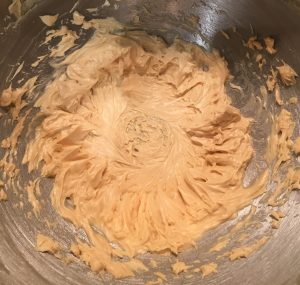
  16. To make the buttercream beat the butter and icing sugar for 5 minutes, place in the fridge for later use.
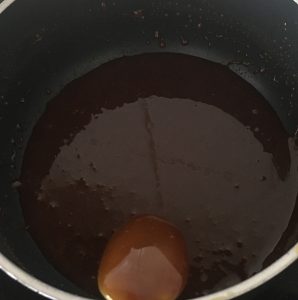
  17. Now make the caramel by place the white sugar and water into a saucepan, on a high heat, stirring until the sugar has dissolved.
  18. Leave the mix without stirring until the sugar syrup is golden is colour, take off heat.
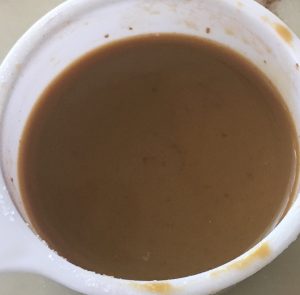
  19. Add the brown sugar and 80ml thickened cream to the caramel (be careful of the caramel spitting when adding the cream) and mix with a metal spoon until the caramel is smooth and glossy, leave aside to cool completely.
  20. In a separate bowl beat the remaining 100ml thickened cream with electric beaters until soft peaks form.
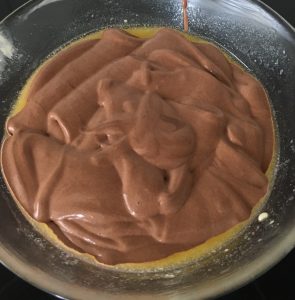
  21. Add the completely cooled caramel to the cream and beat slowly until the caramel is combine and firm peaks form, set aside.
  22. To assemble the cake, cut the tops of both cakes to ensure both are even and flat on top.
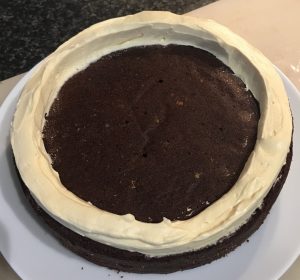
  23. Place the mocha cake layer onto a plate, then using a piping bag with a circular nozzle pipe an icing border around the mocha cake layers top.
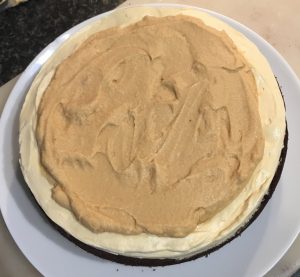
  24. Spoon 1/3rd of the caramel frosting into the center of the buttercream icing and smooth with the back of the spoon.
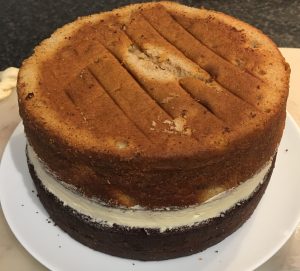
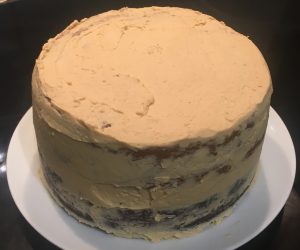
  25. Add the ginger layer on top of the icing and spread the top of the cake and sides with the remaining caramel frosting.
  26. Top with grated dark chocolate, extra grated white chocolate and a pinch of ground ginger if desired.


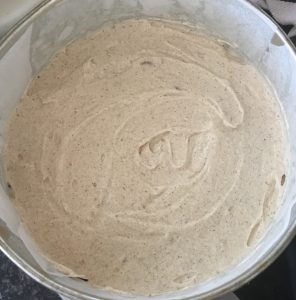
Mocha Ginger and Caramel Layer Cake
Step 5
Mocha Ginger and Caramel Layer Cake
Step 7
Mocha Ginger and Caramel Layer Cake
Step 14
Mocha Ginger and Caramel Layer Cake
Step 19
Mocha Ginger and Caramel Layer Cake
Step 21
Mocha Ginger and Caramel Layer Cake
Step 20
Mocha Ginger and Caramel Layer Cake
Step 23
Mocha Ginger and Caramel Layer Cake
Step 24
Mocha Ginger and Caramel Layer Cake
Step 25
Mocha Ginger and Caramel Layer Cake
Step 25


Like this recipe? Subscribe via RSS or email to get my new entries and more scrumptious recipes with reviews


Email, RSS Follow
Print
Leave a comment .
Tags: caramel, cinnamon, dark chocolate, ginger, mocha, Mocha Ginger and Caramel Layer Cake .

Sticky Chocolate and Bourbon Scrolls

Posted on October 1, 2017 Posted in Bread .

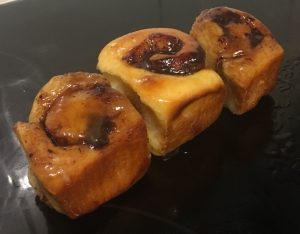
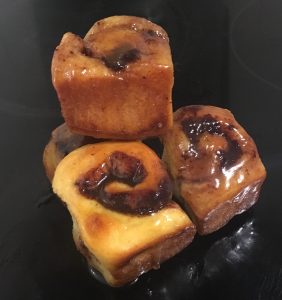
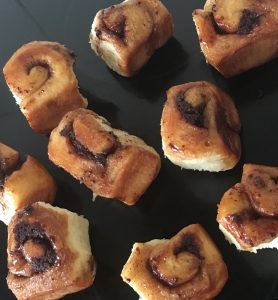
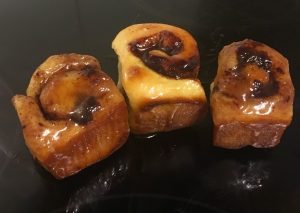
Sticky Chocolate and Bourbon Scrolls

Sticky Chocolate and Bourbon Scrolls

This recipe was originally planned to be chocolate and coffee flavored scrolls, in which the actual dough of the scroll was fluffy and lush but the coffee glaze was not really a standout and to be honest a little boring. Maybe it was the fact chocolate and coffee is such a common flavor combo or maybe there was just no interesting wow factor in the treats.

As I had an awesome cloud-like dough recipe I decided I had to do something with this so I went on an experimental journey with a range of different flavor combos from ingredients that I had in my pantry.

After a few combo assortments, I landed on one I was super happy with and couldn’t stop eating!

I have baked with Chocolate and Bourbon previously (see my Bourbon Chocolate Cake with Peanut Bourbon Icing), thus I knew these flavors work together, however this time I wanted to add an almost caramel flavor to the mix therefore used brown sugar and honey for the glaze that would traditionally be make from white sugar only.

The outcome of the glaze was to die for. It is easily the standout of the scrolls I made up in my experimenting …It’s made me want to make a bourbon, caramel and honey cake now…maybe that can be my next experiment….

Sticky Chocolate and Bourbon Scrolls recipe

Ingredients:

Dough:

  • 200ml warm water
  • 60g butter, melted
  • 60g sugar
  • I sachet yeast (2 tsn)
  • 2 eggs
  • 20g milk powder
  • ¼ tsn salt
  • 470g flour, plus extra for kneading

Filling:

  • 100g dark chocolate
  • 45ml cream

Glaze:

  • 120ml honey
  • 120g butter
  • 90g brown sugar
  • 90ml Bourbon

Extra:

  • 20ml milk


Method:

  1. To make the dough place the water, melted butter, sugar and the yeast in a bowl and stir to combine.
  2. Leave the yeast mix to sit for 5 minutes, or until foamy.
  3. Add the eggs to the yeast mix and whisk with a hand whisk until combine.
  4. In a bowl place the milk powder, salt and flour, stir.
  5. Using the hand whisk beat 300g of the dry flour mix into the water until combine.
  6. With a spatula stir and fold the remaining flour mix until a dough is formed.
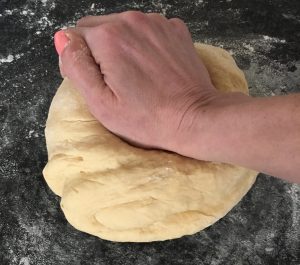
  7. Flour a bench surface and knead the dough for 10 minutes, adding extra flour if required to make the dough smooth and elastic.
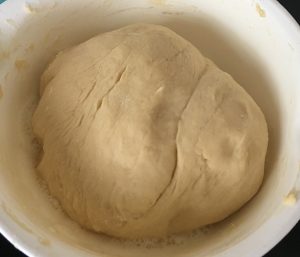
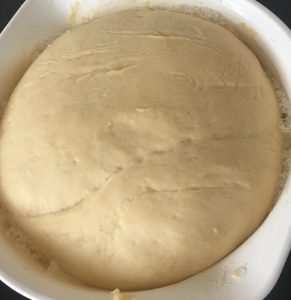
  8. Lightly oil a bowl, add the dough, cover the bowl with plastic wrap and place the bowl in a warm place until doubled in size (at least 1 hour).
  9. While the dough proves pre-heat the oven to 175c degrees and line a 20cm x 35cm cake tin with baking paper.
  10. Now make the filling by placing the cream in a bowl and heat in the microwave until the cream just starts to boil.
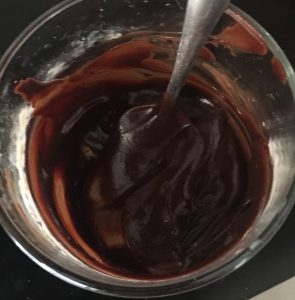
  11. Add the chocolate to the cream and stir until smooth and silky.
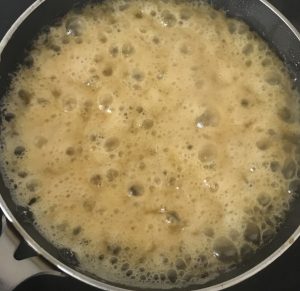
  12. Following, make the glaze by placing all the ingredients into a saucepan on a high heat, stirring until the mix is bubbling, take off the heat.
  13. Pour the glaze in to the cake tin lined base, ensuring the base is evenly covered with the mix.
  14. Flour a bench surface, place the dough in the center and top with a little sprinkle of extra flour.
  15. Use a rolling pin roll the dough into a 15cm x 40cm rectangle shape.
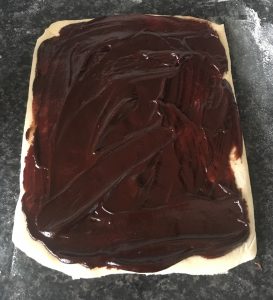
  16. Spread the filling onto the dough covering it evenly.
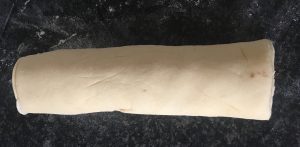
  17. With a longest side facing you roll the long side of the dough tightly into a swiss roll (jelly-roll style logs), seam side at the bottom of the roll.
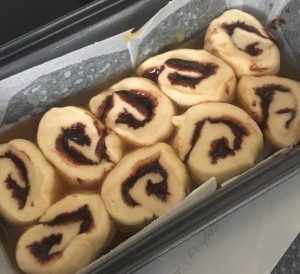
  18. Cut the roll into 3cm sized spiral slices and arrange the spiral slices cut side up into the cake tin on top of the glaze.
  19. Push the spirals into the base of the tin slightly with fingertips and brush the tops with the 20ml milk.
  20. Top the tin with plastic wrap and leave to rise for 1 hour or until doubled in size.
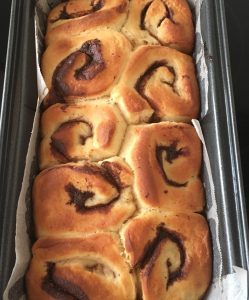
  21. Place the tin in the middle of the oven and bake for 25 minutes or until the tops are golden in colour.
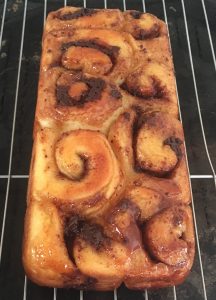
  22. Invert onto a plate and top with any remaining syrup left in the tin.
  23. Allow scrolls to sit until slightly cooled then using fingers pull the scrolls apart from each other.
  24. Serve with a cup of tea (if you wish) and enjoy.


Sticky Chocolate and Bourbon Scrolls recipe

Step 7

Sticky Chocolate and Bourbon Scrolls recipe

Step 7

Sticky Chocolate and Bourbon Scrolls recipe

Step 8

Sticky Chocolate and Bourbon Scroll recipe

Step 8

Sticky Chocolate and Bourbon Scrolls recipe

Step 11

Sticky Chocolate and Bourbon Scrolls recipe

Step 12

Sticky Chocolate and Bourbon Scrolls recipe

Step 12

Sticky Chocolate and Bourbon Scrolls recipe

Step 13

Sticky Chocolate and Bourbon Scrolls recipe

Step 16

Sticky Chocolate and Bourbon Scroll recipe

Step 17

Sticky Chocolate and Bourbon Scroll recipe

Step 18

Sticky Chocolate and Bourbon Scrolls recipe

Step 21

Sticky Chocolate and Bourbon Scrolls recipe

Step 22

Sticky Chocolate and Bourbon Scrolls recipe

Step 23

Sticky Chocolate and Bourbon Scrolls recipe

Step 24


Like this recipe? Subscribe via RSS or email to get my new entries and more scrumptious recipes with reviews


Email, RSS Follow
Print
Leave a comment .
Tags: bourbon, buns, dark chocolate, honey, scrolls, Sticky Chocolate and Bourbon Scrolls .

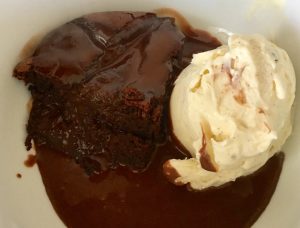
Chocolate Ricotta Cheese Pudding with Ricotta Ice-Cream

Posted on September 16, 2017 Posted in Pudding .

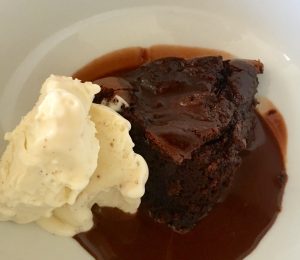
Chocolate Ricotta Cheese Pudding with Ricotta Ice-Cream

Chocolate Ricotta Cheese Pudding with Ricotta Ice-Cream recipe

Recently I needed to make a gluten free pudding for a dinner party, however I didn’t want to use a gluten-free flour as I wanted a really really fluffy texture, almost like a soufflé lightness and from my experience gluten-free flour tends to produce a bit of a denser texture.

Therefore, I ventured into the kitchen and did some experimenting with a range of alternative base ingredients. Surprisingly (almost bizarrely) the ricotta experiment produced the most amazingly light texture that just melts in the mouth.

Keeping with the ricotta theme I completed the dish with my always successful crowd pleasing ricotta ice-cream.

This recipe is super moreish but not too sweet thanks to the dark chocolate and limited sugar in the pudding.

Ingredients:

Ice-cream:

  • 450g ricotta cheese
  • 300ml sweetened condensed milk
  • 3 tsn vanilla extract
  • 450ml thickened cream
  • 60ml vanilla flavored liquor (optional)

Pudding batter:

  • 40ml thickened cream
  • 20ml milk
  • 160g dark chocolate
  • 220g ricotta
  • 15g cocoa powder
  • 1/4 tsn coffee granules
  • 4 eggs
  • 1/4 tsn salt
  • 80g sugar

Sauce:

  • 100g dark chocolate
  • 180ml thickened cream

Extra:

  • 20g butter


Method:

  1. Preheat the oven to 180c degrees.
  2. In a food processor blitz the cheese, condensed milk and vanilla until smooth.
  3. Whisk the cheese mix and cream with electric beaters in a bowl until peaks form.
  4. Stir the liquor until well combined and place in a bowl in the freezer to completely set.
  5. To make the pudding place the cream and milk into a bowl and heat in the microwave until steaming.
  6. Add the chocolate in pieces to the milk mix and stir until silky smooth and well combined.
  7. Place the chocolate mix, ricotta, cocoa powder and coffee granules into a food processor and blitz until well combined.
  8. Separate the egg yolks from the whites and add the yolks to the chocolate mix, blitz until smooth and well combine.
  9. Place the egg whites into a bowl along with the salt and beat until soft peaks form.
  10. Add the sugar to the eggwhites and beat for 5 minutes or until the mix is glossy and smooth.
  11. Fold the chocolate mix into the eggwhites until only just combined.
  12. For the sauce, place the cream into a bowl and heat in the microwave until steaming.
  13. Add the chocolate pieces to the cream and stir until silky smooth and well combined.
  14. Add the 20g of extra butter, melted, to a pudding bowl and roll the bowl  around to ensure all slides are covered in butter.
  15. Pour the pudding mix into the bowl and cook in the oven for 45 minutes or until a skewer inserted into the center comes out almost clean.
  16. Spoon the pudding into serving bowls, top with the chocolate sauce and a scoop of the ricotta ice-cream.


Masala and Coffee Ice-Cream Cheese Cake recipe

Step 2

Chocolate Ricotta Cheese Pudding with Ricotta Ice-Cream recipe

Step 8

Chocolate Ricotta Cheese Pudding with Ricotta Ice-Cream recipe

Step 10

Dark Chocolate and Lemon Bombe recipe

Step 13

Chocolate Ricotta Cheese Pudding with Ricotta Ice-Cream recipe

Step 15

Chocolate Ricotta Cheese Pudding with Ricotta Ice-Cream recipe

Step 15

Chocolate Ricotta Cheese Pudding with Ricotta Ice-Cream recipe

Step 17


Like this recipe? Subscribe via RSS or email to get my new entries and more scrumptious recipes with reviews
Email, RSS Follow
Print
Leave a comment .
Tags: chocolate, Chocolate Ricotta Cheese Pudding with Ricotta Ice-Cream, dark chocolate, ice-cream, pudding, ricotta, ricotta cheese .

Low Fat Dark Chocolate Balsamic and Almond Cupcakes

Posted on February 25, 2017 Posted in Cupcakes .

Low Fat Dark Chocolate Balsamic and Almond Cupcakes

Low Fat Dark Chocolate Balsamic and Almond Cupcakes


Low fat, sound too good to be true? I’d say less than 6g of butter per cupcake is pretty damn good! How does this treat still tastes amazing with such little butter content? A little trick, replacing 60% of the butter with apple puree as I promise no one will even notice!

How chocolate, balsamic and almonds was invented? So balsamic vinegar works brilliantly with strawberries as it brings out the sweetness and intensifies the flavor profile. So I figured if I used the balsamic with the dark chocolate it would have a similar effect and I was right

Additionally, the almond provides a lovely complementary texture and satisfying crunch to the recipe.

This recipe is a lovely twist on the usual chocolate cupcake and you can eat with a clear conscious!

Ingredients:

  • 200g flour
  • 50g cocoa powder
  • 4 tsn baking powder
  • 80g sugar
  • 160g 70% dark chocolate
  • 80g roasted almonds
  • 70g butter
  • 100g apple puree
  • 2 eggs
  • 140ml milk
  • 2 + 1/2 tbsn Balsamic vinegar

Icing:

  • 300g icing sugar
  • 25g cocoa powder
  • 70g balsamic vinegar


Method:

  1. Pre-heat the oven to 200c degrees and line a 12 hole cupcake tin with patty cases.
  2. Sieve the flour, baking powder, cocoa powder and sugar in a bowl and stir to combine.
  3. Chop the chocolate and almonds into really small pieces and place into the flour mix, stir.
  4. Melt the butter in a bowl in the microwave and add the milk, puree, vinegar and eggs. Whisk with a hand whisk until well combined.
  5. Pour the milk mix into the flour mix and using a hand whisk beat until just combine.
  6. Pour the batter into the patty cases and bake in the oven for 20 minutes or until and skewer in the center comes out clean.
  7. Place the cupcakes onto a cooling rack until cool.
  8. Meanwhile to make the icing beat the ingredients until well combined.
  9. Using a spatula spread the icing over the cupcake evenly.
  10. Grate extra chocolate and dice almonds over the icing.


Low Fat Dark Chocolate Balsamic and Almond Cupcakes
Step 3
Low Fat Dark Chocolate Balsamic and Almond Cupcakes
Step 6
Low Fat Dark Chocolate Balsamic and Almond Cupcakes
Step 7
Low Fat Dark Chocolate Balsamic and Almond Cupcakes

Step 8


Like this recipe? Subscribe via RSS or email to get my new entries and more scrumptious recipes with reviews.

Email, RSS Follow
Print
Leave a comment .
Tags: almonds, balsamic vinegar, cupcakes, dark chocolate, low fat, Low Fat Dark Chocolate Balsamic and Almond Cupcakes .

Spiked Oat Peanut and Chocolate Cookies

Posted on September 25, 2016 Posted in Biscuits .

Spiked Oat Peanut and Chocolate Cookies

Spiked Oat Peanut and Chocolate Cookies recipe

These cookies came from me experimenting with cookie ‘sandwich’ biscuit recipes. I made a few patches of a range of varying flavor combinations where to list a few includes;  peanut butter, almond, coconut, lime, butterscotch, caramel, Kahlua, chocolate…and the list goes on. The aim of making all the variations was to (a) have fun playing around with flavor pairings, but ultimately (b) I wanted to make up an epic recipe for a friends birthday to take to her gathering.

The best mix was peanut butter, chocolate and coconut with the addition of Kahlua to enhance and amplify the chocolate flavor, in which that it did!

This recipe you can say is not as out there as others I have made, BUT these cookies are pretty darn amazingly tasty.


Ingredients:

Biscuit:

  • 160g butter
  • 160g sugar
  • 90g peanut butter
  • 45ml Kahlua
  • 150g plain flour
  • 65g desiccated coconut
  • 1/8 tsn salt
  • 105g Oat bran

Filling:

  • 300g dark chocolate
  • 30ml cream
  • 90g peanut butter

Extra:

  • 60g desiccated coconut


Method:

  1. Preheat the oven to 160c degrees and line a 30 x 30cm baking tray with baking paper.
  2. Using electric beaters whisk the soft butter and sugar until creamy.
  3. Add the peanut butter and Kahlua and beat until well combined.
  4. Sift in the flour and add in the coconut, oats and salt. Stir to combine.
  5. Wet hands and roll mix into 15g balls, placing on the tray with 5cm between each ball.
  6. Once all balls are done use the back of a spoon to slightly flatten.
  7. Bake in the oven for 12-14 minutes then place on a cooling rack until cooled.
  8. Meanwhile, to make the filling place the chocolate with the cream in a bowl and microwave in 30 second intervals stirring in between until melted and smooth.
  9. Set the chocolate aside in the fridge for 30 mins of until the chocolate is at a spreadable consistency (similar to peanut butter)
  10. Spread each cooled biscuit on the baked side down with the chocolate mix.
  11. On half the biscuits drop a small amount of peanut butter into the center of the biscuit on top of the ganache.
  12. Sandwich the biscuits together.
  13. Roll each of the biscuits on their side into the extra desiccated coconut and roll to cover all the chocolate filling until all biscuits are done.


Pumpkin Vanilla and Cinnamon Scrolls recipe

Step 2

Spiked Oat Peanut and Chocolate Cookies recipe

Step 4

Spiked Oat Peanut and Chocolate Cookies recipe

Step 6

Spiked Oat Peanut and Chocolate Cookies recipe

Step 7

Spiked Oat Peanut and Chocolate Cookies recipe

Step 8

Spiked Oat Peanut and Chocolate Cookies recipe

Step 13


Like this recipe? Subscribe via RSS or email to get my new entries and more scrumptious recipes with reviews.

Email, RSS Follow
Print
Leave a comment .
Tags: biscuits, chocolate, coconut, cookies, dark chocolate, dessicated coconut, kahlua, oat bran, peanut butter, Spiked Oat Peanut and Chocolate Cookies .

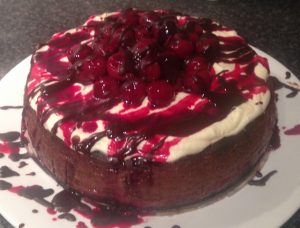
Black Forest Ricotta Cheesecake

Posted on June 20, 2016 Posted in Cakes .

Black Forest Ricotta Cheesecake

Black Forest Ricotta Cheesecake recipe

For a while I have been wanting to make a cheesecake with low fat ricotta instead of the rich and weighty creamcheese cheesecakes traditionally have. I wanted to make this cheesecake ‘melt in your mouth’, which I felt the ricotta could deliver on.

My flavor inspiration for this cake came from originally thinking of making a dark chocolate cheesecake and then adding in some cherries (berries and cheesecake go together like magic).

This though was still a little boring, where I needed a twist, therefore I decided to add the extra elements required to turn this into a ricotta cheesecake black forest cake.

The cherries, chocolate, kirsch and cream would enhance the flavor profiles in the cake and add depth to the creamy ricotta.

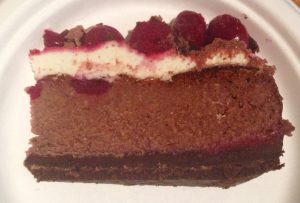
I opted to water bath cook the cake to make the ricotta smooth but sturdy and added layers of the cherries in varying forms to allow for cherry hits throughout.

After eating this cake I doubt I would ever make a normal black forest cake other this recipe again!

Ricotta Black Forest Cheesecake recipe

Ingredients:

  • 200g chocolate ripple biscuit
  • 40g cocoa powder
  • 80g butter
  • 670g jar of Morello cherries (you need 450g of the cherries and 100ml of juice)
  • 5g flour
  • 70g kirsch
  • 400g ricotta
  • 100g sour cream
  • 90g sugar, plus 1 tbsn extra
  • 3 eggs
  • 1 tsn cherry essence
  • 230g dark chocolate
  • 230g cream, plus 20ml extra
  • 1 tbsn icing sugar


Method:

  1. Pre-heat the oven to 170c degrees and line a 25cm spring form cake tin with baking paper.
  2. Place the biscuits into a food processor and blitz until they resemble breadcrumbs.
  3. Add the cocoa and melted butter, stir until well combined and place in the fridge to set.
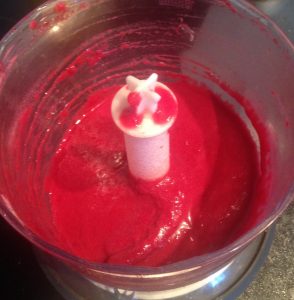
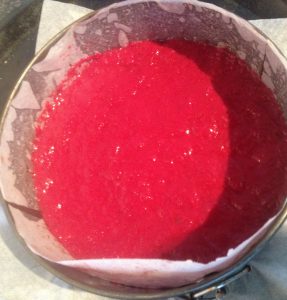
  4. Place 200g cherries in the food processor with flour and blitz.
  5. Spread the cherry mix over the biscuit base and place in the freezer.
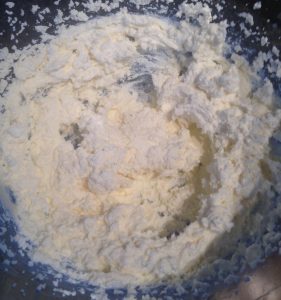
  6. Meanwhile, using electric beaters whisk the ricotta in a bowl until smooth.
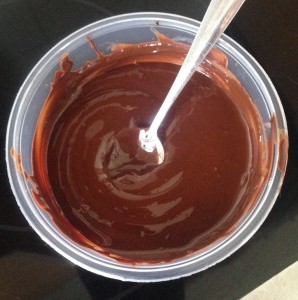
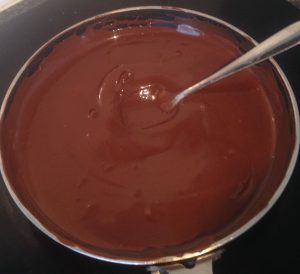
  7. Place 200g chocolate in a bowl and microwave on medium in 30 second blasts. Stir between each burst until melted and silky smooth. Leave aside for 5 minutes to cool.
  8. Add the sour cream and sugar to the ricotta mix and whisk until well combined.
  9. Add 2 eggs and 1 egg yolk and whisk until well combined.
  10. Add the cherry essence as well as the cooled chocolate and whisk until well combined.
  11. Pour the mix into the cake tin on top of the cherry mix and flatter with the back of a spoon.
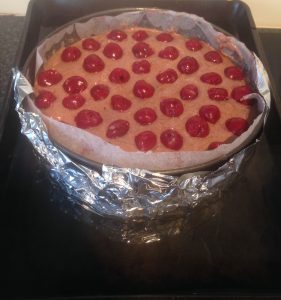
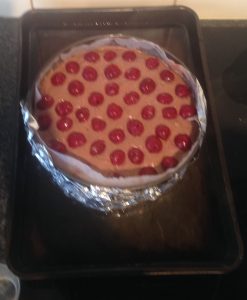
  12. Place 125g of  the cherries on top of the ricotta mix to cover the top of the cake.
  13. Wrap 2 layers of aluminum foil over the bottom and sides of the tin.
  14. Place the cake tin into a large roasting pan and fill the sides with water until half way up the cake tin.
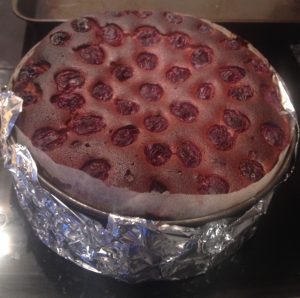
  15. Place the cake in the oven for 90 minutes or until a skewer inserted in the middle comes out clean.
  16. Allow the cake to cool then release the tin and place the cake in the fridge for 2 hours to fully set.
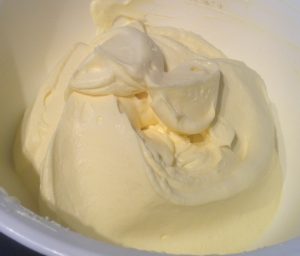
  17. Whip 230ml cream, 20ml kirsch and 1 tbsn of icing sugar with electric beaters until peaks form.
  18. Spread the cream over the cake and top with the remaining 125g more of the cherries.
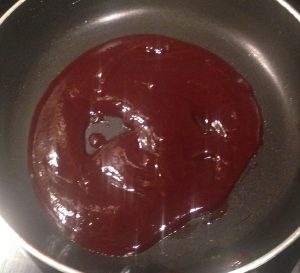
  19. Place 100ml of the cherry juice into a saucepan with 1 tbsn of extra sugar and on a medium heat allow to reduce to ¼ of the volume. Allow to cool.
  20. Pour the reduction over the cake.
  21. Place the remaining 30g of chocolate into a saucepan with 20ml of cream. Stir on a medium heat until the mix is smooth and silky. Allow to cool.
  22. Pour over the cake.


Black Forest Ricotta Cheesecake recipe

Step 4

Black Forest Ricotta Cheesecake recipe

Step 5

Black Forest Ricotta Cheesecake recipe

Step 6

Black Forest Ricotta Cheesecake recipe

Step 7

Black Forest Ricotta Cheesecake recipe

Step 11

Black Forest Ricotta Cheesecake recipe

Step 13

Black Forest Ricotta Cheesecake recipe

Step 14

Black Forest Ricotta Cheesecake recipe

Step 15

Blackberry and Lemon Quadruple Trifle recipe

Step 17

Black Forest Ricotta Cheesecake recipe
Step 21


Like this recipe? Please subscribe via RSS or email to get my new entries and more scrumptious recipes with reviews.


Email, RSS Follow
Print
Leave a comment .
Tags: Black Forest Ricotta Cheesecake, bloack forest, cheesecake, cherries, dark chocolate, ricotta .

Citrus Dark Chocolate and Ricotta Cannoli’s

Posted on June 1, 2014 Posted in Italy, Traditional .

Citrus, Dark Chocolate and Ricotta Cannoli’s


I have actually made these Cannoli’s on quite a few occasions and in variations each time.

In this recipe I have tweaked to provide you with what I think the best variation (and the easiest as I cheat a little). I’ve made this before with alcohol, pistachios, candied fruit peel, glace cherries, you name it!

I have also made these from scratch (the cannoli shells that is) and to be honest they take a very long time while being fiddly and messy. As I have an Italian grocer down the road buying a pack of 12 shells for $5 is so much more easier.

Cannoli’s are a traditional Italian dessert consisting of fried pastry filled with a cheese filling (usually ricotta or mascarpone). Variations of the filling are also common with cream or custard being piped in the shells.

Also stay tuned on this post, in a few weeks time you will see how I experiment with this recipe to produce a delightful and to die for sweet treat alternative using the fillings.


Ingredients:

  • 300g fresh ricotta
  • ¾ cup of icing sugar
  • Finally grated rind on 1 orange
  • Finally grated rind of I lemon
  • 100g dark chocolate grated


Method:

  1. Mix together all ingredients until smooth.
  2. Spoon into a piping bag with a star nozzle (Witlon tip size up to you).
  3. Pipe the filling into the shells generously starting from one end to the other.
  4. And it’s as simple as that.


Notes:

  • This will fill easily 12 medium size shells or 18 small shells.
  • This filling is actually really good as a filling in the middle and on top of a chocolate cake or sponge cake to give a basic cake a twist of variation.
  • The filling can also be piped into profiteroles as a change up from cream or custard (I shared my profiterole recipe in January).


Like this recipe? Subscribe via RSS or email to get my new entries and more scrumptious recipes with reviews.


Email, RSS Follow
Print
Leave a comment .
Tags: Cannoli's, citrus, dark chocolate, ricotta, rind .
Next Page »

Pages

  • About Me
  • Baking Metrics
  • Blogroll
  • Common Baking Questions
  • Recipe Index
  • Tips & Tricks
  • Contact

Archives

  • February 2022
  • October 2021
  • September 2021
  • August 2021
  • April 2021
  • February 2021
  • January 2021
  • December 2020
  • November 2020
  • October 2020
  • September 2020
  • August 2020
  • July 2020
  • June 2020
  • May 2020
  • September 2019
  • June 2019
  • May 2019
  • April 2019
  • March 2019
  • February 2019
  • January 2019
  • December 2018
  • November 2018
  • October 2018
  • September 2018
  • August 2018
  • July 2018
  • June 2018
  • May 2018
  • April 2018
  • March 2018
  • February 2018
  • January 2018
  • December 2017
  • November 2017
  • October 2017
  • September 2017
  • August 2017
  • July 2017
  • June 2017
  • May 2017
  • April 2017
  • March 2017
  • February 2017
  • January 2017
  • December 2016
  • November 2016
  • October 2016
  • September 2016
  • August 2016
  • July 2016
  • June 2016
  • May 2016
  • April 2016
  • March 2016
  • February 2016
  • January 2016
  • December 2015
  • November 2015
  • October 2015
  • September 2015
  • August 2015
  • July 2015
  • June 2015
  • May 2015
  • April 2015
  • March 2015
  • February 2015
  • January 2015
  • December 2014
  • November 2014
  • October 2014
  • September 2014
  • August 2014
  • July 2014
  • June 2014
  • May 2014
  • April 2014
  • March 2014
  • February 2014
  • January 2014
  • December 2013

Categories

  • America (5)
  • Arabic (1)
  • Australian (2)
  • Biscuits (24)
  • Brazil (1)
  • Bread (12)
  • Brownies (5)
  • Cakes (141)
  • Croatian (1)
  • Cupcakes (20)
  • Custard (1)
  • Doughnuts (6)
  • Flan (1)
  • France (5)
  • Fudge (3)
  • German (1)
  • Greece (2)
  • Hungary (1)
  • Ice-cream & Sorbet (15)
  • Ice-cream cake (6)
  • Icing (18)
  • Italy (4)
  • Jam (1)
  • Jamaican (1)
  • Lebanese (1)
  • Marshmallows (2)
  • Mexican (1)
  • Morocco (1)
  • Mousse (2)
  • Muffins (1)
  • Panna Cotta (1)
  • Pastries (2)
  • Pies (7)
  • Portugal (1)
  • Pudding (12)
  • Roulade (1)
  • Russia (1)
  • Slice (27)
  • Souffle (1)
  • Sweden (1)
  • Swedish (1)
  • Syrup (1)
  • Tarts (13)
  • Traditional (17)
  • Trifile (1)
  • Truffles (5)
  • Turkey (1)
  • Uncategorized (1)
  • Unique (10)

WordPress

  • Register
  • Log in
  • WordPress

Subscribe

  • Entries (RSS)
  • Comments (RSS)

CyberChimps WordPress Themes

© Sweet Tooth Experiments