Sweet Tooth Experiments

  • About Me
  • Recipe Index
  • Baking Metrics
  • Tips & Tricks
  • Common Baking Questions
  • Contact

Category Archives: Tarts

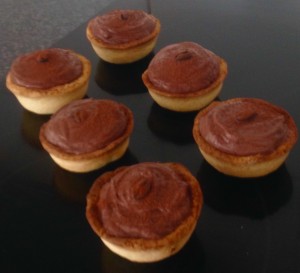
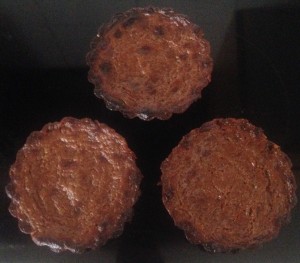
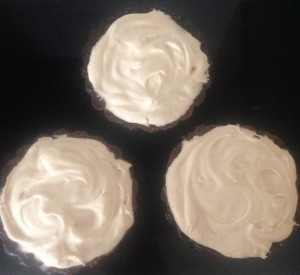
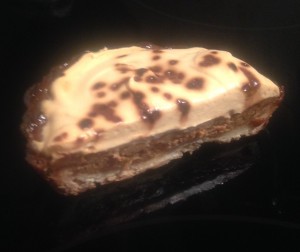
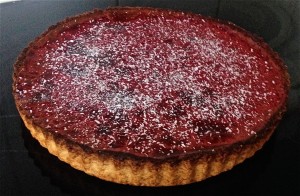
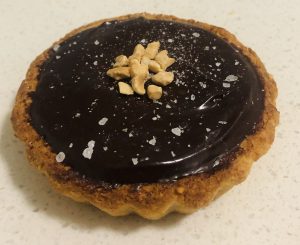
Chocolate and Peanut Rice Crust Tart
Posted on November 1, 2020 Posted in Tarts .

Chocolate and Peanut Rice Crust Tart

Chocolate and Peanut Rice Crust Tart recipe

This recipe actually derived from a savoury tart recipe with a brown rice and seed base. I liked the idea of a rice base so much I adapted the recipe to suit a sweeter bake.

As the parmesan added such great richness and flavour, whilst being a great binding ingredient I left it in the sweet adaptation recipe. This then dictated what type of a sweet bake I would make as dark chocolate and parmesan go so well together (see my Parmesan Cheese Chocolate Slice recipe).

I changed the seeds from the original recipe to peanuts as peanuts had similar fat content in which the tart needed to keep it moist, while coating the proteins and starches in the egg, rice and flour. A few trials and I had the perfect base.

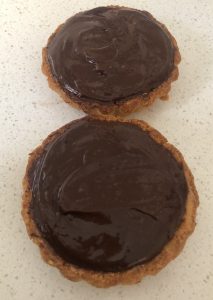
As peanuts were used in my base, I made this the hero ingredient along with the previously identified dark chocolate and wah-lah a peanut filled tart with chocolate ganache recipe on a rice crust tart case was born.

You would have no idea of rice in the base, in which is a great alternative to flour and the peanut filling with dark chocolate topping is just to die for.

This recipe exceeded my expectations and then some – decadent, delicious, unique and so so satisfying.
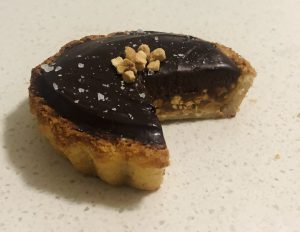
Chocolate and Peanut Rice Crust Tart recipe

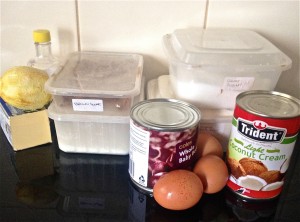
Ingredients:

Base:

  • 500g packet ready steamed white rice
  • 50g peanuts
  • 40g parmesan
  • 20g plain flour
  • 1 egg
  • 1/2 tsn salt

Filling:

  • 75g peanut butter
  • 180g sugar
  • 60ml water
  • 80g butter
  • 80ml thickened cream
  • 160g peanuts

Ganache:

  • 165g thickened cream
  • 240g dark choc
  • 3 egg yolks
  • 1 tbsn caster sugar


Method:

  1. Preheat the oven to 180c degrees and spray 8 mini tart cases with oil spray.
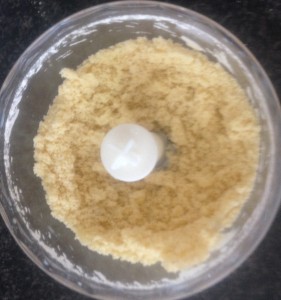
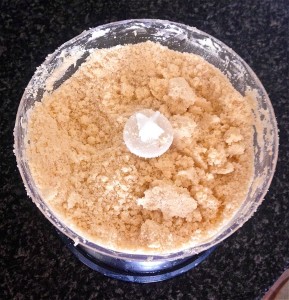
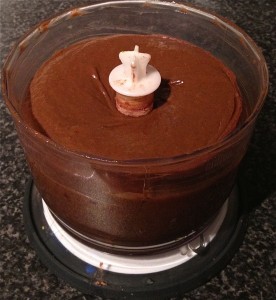
  2. Place the rice, peanuts, flour and parmesan into a food processor and blitz until the mix resembles bread crumbs.
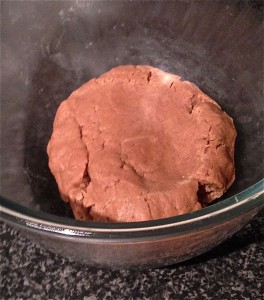
  3. Add the egg and salt and blitz until well combined.
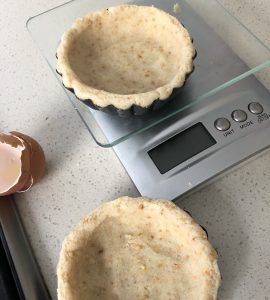
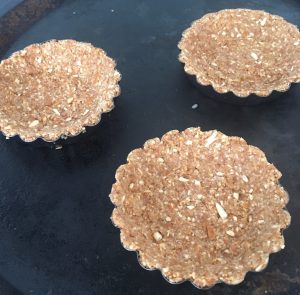
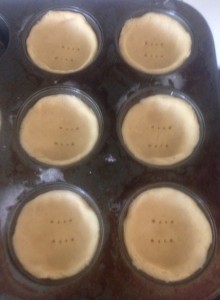
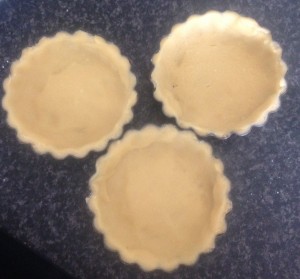
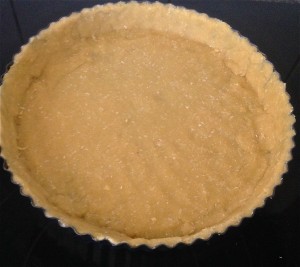
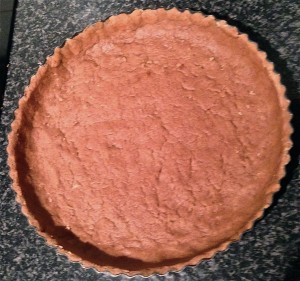
  4. Divide the mix into 8 balls and using wet hands push the mix into the base of the tin and up the sides of the tin to cover the tin completely and evenly.
  5. Prick the bases with a fork a few times and place the tart cases into the oven, baking for 20 minutes.
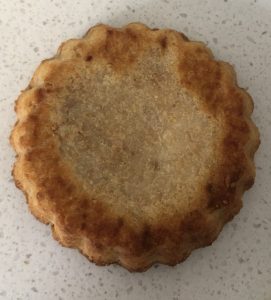
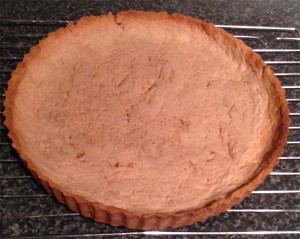
  6. Remove the tarts from the oven, take the tins off the tart shells and bake for a further 5 minutes base side up to ensure a crispy brown base on the tart shells.
  7. Set the bases aside to cool.
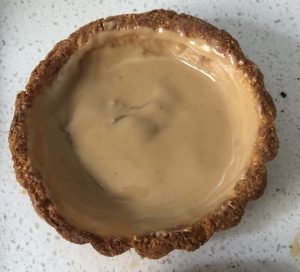
  8. Spoon and evenly spread the peanut butter into the base of each tart shell and place in the fridge for 15 minutes to set.
  9. Meanwhile place the sugar and water into a saucepan on medium heat, whisking with a hand whisk until sugar is dissolved.
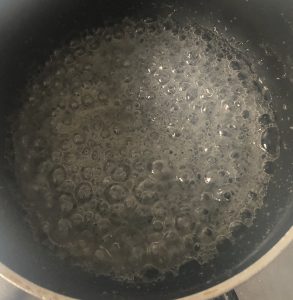
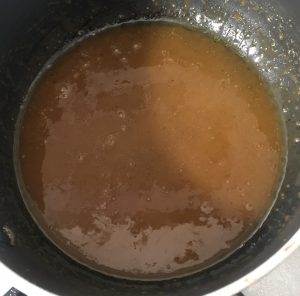
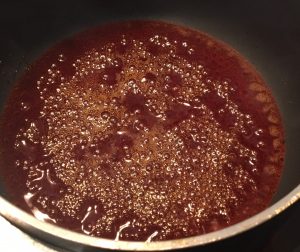
  10. Turn the heat to high and allow to bubble until the mix starts to caramelise.
  11. Remove the mix off the heat and carefully add the butter, cream and salt, whisking with a hand whisk.
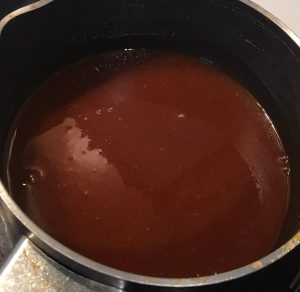
  12. Place the pan back on a medium heat, whisking until the mix is silky smooth.
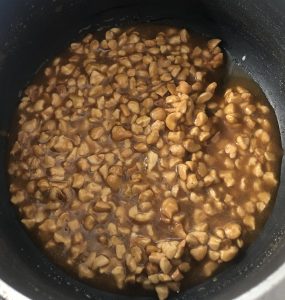
  13. Add the peanuts to the pan and whisk until well combined, leave aside to cool.
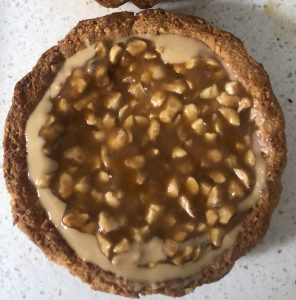
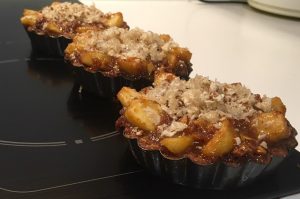
  14. Spoon the peanut caramel mix into the base of the tart shells – over the peanut butter and place the tarts back in the fridge for 30 minutes.
  15. To make the ganache place the cream and chocolate in a saucepan over a pot of simmering water and stir until well combined, silky and smooth in texture, leave aside until slightly cooled.
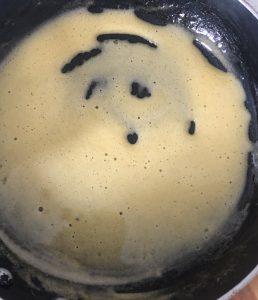
  16. Place the egg yolks and sugar in another saucepan and whisk with a hand whisk until the egg is pale and creamy – do not place directly on the heat or the yolk with scramble.
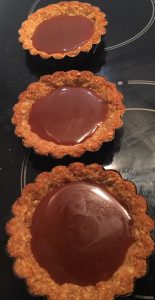
  17. Place the yolk mix and chocolate mix into a bowl and beat with electric beaters until cooled, thick and creamy.
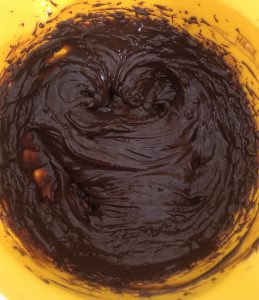
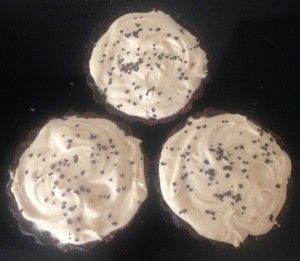
  18. Spoon over the top of the peanut mix and place the tarts in the fridge to completely set for 2+ hours.
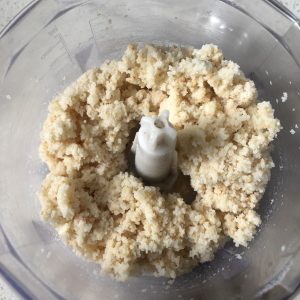


Chocolate and Peanut Rice Crust Tart recipe

Step 2


Chocolate and Peanut Rice Crust Tart recipe

Step 4

Chocolate and Peanut Rice Crust Tart recipe

Step 7


Chocolate and Peanut Rice Crust Tart recipe

Step 8

Chocolate and Peanut Rice Crust Tart recipe

Step 10


Chocolate and Peanut Rice Crust Tart recipe

Step 14


Chocolate and Peanut Rice Crust Tart recipe

Step 13

Chocolate and Peanut Rice Crust Tart recipe

Step 14


Chocolate and Peanut Rice Crust Tart recipe

Step 16

Chocolate and Peanut Rice Crust Tart recipe

Step 17


Chocolate and Peanut Rice Crust Tart recipe

Step 18

Email, RSS Follow
Print
Leave a comment .
Tags: chocolate, Chocolate and Peanut Rice Crust Tart, Parmesan, peanuts, Rice, Rice Crust Tart, tarts .

Peach and Basil Tarte Tatin

Posted on June 14, 2020 Posted in Tarts .

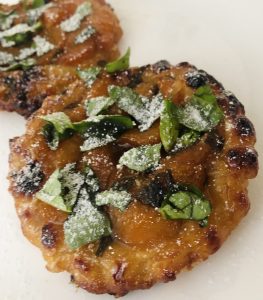
Peach and Basil Tarte Tatin

Peach and Basil Tarte Tatin

Yes baking with canned peaches instead of fresh in a Tarte Tatin is very odd, some may think sinful, but the challenge ingredient I was given for this bake was canned peaches.

It is quite frustrating when you come up with a recipe idea and have to wait months for the fruit to be in season. So the challenge was to come up with a recipe that would combat seasonality as well as be unique in flavour and of course super tasty.

This recipe needed to produce a bake that gave the illusion of fresh and ripe peaches being used.

I have been thinking of creating a recipe with peaches and basil for a while, so I thought this was a good opportunity for me to do some experimenting.

Why Tarte Tatin? I honestly cannot remember now…maybe because it was so unconventional…

A few trials to get it to the right bake outcome and below is how to make a delicious Peach Tarte Tatin all year around!

Peach and Basil Tarte Tatin

Ingredients:

  • 1 sheet puff pastry
  • 280g drained peaches from a can
  • 80g caster sugar
  • 80g butter
  • 1 tsn vanilla essence
  • ¼ tsn salt
  • 1 tsn lemon juice
  • 1 tsn basil, chopped

Extra:

  • 6 ripped basil leaves
  • Double cream


Instructions:

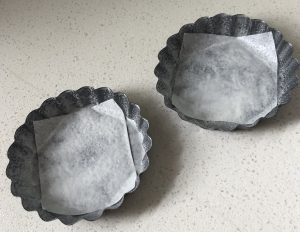
  1. Oil a 25cm cake tin lined with baking paper on the base, allowing for a 1cm border of no paper around the edge.
  2. Pre-heat oven to 190c degrees.
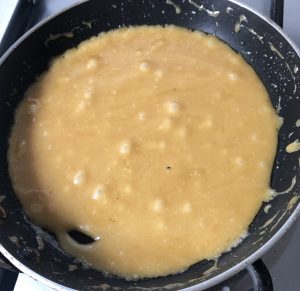
  3. Place butter, sugar, salt, vanilla and lemon juice into a saucepan and stir on low heat until the sugar is dissolved.
  4. Increase temperature to high and allow to boil until a candy thermometer hits 90c degrees.
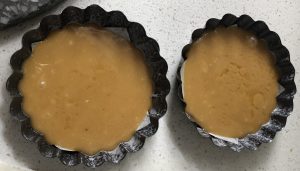
  5. Pour the caramel into the prepared tin base.
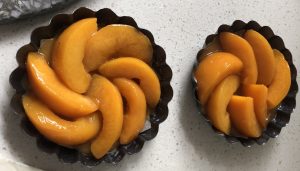
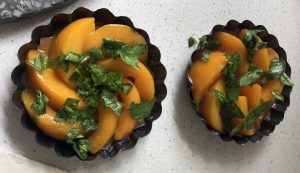
  6. Add the peaches in a spiral pattern ensuring the based is covered with the fanned fruit.
  7. Sprinkle the chopped basil over the peaches evenly.
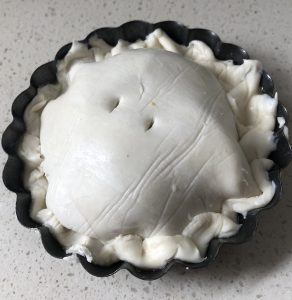
  8. Cover the peaches with the pastry, tucking in the sides to ensure full coverage and poke a few holes to let the steam out during the bake.
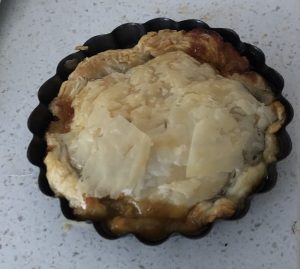
  9. Bake for 30 minutes, allow to cool for 15 minutes before inverting onto an oven safe plate, remove the baking paper.
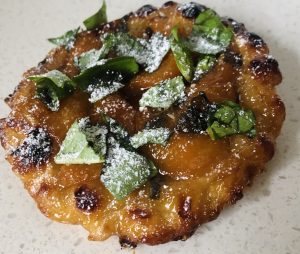
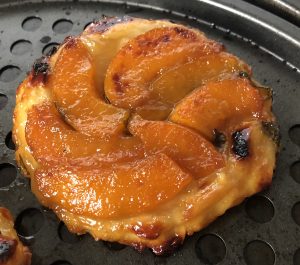
  10. Place the tart under a hot grill for 5 minutes or until golden and bubbly.
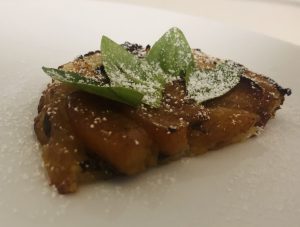
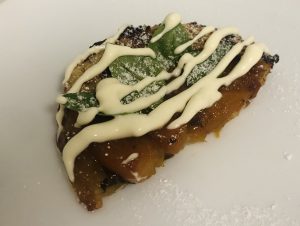
  11. Top with the extra ripped basil and a good dollop of cream to serve.
Peach and Basil Tarte Tatin

Step 1


Peach and Basil Tarte Tatin

Step 3


Peach and Basil Tarte Tatin

Step 5

Peach and Basil Tarte Tatin

Step 6


Peach and Basil Tarte Tatin

Step 7


Peach and Basil Tarte Tatin

Step 8


Peach and Basil Tarte Tatin

Step 9


Peach and Basil Tarte Tatin

Step 10


Peach and Basil Tarte Tatin

Step 11


Peach and Basil Tarte Tatin

Step 11

Email, RSS Follow
Print
Leave a comment .
Tags: basil, peach, Peach and Basil Tarte Tatin, Tarte Tatin .

Fig Lavender and Honey Mini-Tarts

Posted on December 29, 2018 Posted in Tarts .

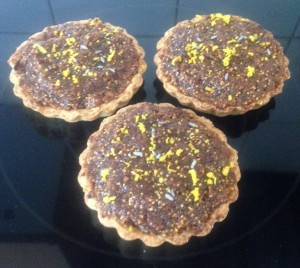
Fig Lavender and Honey Mini-Tarts

Fig Lavender and Honey Mini-Tarts recipe

The taste of this tart is Christmas in a nutshell, but you do need to be a lover of figs that’s for sure!

After playing around with the size, flavours and quantities of a mince-pie alternative tart (I love mince pies apart from the filling aka the main part of a mince pie lol), I ended up happy with little bite sized tarts (almost canapé style).

If you like mince pies but prefer figs over sultanas this is the perfect mince pie replacement Christmas treat for you.

You never know, you may convert yourself to a new Christmas fav, others too!


Ingredients:

Pastry:

  • 100g flour
  • 50g butter
  • 25g sugar

Filling:

  • 20g honey
  • ½ tsn ground lavender
  • 225g dried figs
  • ¼ tsn apple cider vinegar
  • ½ tsn orange zest

Decoration:

  • Honey
  • Lavender flowers
  • Orange zest


Method:

  1. Pre-heat the oven to 200c degrees.
  2. Place the pastry ingredients into a food processor and blitz until the mix resembles fine breadcrumbs.
  3. Add 25ml of water and process until the mix resembles dough and comes away from the sides of the bowl. If this does not occur and the mix looks too dry add an extra 5ml of water and process again.
  4. Place the dough on a floured bench and knead the dough for a minute. Following divide the dough into 12 balls of 15g each.
  5. With a rolling pin roll the balls into disks and place them into 12 mini (1 + ½ tbsn capacity) tart cases. OR as an alternative grease a small cupcake tin and place the disks in the bottom and sides of the tin cupcake holes (a 24 capacity – 33x22cm sized tin are quite common to have or find).
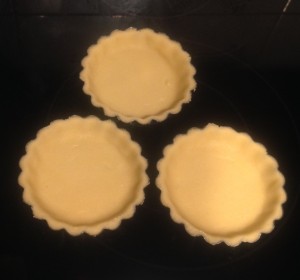
  6. Prick the pastry with a fork a few times and place the tarts in the fridge for 30 minutes.
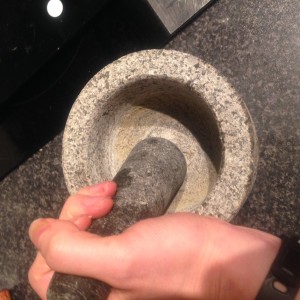
  7. Meanwhile make the filling by placing the lavender into a mortar and pestle and grind until the lavender is too a powder consistency.
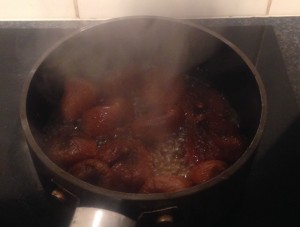
  8. Place the figs, 320ml of water, honey, lavender, vinegar and orange zest in a pan on a medium heat.
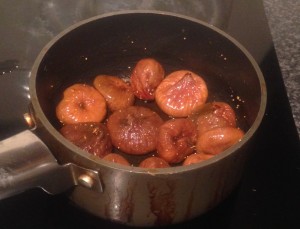
  9. Boil the mix for 15 minutes; stirring every few minutes until the figs are plumb and the water is to a syrupy sticky consistency.
  10. Place the mix into the food processor and blitz until the figs are at a paste consistency.
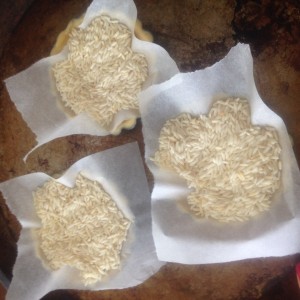
  11. Place baking paper in the center of each tart case followed with some rice or baking weights to weight down the rise of the pastry base while cooking.
  12. Place the tart shells in the oven for 10 minutes.
  13. Remove the baking paper and weights and bake in the oven for a further 8 minutes or until the tart shells are slightly golden brown.
  14. Place the fig mix into the tart shells and bake for a further 5 minutes.
  15. Remove the tarts from the oven and once cooled if you wish add a few lavender flowers and a little orange zest for decoration.


Fig Lavender and Honey Mini-Tarts recipe

Step 5

Fig Lavender and Honey Mini-Tarts recipe

Step 5

Fig Lavender and Honey Mini-Tarts recipe

Step 7

Fig Lavender and Honey Mini-Tarts recipe

Step 8

Fig Lavender and Honey Mini-Tarts recipe

Step 9

Fig Lavender and Honey Mini-Tarts recipe

Step 13


Like this recipe? Subscribe via RSS or email to get my new entries and more scrumptious recipes with reviews.


Email, RSS Follow
Print
Leave a comment .
Tags: Fig Lavender and Honey Mini-Tarts, figs, honey, lavender, orange .

Pretzel-base Caramel Apple Walnut and Pork Crackle Tart

Posted on October 6, 2018 Posted in Tarts .

Pretzel-base Caramel Apple Walnut and Pork Crackle Tart

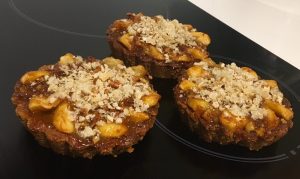
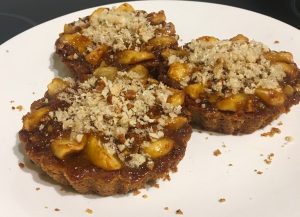
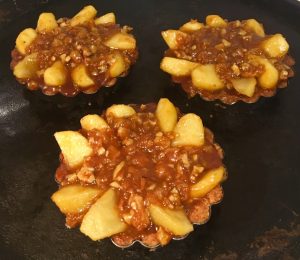
Pretzel Based Caramel Apple Walnut and Pork Crackle Tart recipe

The idea for this recipe was all around combining the sweet, the salty, the sour and savoury.

As I had a bunch of apple left from a previous baking session I decided to use them up and have apples as a core sweet component of a dessert. I thought that if I made a salted caramel, in which would go brilliantly with the apple I could get some saltiness as well as the sweet. I’m also mindful that these 2 ingredients  would make for a prefect tart filling.

So, if I was to make a tart then I needed a base. I figured since pretzels are basically flour and salt I could use these savory snacks as a base to my recipe, ticking the savory and salty box.

To not only ramp up the savory but also ensure some crunchy texture I opted for a few extra ingredients that also complement the apple flavour. After playing around with a few ingredients I decided that walnuts and pork crackle, when combine with the apple were too good of a combo to ignore.

Lastly, as I did want to have sour in the recipe in some way the only way this would work and add an extra depth to the flavour was through some lemon zest.

A lot of trial and error was had for this recipe, but in the end I’m impressed with the result. I successfully ticked the sweet, sour, salty and savory boxes as well as the tarts achieving deliciousness with a diverse range of textures, from crunchy, smooth and soft.

Pretzel Based Caramel Apple Walnut and Pork Crackle Tart recipe


Ingredients:

Base:

  • 140g pretzels
  • 110g butter
  • 40ml honey

Caramel:

  • 180ml cream
  • Pinch salt
  • 50g butter
  • 220g sugar

Apples:

  • 5 apples (130g per apple will amount to 90g apple slices)
  • Pinch salt
  • 40g brown sugar
  • 1 tsn lemon zest
  • 20g flour
  • 50g walnuts, finely chopped
  • 40g pork crackle, finely chopped


Method:

  1. Pre-heat the oven to 175c degrees and grease 6 small tart pans with oil spray.
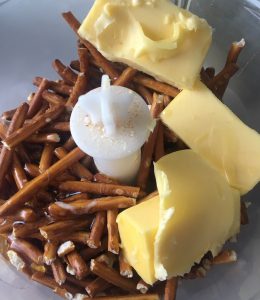
  2. Process the pretzels, butter and honey in a food processor until the mix resembles breadcrumb texture.
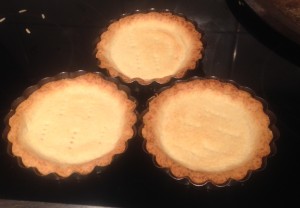
  3. Spoon 50g of filling into each tart case and pat the bottom and sides of the tart case with oiled fingertips until the whole tart case is covered with the mix.
  4. Place the tart cases on a tray, poke with a fork in the centre lightly and bake in the oven for 8 minutes or until golden, set aside to cool.
  5. Make the caramel by placing the sugar into a pan on high heat until the mix turns amber and bubbles.
  6. Remove off the heat, pour in the cream, add the salt and the butter. Stir until well combine and silky smooth in texture.
  7. Allow the caramel to sit for 10 minutes to cool then place half the caramel into a bowl and for the remaining pour into the bottom of the cooked tart cases.
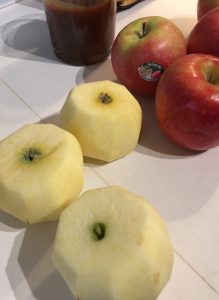
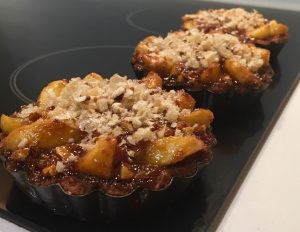
  8. Peel the apples and core them.
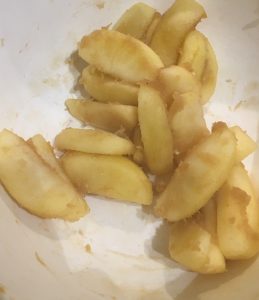
  9. Cut the apples into quarters, then each quarter into 3 pieces lengthways.
  10. Put the apple pieces in a bowl with a pitch of salt, the brown sugar, the lemon zest and flour. Stir until the apple is well coated and the mix is evenly distributed.
  11. Place the bowl in the microwave on a medium heat, stopping and mixing in 60 second bursts until the apple is soft and the flour mix coats the apple well.
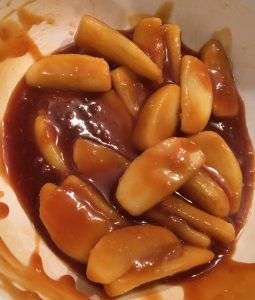
  12. Add the remaining caramel to the apples and stir until well combine.
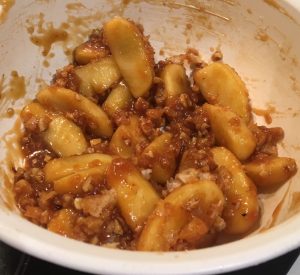
  13. Place 40g walnuts and 30g of the pork crackle into the apple mix and stir until well combined.
  14. Spoon the apple pieces over the caramel in a fan design, topping with the remaining caramel mix over the apples.
  15. Place tarts on a tray and bake in the oven on 175c degrees, for 20 minutes.
  16. Remove from the oven and top with remaining 10g walnuts and 10g pork crackle, leave aside until they have cooled to just warmer than room temperature.
  17. Remove the tarts out of the tart casings and enjoy as is or with a scoop of vanilla ice-cream on the top.


Note: You are best using actual pork crackle, not using the pork belly crackling with the fat. We just want to the crunchiness of the crackling!


Pretzel Based Caramel Apple Walnut and Pork Crackle Tart recipe

Step 2


Pretzel Based Caramel Apple Walnut and Pork Crackle Tart recipe

Step 2


Pretzel Based Caramel Apple Walnut and Pork Crackle Tart recipe

Step 3

Pretzel Based Caramel Apple Walnut and Pork Crackle Tart recipe

Step 5

Pretzel Based Caramel Apple Walnut and Pork Crackle Tart recipe

Step 6

Pretzel Based Caramel Apple Walnut and Pork Crackle Tart recipe

Step 7

Pretzel Based Caramel Apple Walnut and Pork Crackle Tart recipe

Step 8


Pretzel Based Caramel Apple Walnut and Pork Crackle Tart recipe

Step 12

Pretzel Based Caramel Apple Walnut and Pork Crackle Tart recipe

Step 12

Pretzel Based Caramel Apple Walnut and Pork Crackle Tart recipe

Step 13

Pretzel Based Caramel Apple Walnut and Pork Crackle Tart recipe

Step 15

Pretzel Based Caramel Apple Walnut and Pork Crackle Tart recipe

Step 17

Pretzel Based Caramel Apple Walnut and Pork Crackle Tart recipe

Step 17


Like this recipe? Subscribe via RSS or email to get my new entries and more scrumptious recipes with reviews.


Email, RSS Follow
Print
Leave a comment .
Tags: apple, caramel, lemon, pork crackle, pretzel, Pretzel Based Caramel Apple Walnut and Pork Crackle Tart, Pretzel-base Caramel Apple Walnut and Pork Crackle Tart, walnut .

Torta Di Ricotta

Posted on April 29, 2017 Posted in Italy, Tarts .

Torta Di Ricotta

Torta Di Ricotta

I must say I do get drawn to traditional Italian desserts; they really do produce the most magnificent desserts on the world (and clearly don’t underdeliver of the savory side ether)!

One dish that I have had my eye on for ages is a traditional Sicilian Cheesecake that is commonly made for Easter celebrations. This sweet treat being the Torta Di Ricotta.

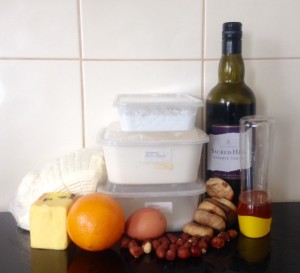
Now there are a few variations of this, as there are for most traditional desserts pending the part of Italy you are in. The version I have chosen to explore in a fig, hazelnut and of course the traditional Italian dessert wine Marsala (my favorite wine).
Not only is this tart easy to make its not too unhealthy as it’s low-ish in sugar and uses low fat protein building ricotta.


Ingredients:

Pastry

  • 230g plain flour
  • 70g sugar
  • 160g butter
  • 1 egg

Filling

  • 135g dried fig
  • 80ml marsala
  • 750g ricotta
  • 110g sugar
  • 2 tbsn honey
  • 1 egg
  • 100g roasted hazelnuts
  • 1 orange


Method:

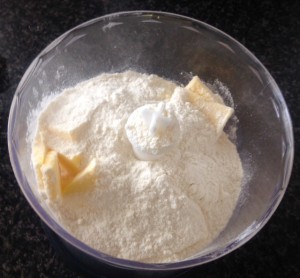
  1. Make the pastry first by placing the flour, sugar, butter and egg yolk into a food processor and pulse until the mix comes away on the sides.
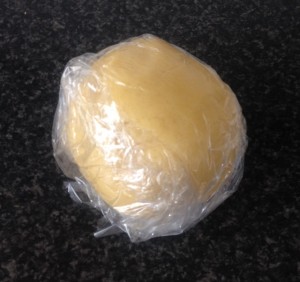
  2. Place the dough on the bench and knead until the dough is smooth and combined.
  3. Place in plastic wrap and put in the fridge for 1 hour.
  4. Pre-heat the oven to 190c degrees and place a 30cm round tart pan on the bench ready for later.
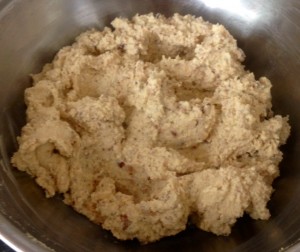
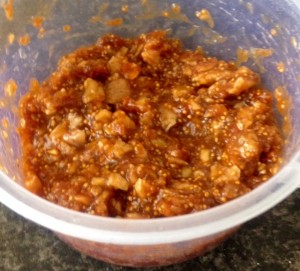
  5. In the food processor pulse the figs until finely chopped, then place in a small bowl mixed in with the Marsala. Leave aside for 20 minutes so the figs soak up the liquid.
  6. Place the ricotta, sugar, honey and egg in a large bowl and whisk until combine.
  7. In the food processor pulse the hazelnuts until finely chopped, place in with the ricotta mix as well as the zest of an orange and fig mix.
  8. Whisk until smooth and combined.
  9. For the tart shell cut off approx. a 5th of the pastry and leave aside for the top of the tart.
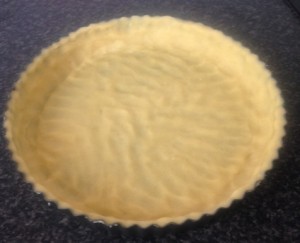
  10. With the remaining larger quantity of pastry roll into a ball then rollout with a rolling pin to a 35cm radius circle.
  11. Place the pastry in the tart pan, pressing the pastry into the bottom and sides of the tin.
  12. Trim the pastry if it overlaps and add to the smaller quantity.
  13. Bake the tart shell for 10 minutes.
  14. Spoon the ricotta mix into the tart and smooth down with a spoon.
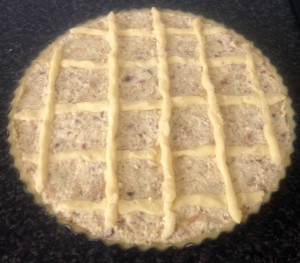
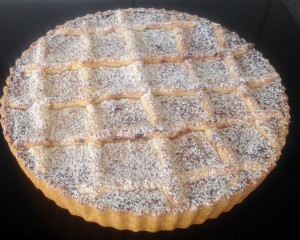
  15. With the remaining pastry roll out and cut into long 1 cm strips. Top the tart with the strips overlapping to create a lattice look.
  16. Brush the lattice pastry with the remaining egg white.
  17. Bake for 30 minutes, until the pastry is golden.
  18. Once cooled dust with icing sugar and serve warm.


Torta Di Ricotta recipe

Ingredients

Torta Di Ricotta recipe

Step 1

Torta Di Ricotta

Step 3

Torta Di Ricotta

Step 5

Torta Di Ricotta

Step 8

Torta Di Ricotta

Step 9

Torta Di Ricotta recipe

Step 15


Like this recipe? Subscribe via RSS or email to get my new entries and more scrumptious recipes with reviews.

Email, RSS Follow
Print
Leave a comment .
Tags: dried fig, fig, hazelnuts, Italian cheesecake, Italian tart, marsala, ricotta, Torta Di Ricotta .

Cocoa Ricotta Mousse Tarts

Posted on March 28, 2016 Posted in Tarts .

Cocoa Ricotta Mousse Tarts

Cocoa Ricotta Mousse Tarts recipe
 
I have made many versions of chocolate mousse with interesting ingredients, from silken Tofu to Avocado (check out my Healthy Chocolate Mousse Tart and Avocado Chocolate and Orange Mousse Tart recipes) and made unusual icings from Ricotta to Yoghurt (check out my Rubarb Strawberry Yoghurt cake with Lemon Yoghurt Frosting).

Thus from this experience I do know there is always an alternative to fattening cream that can have nutrient and vitamin benefits instead.

Since I was going down the pathway of experimenting with another alternative version of mousse I decided to also use an alternative to chocolate to lower the sugar content.

Standard chocolate mousse is filled with full fat whipped cream, sugar and lots of chocolate. My aim was to use low fat ricotta instead of cream, cocoa with a little sugar and honey to mimic the chocolate effect and add a little Kahlua kick to intensify the chocolate flavor.

I also wanted to make this super easy (all you need to do it place all ingredients in a blender). This recipe is pretty much fool proof, instantly thick and super tasty.


Ingredients:

Pastry:

  • 200g flour
  • 100g butter
  • 40g sugar

Filling:

  • 400g ricotta
  • 2 eggs
  • 55g honey
  • 55g icing sugar
  • 40g cocoa powder
  • 3 tsn Kahlua


Method:

  1. Pre-heat the oven to 200c degrees and spray a 12 x 7cm capacity cupcake tray with oil spray.
  2. Place all the pastry ingredients into a food processor and blitz until the mix resembles breadcrumbs.
  3. Add 25ml of water and blitz until the dough comes away from the side of the bowl.
  4. Knead dough for a minute and roll out between 2 pieces of baking paper.
  5. Use a 9cm cookie cutter to cut out 12 pastry circles and place in the center of each mold.
  6. Using a fork prick the middle of the pastry and place the shells in the fridge for 30 minutes.
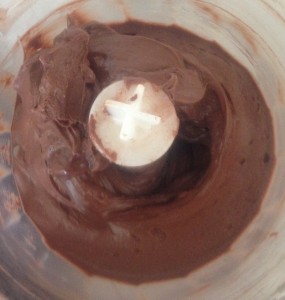
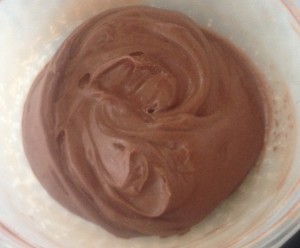
  7. Meanwhile place the ricotta, egg yolk, honey, sugar, cocoa powder and Kahlua into the food processor and blitz until soft and smooth.
  8. Place the egg whites into a bowl and using electric beaters whisk until peaks form.
  9. Fold the chocolate mix into the egg whites and leave in the fridge for later.
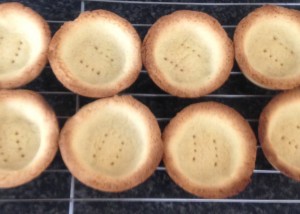
  10. Place the pastry shells into the oven for 18 minutes or until the shells start to brown slightly.
  11. Set the shells aside to cool completely.
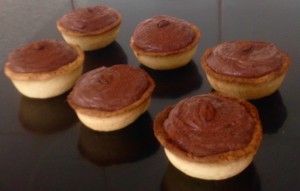
  12. Spoon the chocolate mix into the shells and enjoy.


Cocoa Ricotta Mousse Tarts recipe

Step 2

Balsamic and Strawberry Custard Biscuits recipe
Step 4
Cocoa Ricotta Mousse Tarts recipe

Step 6

Cocoa Ricotta Mousse Tarts recipe
Step 7
Cocoa Ricotta Mousse Tarts recipe
Step 8
Cocoa Ricotta Mousse Tarts recipe
Step 11
Cocoa Ricotta Mousse Tarts recipe


Like this recipe? Subscribe via RSS or email to get my new entries and more scrumptious recipes with reviews.


Email, RSS Follow
Print
Leave a comment .
Tags: chocolate mousse, Citrus Ricotta Doughnut Fritters, cocoa, Cocoa Ricotta Mousse Tarts, ricotta .

Portuguese Custard Tarts

Posted on November 30, 2015 Posted in Portugal, Tarts .

Portuguese Custard Tarts

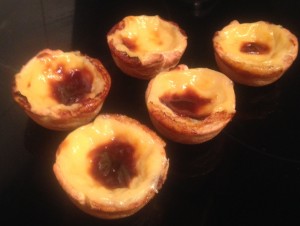
Portuguese Custard Tarts recipe

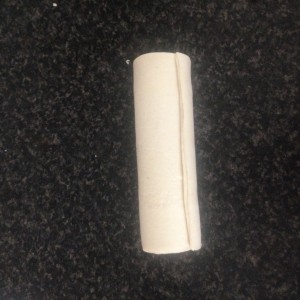
Portuguese Custard Tarts (aka Pastéis De Nata) are not only Portuguese traditional delicious sweet treats they are super easy to make!

The background of these lovely treats is quite interesting. They were created back in the 1800’s when egg-whites were used for starching of clothes, therefore egg yolks were in the abundance. Due to this the leftover egg yolks were used to make cakes and pastries – where Portuguese Custard Tarts was one of these treats.

There have been many alterations to the recipe over the years (etc speckled with Cinnamon) however I believe the original flavor mix is the best!


Ingredients:

  • 165g sugar
  • 185g water
  • 2 lemon peels
  • 1 tsn vanilla essence
  • 35g corn flour
  • 375g milk
  • 3 egg yolks
  • 1 sheet of puffy pastry

Method:

  1. Preheat the oven to 200c degrees and spray a 12 capacity muffin tin with oil spray.
  2. Place the sugar, water, lemon peel and essence in a pan on a high heat on the stove, stir constantly until boiling.
  3. Conclude the stirring and let the syrup thicken up for a few minutes.
  4. Take off the heat to cool slightly.
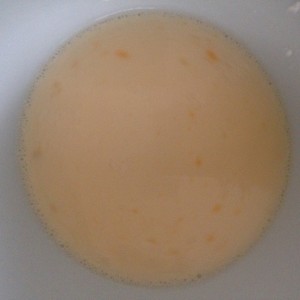
  5. Place the corn flour, milk and egg yolks in a bowl and whisk with a hand whisk until well combine.
  6. Pour the milk mix into the saucepan with the sugar syrup and whisk with the hand whisk until the sugar syrup has dissolved into the milk mix.
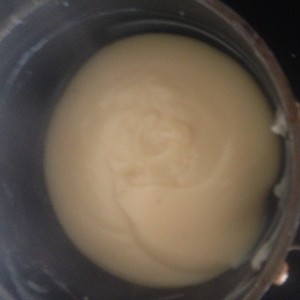
  7. Place the saucepan on the heat and on high stir continuously until the mix thickens and boils (about 5 mins), set aside to cool.
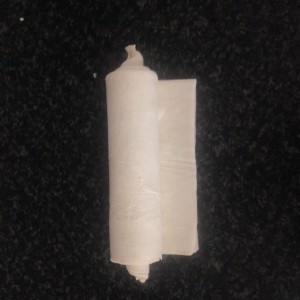
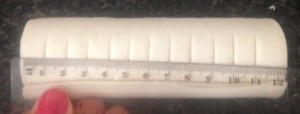
  8. Fold the pastry sheet in half and roll up at the short end tightly into a log shape.
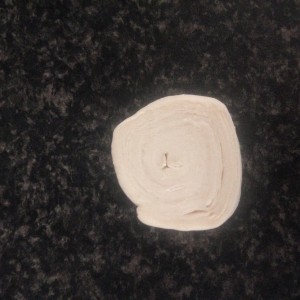
  9. Trim the edges of the log and cut circles 1cm thick. You will have 12 rounds.
  10. Lay the pastry flat on the bench and using a rolling pin roll out to 10x10cm circles.
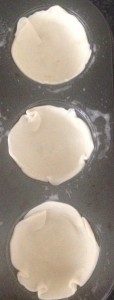
  11. Press the pastry into the muffin tin holes and lightly press in place.
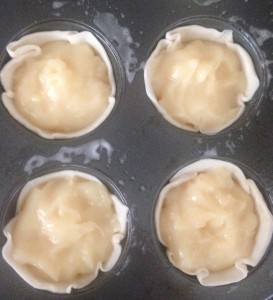
  12. Spoon the custard mix into the pastry cups.
  13. Place the tin in the oven for 25 minutes or until the tops of the custard gets dark golden.
  14. Allow to cool and enjoy!

Portuguese Custard Tarts

Step 5

Custard Tarts recipe.

Step 7

Portuguese Custard Tarts recipe

Step 8

Portuguese Custard Tarts recipe

Step 8

Portuguese Custard Tarts recipe

Step 9

Portuguese Custard Tarts recipe

Step 9

Portuguese Custard Tarts recipe

Step 9

Portuguese Custard Tarts recipe.

Step 10

Portuguese Custard Tarts recipe

Step 11

Portuguese Custard Tarts recipe

Step 12


Like this recipe? Subscribe via RSS or email to get my new entries and more scrumptious recipes with reviews.


Email, RSS Follow
Print
Leave a comment .
Tags: custard, portugal, Portuguese Custard Tarts, tart, traditional .

Coffee Caramel Tart

Posted on June 9, 2015 Posted in Tarts .

Coffee Caramel Tart

Coffee Caramel Tart recipe

This tart is simple, straightforward and not too crazy with methodology or taste combinations.

Caramel and coffee makes sense and does sound like a perfect match. Why this recipe makes it to this website is that I actually came up with this recipe by combining a few recipes into one.

I have used a recipe base of a Banoffee pie, however created a caramel latté twist instead of a banana flavour base.

If you love your café lattes this tart will be a moreish and addictive teat!

Ingredients:

Pastry:

  • 200g flour
  • 100g butter
  • 50g sugar

Filling:

  • 435g cream
  • 10g coffee granules
  • 375g caramel (I used Nestle top ‘n’ fill).
  • 3 egg yolks

Topping:

  • 250g cream
  • 100g caramel

Method:

  1. Pre-heat the oven to 200c degrees.
  2. Place the pastry ingredients into a food processor and blitz until the mix resembles fine breadcrumbs.
  3. Add 50g of water and process until the mix resembles dough and comes away at the sides of the bowl.
  4. Knead the dough for a minute then divide into 6 balls of 60g each.
  5. With a rolling pin roll the balls to disks and place in 6 small tart cases.
  6. Prick the pastry with a fork a few times and place the tarts in the fridge for 30 minutes.
  7. Meanwhile make the filling by placing the 435g cream and the coffee granules in the microwave on a high heat until boiling.
  8. Stir to combine and leave aside to cool.
  9. Place the 375g of caramel in a bowl with the egg yolks and whisk with a hand whisk until well combine.
  10. Add the cream mix to the caramel mix and whisk with a hand whisk until smooth and combine.
  11. Place some rice or baking weights onto some baking paper and add to the center of each tart case to weight down the rise of the pastry base while cooking.
  12. Place the tart shells in the oven for 10 minutes.
  13. Remove the baking paper and weights and bake in the oven for a further 8 minutes or until the tart shells are slightly golden brown.
  14. Turn the oven down to 180c degrees.
  15. Pour the caramel filling into the pastry shells until full to the top.
  16. Bake in the oven for 30 minutes or until the top is set.
  17. Allow the tarts to cool then place in the fridge for an hour to firm up.
  18. For the topping beat the cream with caramel with an electric mix until peaks form.
  19. Spoon the cream over the caramel top and sprinkle with a few coffee granules.


Coffee Caramel Tart recipe

Step 4

Coffee Caramel Tart recipe

Step 5

Coffee Caramel Tart recipe

Step 6

Coffee Caramel Tart recipe

Step 8

Coffee Caramel Tart recipe

Step 9

Coffee Caramel Tart recipe

Step 11

Coffee Caramel Tart recipe

Step 17

Coffee Caramel Tart recipe

Step 19

Coffee Caramel Tart recipe

Coffee Caramel Tart recipe


Like this recipe? Subscribe via RSS or email to get my new entries and more scrumptious recipes with reviews.


Email, RSS Follow
Print
4 Comments .
Tags: caramel, coffee, Coffee Caramel Tart .

Coconut and Beetroot Tart

Posted on August 25, 2014 Posted in Tarts .

Coconut and Beetroot Tart

Coconut and Beetroot Tart recipe

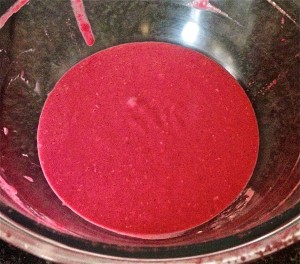
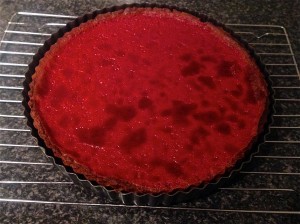
If you’re not a big fan of beetroot then I recommend you check out the below posted recipe…If you love beetroot this pie will put you in heaven.

An addictively strong beetroot flavour gem with an after hit of coconut, the interesting mix of flavours and use of one of the sweetest vegetables will surprise and satisfy.

In previous beetroot baking I have mastered what I think is the best version of Beetroot and Chocolate Brownies, however without the strong taste of chocolate this tart lets the beetroot shine!

Ingredients:

Pastry:

  • 220g plain flour
  • 100g butter
  • 55g white sugar
  • 1 egg yolk
  • 2 tbsn desiccated coconut
  • ½ tsn vanilla essence

Filling:

  • 420g can of beetroot (you will need 250g drained)
  • ½ cup brown sugar
  • 1 tsn group mixed spice
  • 2 tsn lemon juice
  • 1/2 tsn coconut essence
  • 1 cup coconut cream
  • 4 eggs


Method:

  1. Pre-heat the oven to 190c.
  2. Place the flour, butter, sugar, egg yolk, coconut and vanilla in a food processor and pulse a few times to combine. Now process until the mix resembles breadcrumbs.
  3. If mix is to dry add 1 tbsn on water and process.
  4. Place the mix into a bowl and kneed until combined, shape into a ball and place in the fridge for 15 minutes.
  5. Roll the dough with a rolling pin on a lightly floured surface and place the dough into a tart tray.
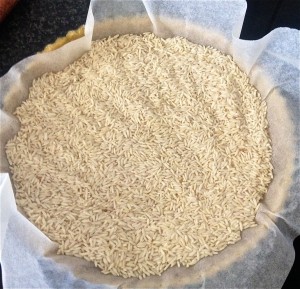
  6. Place baking paper on top of the tart and blind bake for 20 minutes.
  7. Remove the paper and beans/rice and bake for a further 5 minutes.
  8. Reduce the oven to 180c.
  9. Place 100ml water, brown sugar and spice in a bowl, mix together then microwave on high for 1 minute or until the mix starts to bubble. Leave aside to cool.
  10. Place the beetroot, juice, essence, coconut cream and sugar syrup into a food processor and process until smooth.
  11. Whisk the 4 eggs until thick and pale.
  12. Add the beetroot mix into the eggs and fold until combine.
  13. Pour the mix into the tart shell and bake for 40 minutes or until the filling is set.


Note:

  • I have sprinkled a little desiccated coconut on top of the tart for presentation.
  • You can use coconut milk instead of cream, however it will change the texture creaminess slightly.
  • Blind baking means the tart will cook but the rice/beans stops the centre of the tart from puffing up, allowing for sufficient space for the filling to sit in.


Coconut and Beetroot Tart recipe

Ingredients

Coconut and Beetroot Tart recipe

Step 3

Coconut and Beetroot Tart recipe

Step 5

Coconut and Beetroot Tart recipe

Step 6

Coconut and Beetroot Tart recipe

Step 12

Coconut and Beetroot Tart recipe

Step 13


Like this recipe? Subscribe via RSS or email to get my new entries and more scrumptious recipes with reviews.

Email, RSS Follow
Print
Leave a comment .
Tags: beetroot, coconut, Coconut and Beetroot Tart .

Avocado Chocolate and Orange Mousse Tart

Posted on July 6, 2014 Posted in Tarts .

Avocado, Chocolate and Orange Mousse Tart

Avocado Chocolate and Orange Mousse Tart recipe

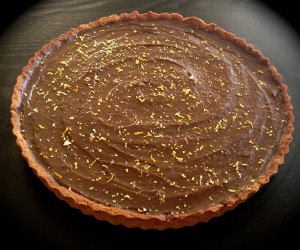
Creamy and rich chocolate mousse that is scrumptious, made of fruit and is free from sugar, cream and butter…you have to be kidding right? Wait don’t click off this post, its true I promise!

Not only that, this recipe is actually healthy for you, seriously!

To be able to serve this mousse I have also created a pastry tart shell recipe that is also sugar free to keep with the no sugar theme. This is also detailed below:


Ingredients:

Pastry

  • 2 cups flour
  • ½ tsn salt
  • 50g honey
  • 2 tsn cocoa powder
  • 110g butter
  • 1 egg
  • 1 tbsn milk

Mousse

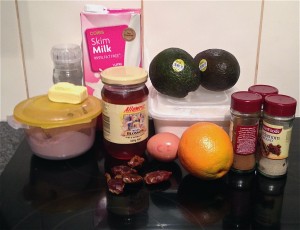
  • 100g pitted dates
  • 2 avocadoes
  • 1 orange
  • 150g honey
  • 55g cocoa powder
  • ½ tsn cinnamon
  • ½ tsn ground cardamom
  • 1/2 ground mixed cloves


Method:

  1. Pre-heat the oven to 175c and spray a tart tin with oil.
  2. Place the flour, salt and cocoa powder into a food processor and pulse a few times to mix.
  3. Dice the butter into small pieces and process until combined.
  4. Add the egg, honey and milk and process until combined.
  5. Wash hands and turn dough out onto the bench and kneed into a ball onto baking paper.
  6. Using a rolling pin roll the dough into a circle shape and place into the tart tin.
  7. Place the tin into the fridge for 20 mins.
  8. Place the dates into boiling hot water in a bowl and let sit for 10 minutes.
  9. Blind bake the tart shell (place baking paper and rice on top of the tart shell to stop the pastry rising).
  10. Place the tart shell in the oven and cook for 20 mins. remove the rice and bakng paper and bake for further 5 mins or until the pastry sides have browned.
  11. Once the tart is cooled place on a cooling rack until cooled.
  12. To make the mousse place the drained dates, avocado, orange zest, juice, cocoa powder, honey, cinnamon, cardamom and mixed cloves into a food processor and process until smooth and combine.
  13. Spoon the mousse into the cooled tart shell and flatten the top.
  14. Place in the fridge to set for 1 hour minimum.


Notes:

  • For best results make the day prior and leave overnight in the fridge, letting the mousse really set. This will thicken the texture of the mousse making it hold its shape for much longer, especially when slicing and platting up.
  • You can decorate with some additional grated orange zest or sift some extra cocoa powder.


Avocado Chocolate and Orange Mousse Tart recipe

Ingredients

Avocado Chocolate and Orange Mousse Tart recipe

Step 12

Avocado Chocolate and Orange Mousse Tart recipe

Step 5

Avocado Chocolate and Orange Mousse Tart recipe

Step 6

Avocado Chocolate and Orange Mousse Tart recipe

Step 11
Like this recipe? Subscribe via RSS or email to get my new entries and more scrumptious recipes with reviews.

Email, RSS Follow
Print
2 Comments .
Tags: avocado, Avocado Chocolate and Orange Mousse Tart, dates, healthy chocolate mousse, jaffa, orange, spices, sugar free .
Next Page »

Pages

  • About Me
  • Baking Metrics
  • Blogroll
  • Common Baking Questions
  • Recipe Index
  • Tips & Tricks
  • Contact

Archives

  • February 2022
  • October 2021
  • September 2021
  • August 2021
  • April 2021
  • February 2021
  • January 2021
  • December 2020
  • November 2020
  • October 2020
  • September 2020
  • August 2020
  • July 2020
  • June 2020
  • May 2020
  • September 2019
  • June 2019
  • May 2019
  • April 2019
  • March 2019
  • February 2019
  • January 2019
  • December 2018
  • November 2018
  • October 2018
  • September 2018
  • August 2018
  • July 2018
  • June 2018
  • May 2018
  • April 2018
  • March 2018
  • February 2018
  • January 2018
  • December 2017
  • November 2017
  • October 2017
  • September 2017
  • August 2017
  • July 2017
  • June 2017
  • May 2017
  • April 2017
  • March 2017
  • February 2017
  • January 2017
  • December 2016
  • November 2016
  • October 2016
  • September 2016
  • August 2016
  • July 2016
  • June 2016
  • May 2016
  • April 2016
  • March 2016
  • February 2016
  • January 2016
  • December 2015
  • November 2015
  • October 2015
  • September 2015
  • August 2015
  • July 2015
  • June 2015
  • May 2015
  • April 2015
  • March 2015
  • February 2015
  • January 2015
  • December 2014
  • November 2014
  • October 2014
  • September 2014
  • August 2014
  • July 2014
  • June 2014
  • May 2014
  • April 2014
  • March 2014
  • February 2014
  • January 2014
  • December 2013

Categories

  • America (5)
  • Arabic (1)
  • Australian (2)
  • Biscuits (24)
  • Brazil (1)
  • Bread (12)
  • Brownies (5)
  • Cakes (141)
  • Croatian (1)
  • Cupcakes (20)
  • Custard (1)
  • Doughnuts (6)
  • Flan (1)
  • France (5)
  • Fudge (3)
  • German (1)
  • Greece (2)
  • Hungary (1)
  • Ice-cream & Sorbet (15)
  • Ice-cream cake (6)
  • Icing (18)
  • Italy (4)
  • Jam (1)
  • Jamaican (1)
  • Lebanese (1)
  • Marshmallows (2)
  • Mexican (1)
  • Morocco (1)
  • Mousse (2)
  • Muffins (1)
  • Panna Cotta (1)
  • Pastries (2)
  • Pies (7)
  • Portugal (1)
  • Pudding (12)
  • Roulade (1)
  • Russia (1)
  • Slice (27)
  • Souffle (1)
  • Sweden (1)
  • Swedish (1)
  • Syrup (1)
  • Tarts (13)
  • Traditional (17)
  • Trifile (1)
  • Truffles (5)
  • Turkey (1)
  • Uncategorized (1)
  • Unique (10)

WordPress

  • Register
  • Log in
  • WordPress

Subscribe

  • Entries (RSS)
  • Comments (RSS)

CyberChimps WordPress Themes

© Sweet Tooth Experiments